Blogg
Här finns tekniska artiklar, presentationer och nyheter om arkitektur och systemutveckling. Håll dig uppdaterad, följ oss på LinkedIn
Här finns tekniska artiklar, presentationer och nyheter om arkitektur och systemutveckling. Håll dig uppdaterad, följ oss på LinkedIn

Handling user registration and authentication on a website is hard, both for the users required to remember yet another pair of username/password and for developers implementing a secure handling of the user credentials. With requirements of more sophisticated login-methods such as two-factor authentication and single sign-on it gets even worse. A few years ago websites started to use social login, i.e. delegating the sign in process to social network services such as Facebook, Twitter and Google+ allowing users to sign in to the website using their social network accounts.
Initially social login was rather complex to setup and a number of commercial offerings from social network integration providers evolved to simplify the setup. Today a free and open source based alternative exists, the Spring Social project.
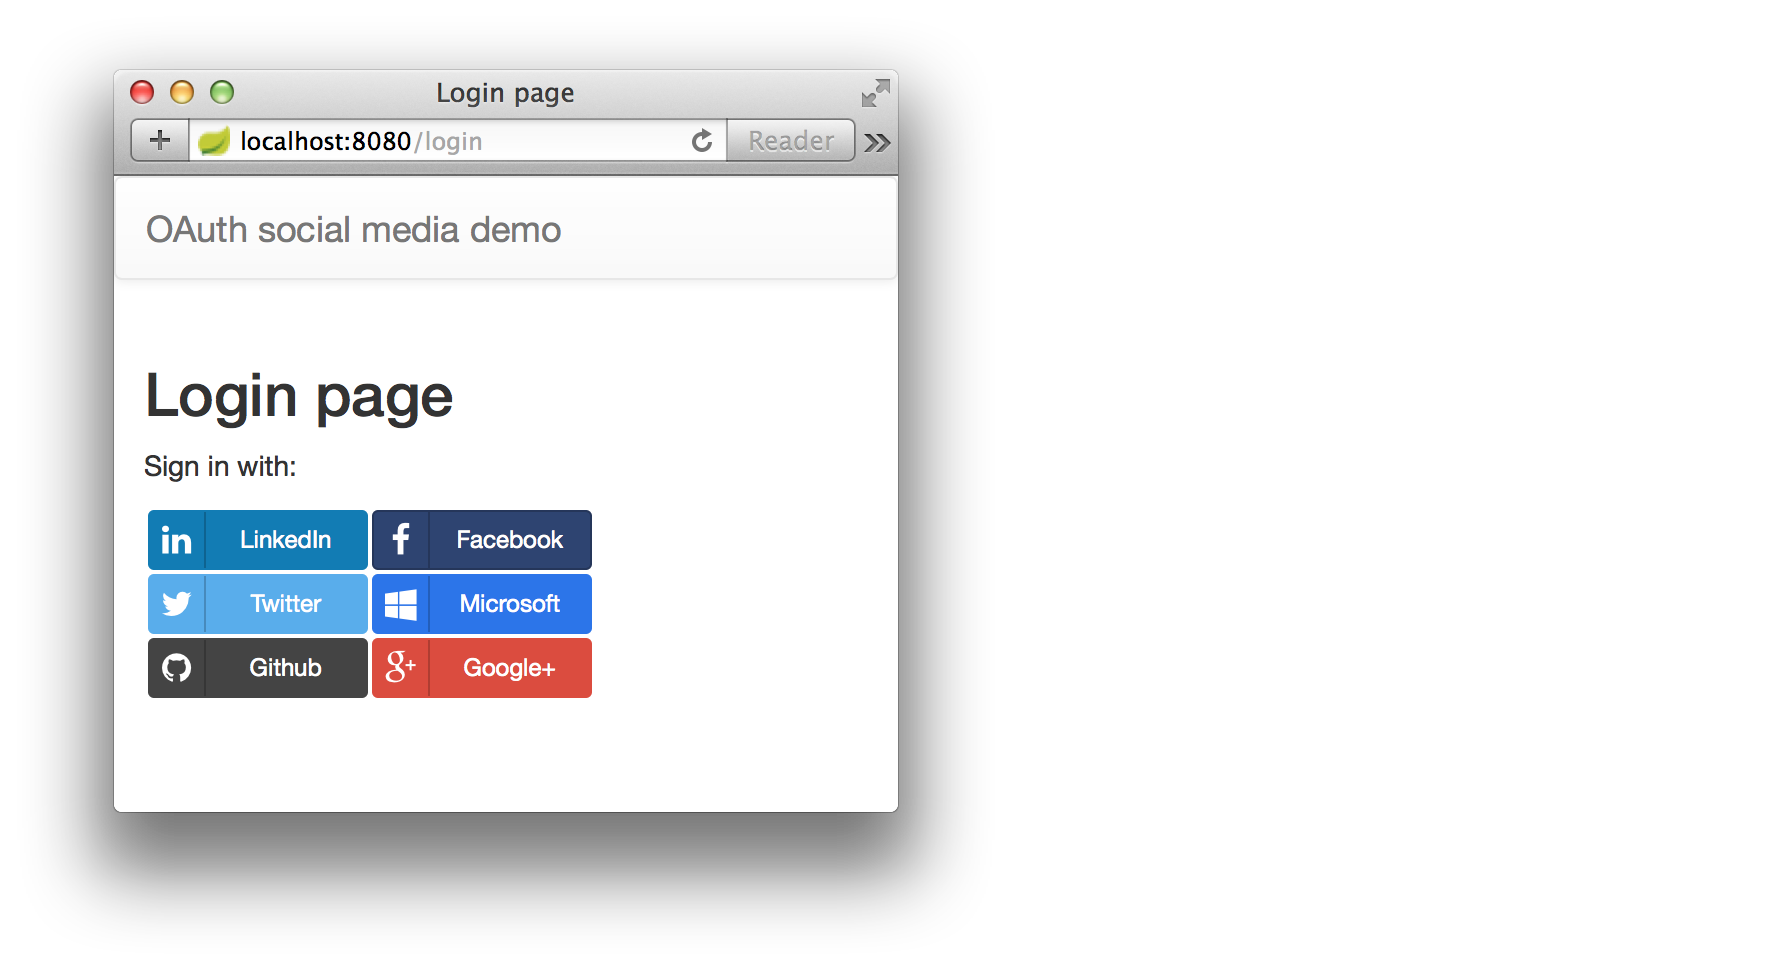
This blog will describe how Spring Social can be used to setup social login for a sample website. The login page looks like:
Before we delve into the details let’s go through some background on the subject…
The benefits of social login are two-folded.
To enable social login an open standard, OAuth, is used. The main purpose of OAuth is actually to standardize on how a client application can be given authorization from a user (resource owner) to access server resources on behalf of the user, typically through an API that the service provide. But since authorization requires authentication, authentication is also provided by the social network services in various forms.
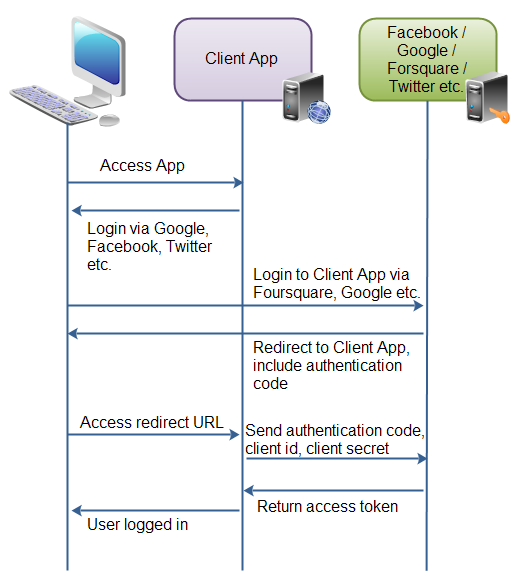
Going through the details of the OAuth standard is out of scope for this blog but Jacob Jenkov’s tutorial on OAuth 2.0 is recommend for the interested reader, where Jacob explains the steps in “the OAuth dance” illustrated in his tutorial as:
In 2011 an open source based project, Spring Social, was created, as a subproject in the Spring family, with the target to simplify access to social networking services from Java. In April 2014 v1.1 was released with support for Twitter, Facebook and LinkedIn and with, as of today, support for some 30 more social network services as either incubator or community projects.
The Spring Social project provides:
For more information regarding the Spring Social project and how it works see its reference documentation.
The sample website is designed to be as simple as possible providing:
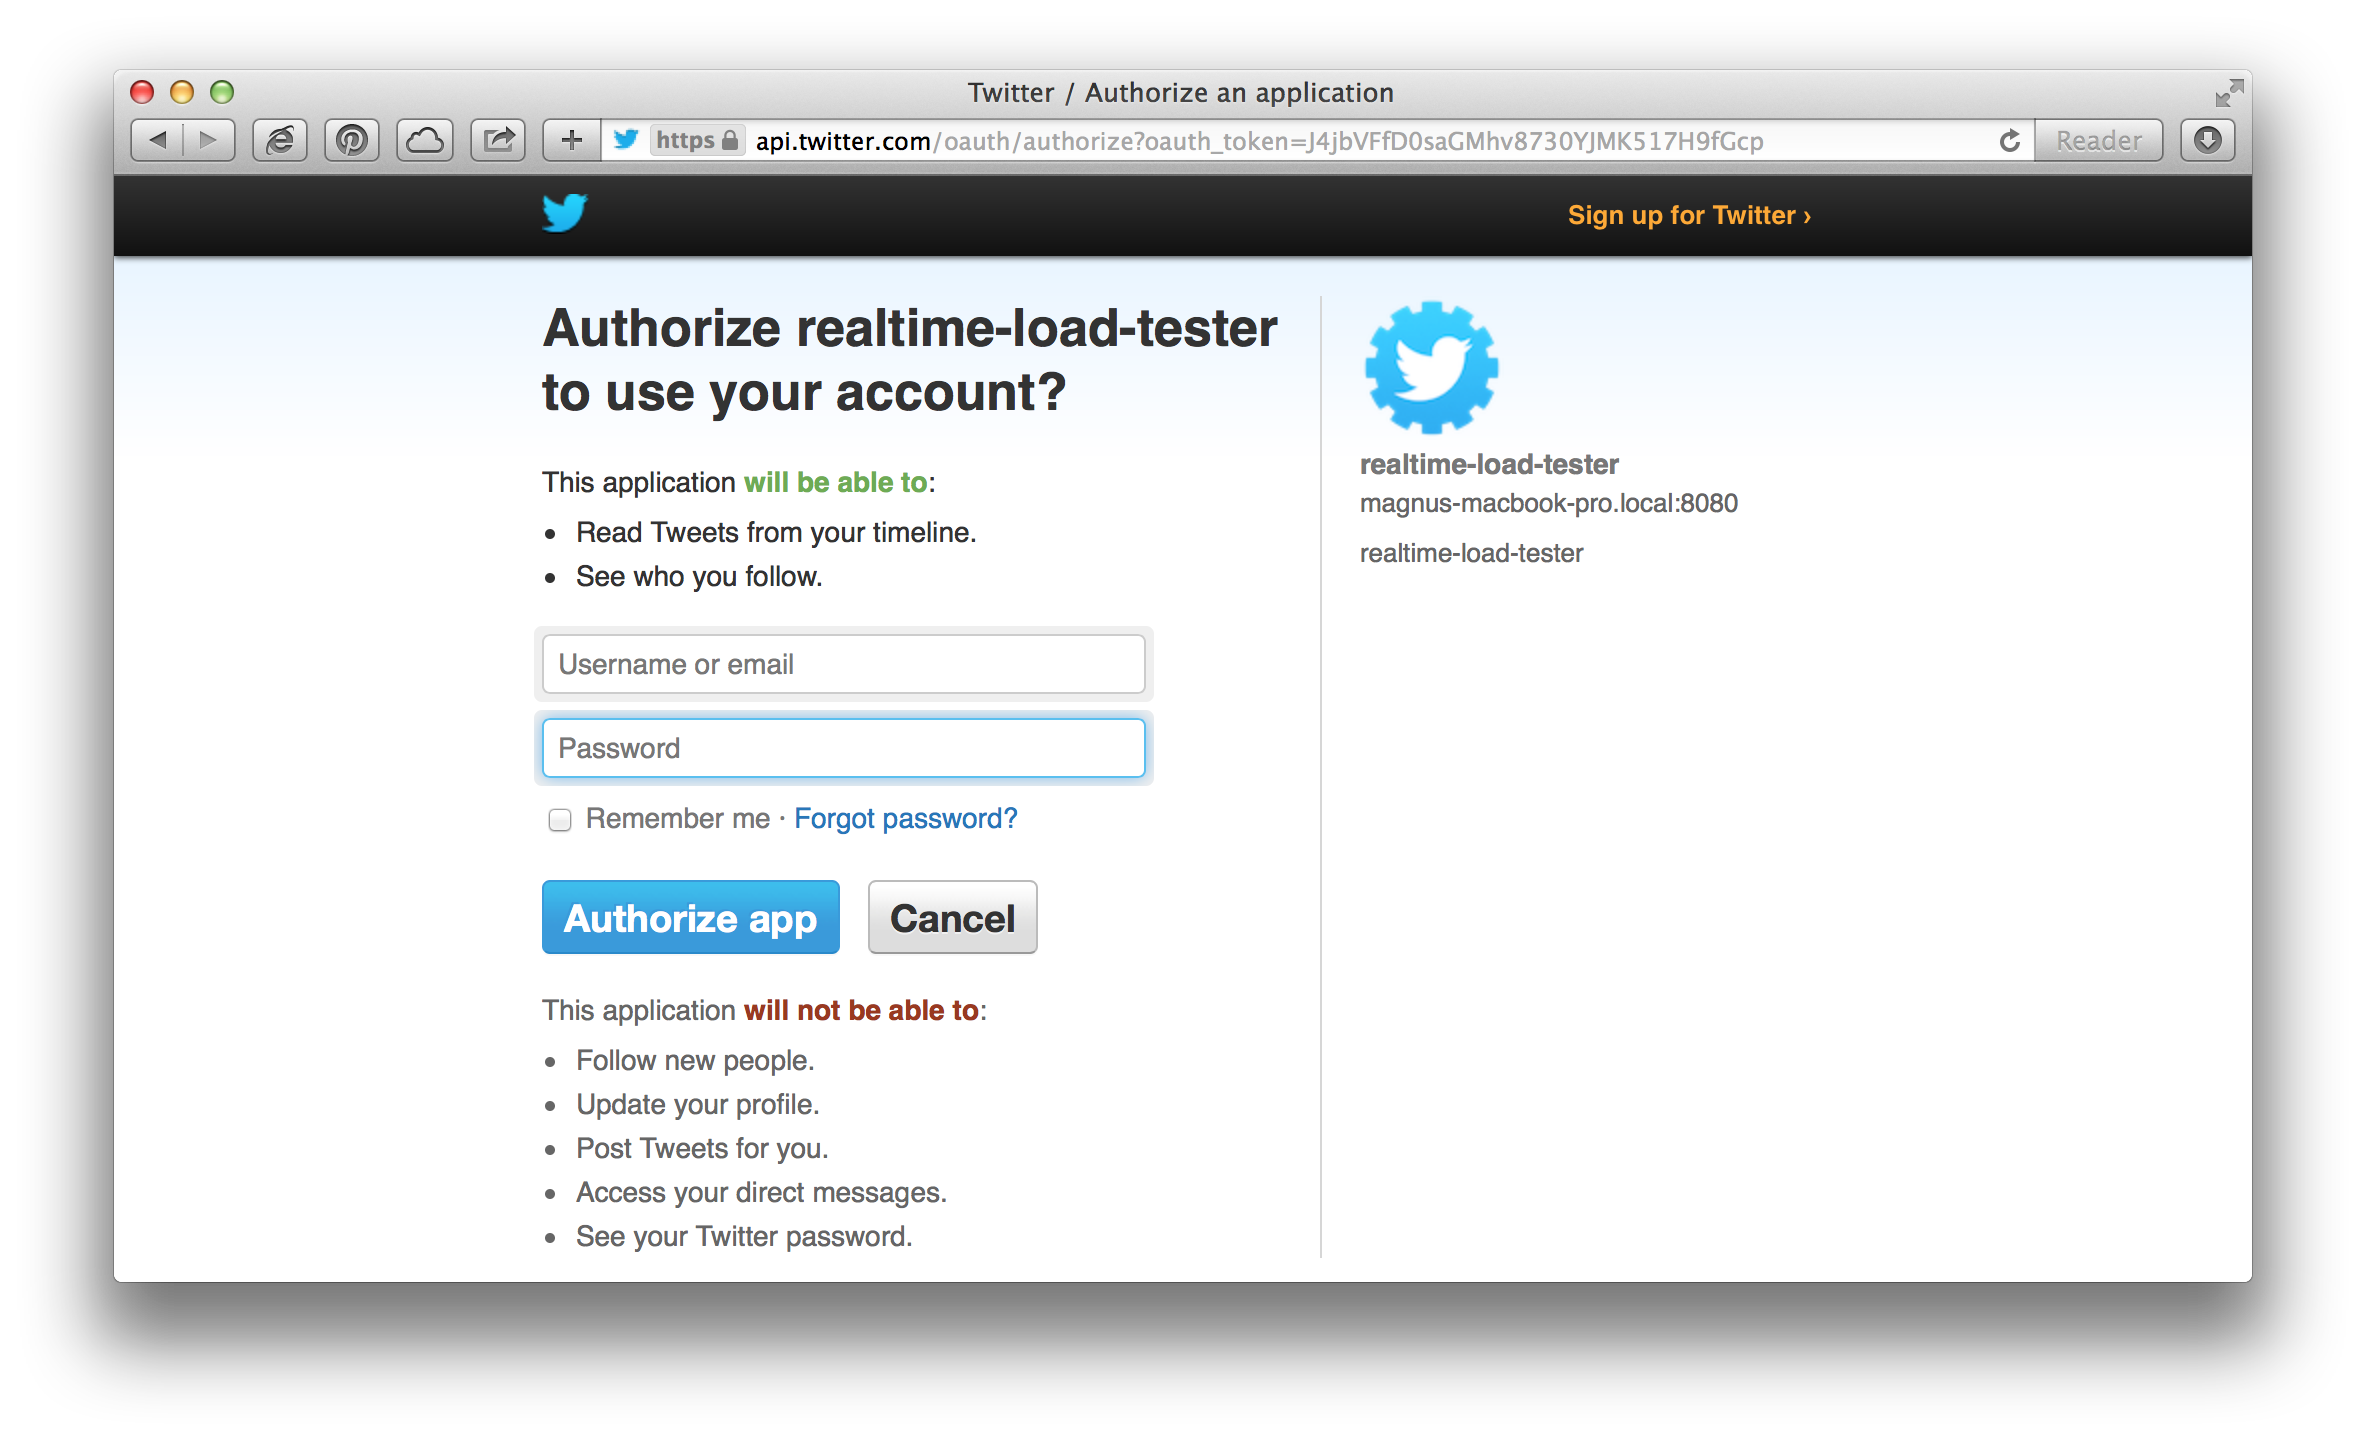
When the user clicks on one of the login buttons in the login page (see above) he will be redirected to the selected social network service login page (if not already logged in) and if this is the first time the website is used the social network service will also ask for permissions to share the users login information with the website. This is done in a different ways, for example Twitter displays a combined web page where the user both can login and give its consent:
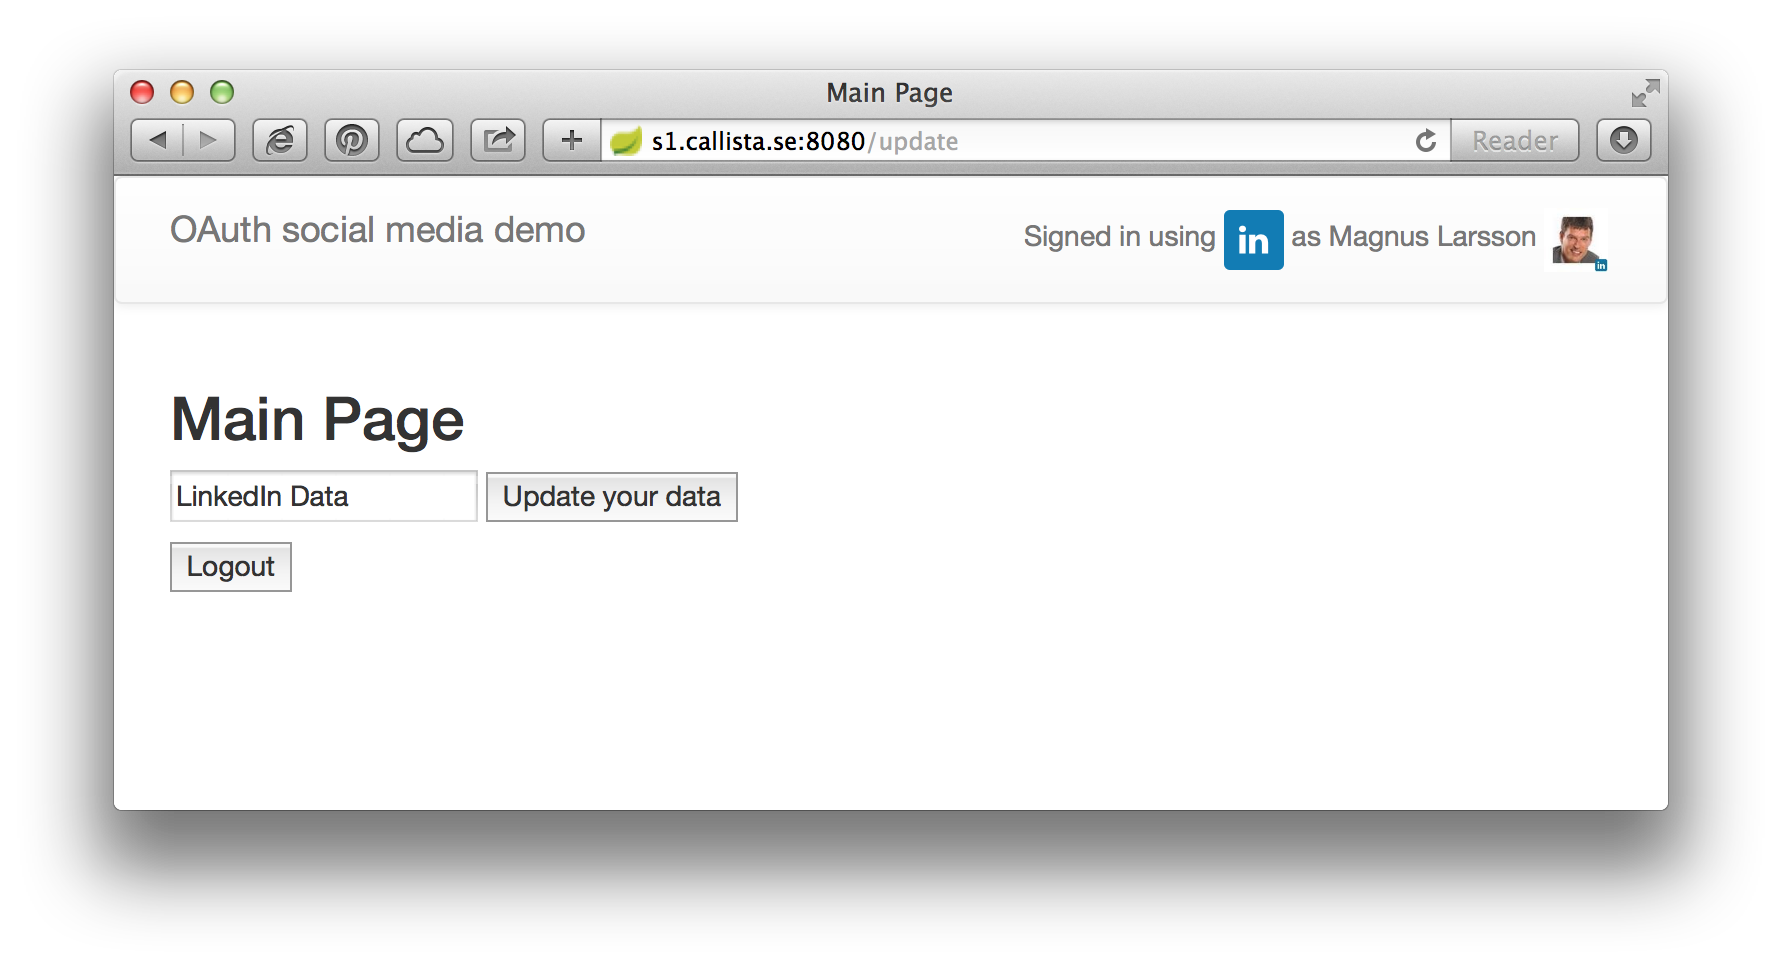
Once the user is signed in the main page will display some profile information in the upper right corner and present a form where the user can store some data in the website. When using Facebook it looks like:

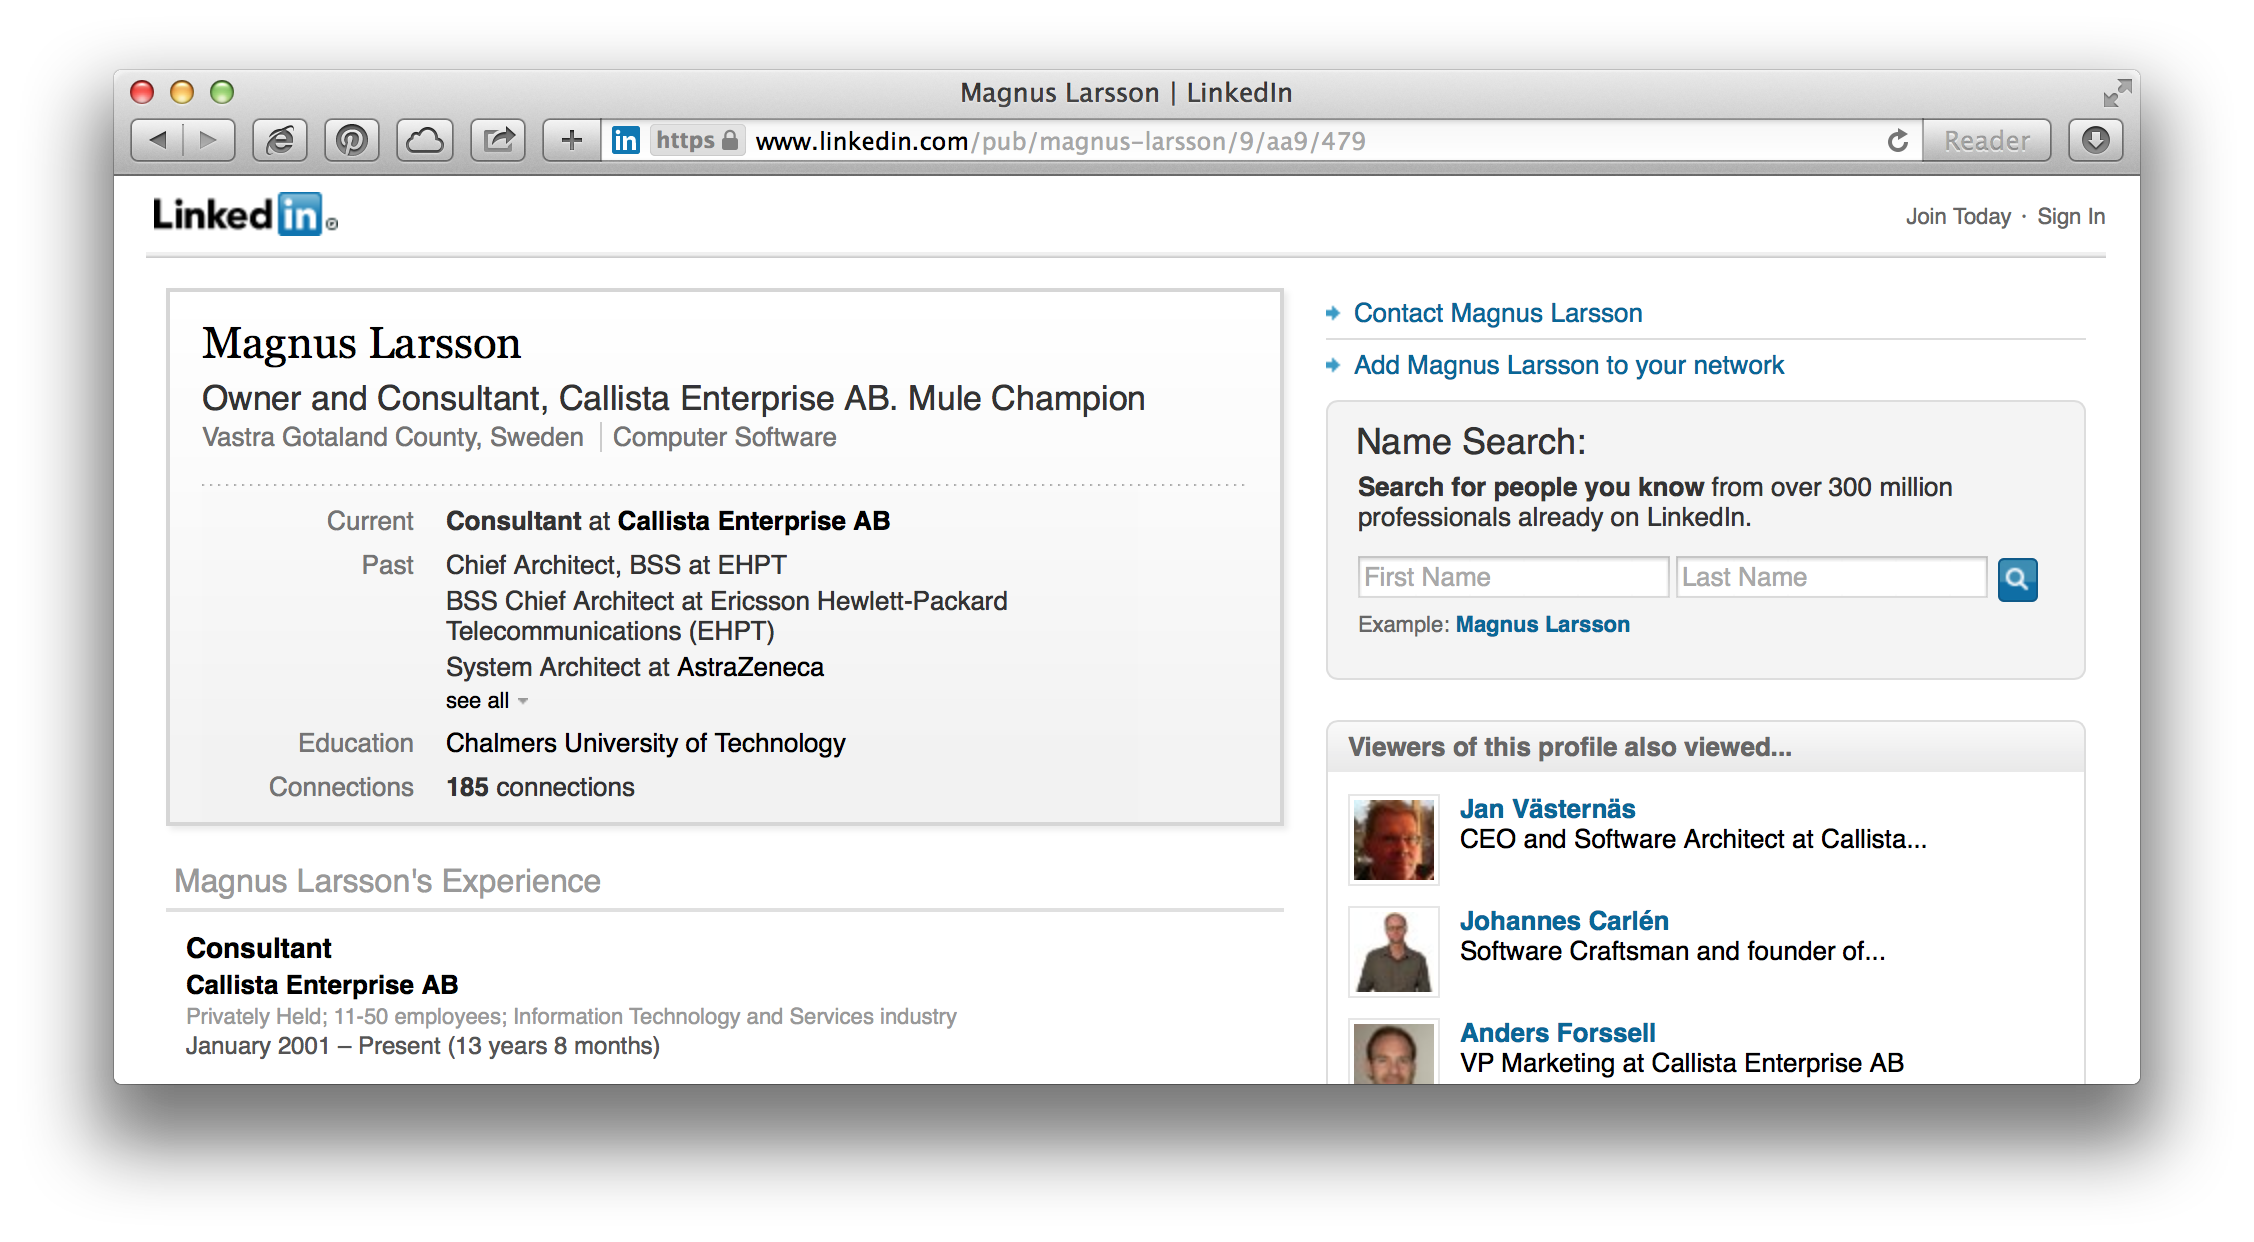
…and when a user is signed in using LinkedIn the main page looks like:
Clicking on the username in the upper right corner takes you to the profile page of the selected social network service, e.g. for LinkedIn:
If you want to check out the source code (see below for how to build and run it) you need to have Git installed. Then perform:
$ git clone https://github.com/callistaenterprise/blog-social-login-with-spring-social.git
$ cd blog-social-login-with-spring-social
$ git checkout -b my-branch-1.0 v1.0
$ tree
The sample website use Spring Social to login users from a list of social networks and automatically create an internal user-account that is connected to the social network login. The sample website also demonstrates how a user can store user specific data and that the user can continue to work with the data the next time the user sing in using the same social network login.
The sample website is based on Spring Boot (blog) and Spring MVC using Thymeleaf for page rendering and Bootstrap for CSS based layout of the HTML pages. It also use Spring Security and Spring Data JPA to simplify the Spring Social integration with the web pages and the database storage. During development it use H2 as a in-memory database. The website is built using Gradle (blog).
To bring in Spring Social with the providers for the selected social networks into the project we only have to add the following to our Gradle build file, build.gradle:
compile("org.springframework.social:spring-social-security:1.1.0.RELEASE")
compile("org.springframework.social:spring-social-config:1.1.0.RELEASE")
compile("org.springframework.social:spring-social-facebook:1.1.0.RELEASE")
compile("org.springframework.social:spring-social-twitter:1.1.0.RELEASE")
compile("org.springframework.social:spring-social-linkedin:1.0.0.RELEASE")
compile("org.springframework.social:spring-social-github:1.0.0.M4")
compile("org.springframework.social:spring-social-google:1.0.0.RELEASE")
compile("org.springframework.social:spring-social-live:1.0.0-SNAPSHOT") {
    exclude group: 'javax.servlet', module: 'servlet-api'
}
Once we have the dependencies in place we can configure Spring Social. We need to first specify a security filter and next setup the selected social network providers.
First we have to setup a security filter, SocialAuthenticationFilter, provided by Spring Social to integrate with Spring Security so that a social network provider can be activated when a user needs to be authenticated. The security filer will listen to URL’s that start with /auth and route incoming requests to the corresponding social network provider. E.g. a request sent to /auth/facebook will be redirected to the Facebook provider. The security filter is configured by an SpringSocialConfigurer-instance in the class SecurityConfiguration like:
@Configuration
@EnableWebMvcSecurity
public class SecurityConfiguration extends WebSecurityConfigurerAdapter {
    ...
    @Override
    protected void configure(HttpSecurity http) throws Exception {
        http
            .formLogin()...
        .and()
            .apply(new SpringSocialConfigurer()
                .postLoginUrl("/")
                .alwaysUsePostLoginUrl(true));
    }
}
Next we have to configure each provider with the standard OAuth Client Id and Client Secret properties. This is done in the class SocialConfigurer where we add a connection factory implementation for each social network service (the example only shows two of the six to save some space):
@Configuration
@EnableSocial
public class SocialConfig implements SocialConfigurer {

    @Override
    public void addConnectionFactories(ConnectionFactoryConfigurer connectionFactoryConfigurer, Environment environment) {
        connectionFactoryConfigurer.addConnectionFactory(new FacebookConnectionFactory(
            environment.getProperty("spring.social.facebook.appId"),
            environment.getProperty("spring.social.facebook.appSecret")));
        ....
        connectionFactoryConfigurer.addConnectionFactory(new LiveConnectionFactory(
            environment.getProperty("spring.social.live.appId"),
            environment.getProperty("spring.social.live.appSecret")));
    }
We specify the properties in the application.properties - file:
spring.social.facebook.appId=...add your Client Id here...
spring.social.facebook.appSecret=...add your Client Secret here...
...
spring.social.live.appId=...add your Client Id here...
spring.social.live.appSecret=...add your Client Secret here...
See below for how to get access to you own Client Id’s and Client Secrets.
When it comes to creating a local user account connected to the social network service account most of the machinery is handled by the Spring Social project but we have to supply some logic to define how to:
Se the classes in the services package for details.
With the configuration in place we can now login a user using social login by declaring a set of login buttons in the login.html page like:
<table style="border-collapse: separate; border-spacing: 2px">
    <tr>
        <td><a th:href="@{/auth/linkedin}" class="..."><i class="..."></i>LinkedIn</a></td>
        <td><a th:href="@{/auth/facebook}" class="..."><i class="..."></i>Facebook</a></td>
    </tr>
    <tr>
        <td><a th:href="@{/auth/twitter}" class="..."><i class="..."></i>Twitter</a></td>
        <td><a th:href="@{/auth/live(scope='wl.signin,wl.basic')}" class="..."><i class="..."></i>Microsoft</a></td>
    </tr>
    <tr>
        <td><a th:href="@{/auth/github}" class="..."><i class="..."></i>Github</a></td>
        <td><a th:href="@{/auth/google(scope='profile')}" class="..."><i class="..."></i>Google+</a></td>
    </tr>
</table>
We are using Bootstrap Social Buttons for the login buttons. See the source code for details on CSS usage to render the buttons.
The information for each users connection to his social network service account is stored in a set of tables defined by Spring Security and Spring Social:
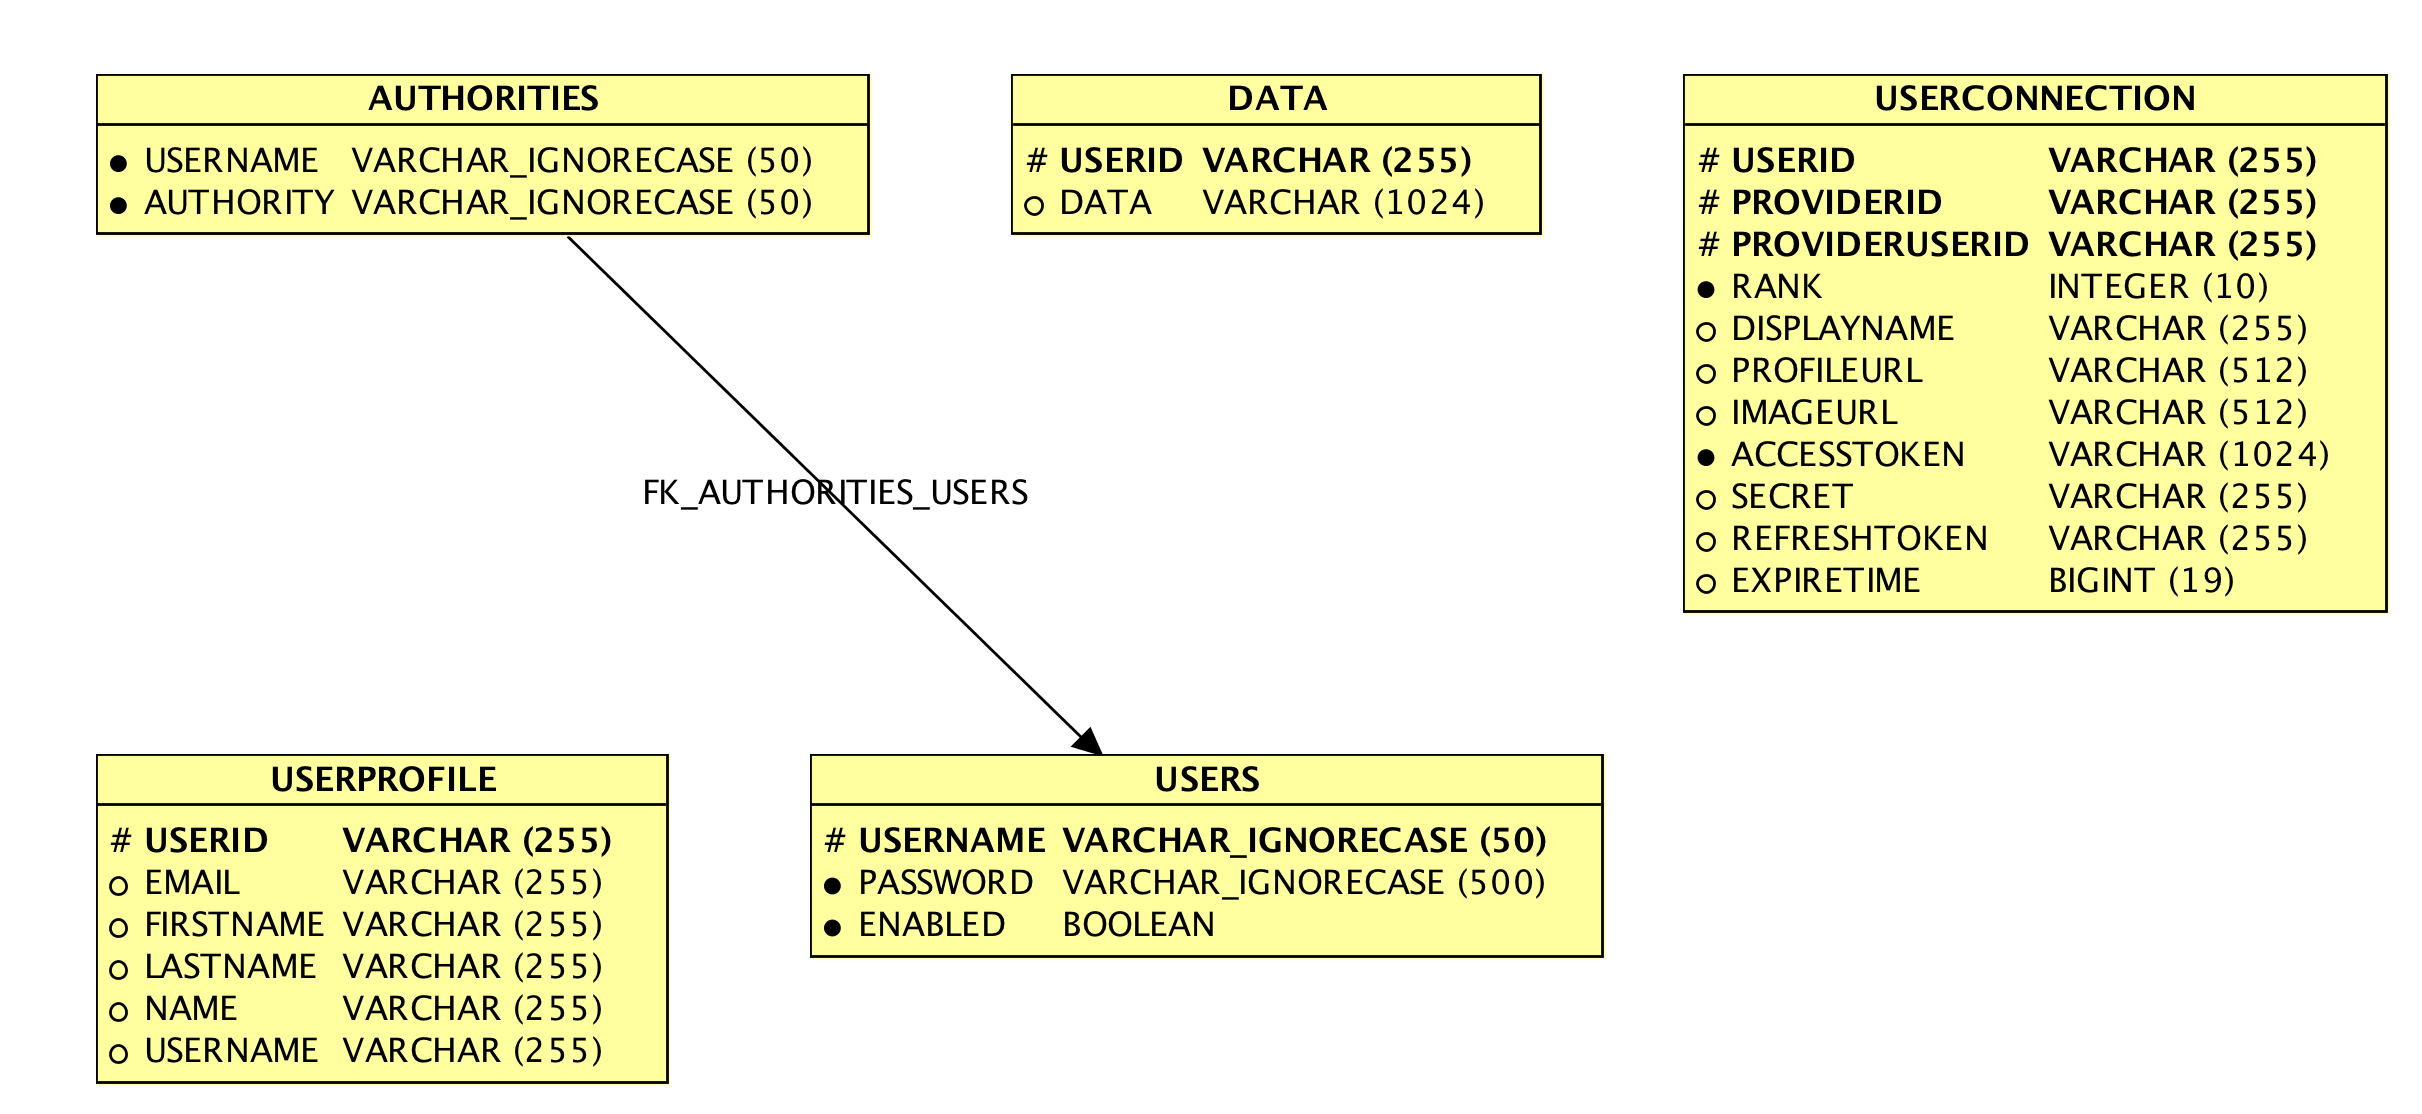
Some notes on the data model:
USERS-table. The table is defined by Spring Security for general purpose usage and not specific for social login use-cases.DATA is the only table that is specific to our sample website and it holds the data that the user enters in the main page.USERCONNECTION-table and is stored in a model-element by the Spring MVC controller, MainController.java, so that the Thymeleaf template engine can render it on the HTML pages using a html-framgent, header.html, as:<a th:href="${currentUserConnection.profileUrl}" class="navbar-link">
<span th:text="${currentUserDisplayName}"/>
</a>
<img th:src="${currentUserConnection.imageUrl}" width="32" height="32" />
To be able to build and run the sample code you need: Java SE 7, Gradle and Maven 3.
Before you can build the source code you checked out earlier you first have to build one of the providers, the Windows Live provider, since it is yet in its early days:
$ git clone git@github.com:sachin-handiekar/spring-social-live.git
$ cd spring-social-live
$ mvn install
Now you can build the sample project:
$ cd .../blog-social-login-with-spring-social
$ ./gradlew build
Before you actually can run the project you have to register your own applications at the social network services, since I don’t want to share my OAuth 2 Client Secrets with you (and I should not!). You can register your own application using the following links:
Some of the social network services don’t accept localhost as a hostname or .local as part of the hostname in the Redirect URI that you need to register for your application. Instead of setting up a fully-fledged DNS-hostname for my PC I created a made-up hostname, e.g. my.host.org that I used as the Redirect URI. I also added it to my /etc/hosts -file like:
127.0.0.1 my.host.org
The Redirect URI is only resolved by the web browser, not by the social network services, so it is ok that only your web browser knows how to translate the made-up hostname.
When you deploy it for real use you should of course replace it with a real DNS hostname!
Note. Microsoft has chosen to add an extra security check on the Redirect URI so they will not accept a made-up hostname. However they do accept localhost as a hostname so if you look carefully in the login.html page you can see that I have overridden the Redirect URI for the Windows Live provider as:
<td><a th:href="@{/auth/live(scope='wl.signin,wl.basic',
redirect_uri='http://localhost:8080/auth/live')}" class="..."><i class="..."></i>Microsoft</a></td>
Now you can start the website with:
$ ./gradlew bootRun
Go to a web browser on a machine that can translate the hostname my.host.org (typically your own PC) and enter the URL http://my.host.org:8080 and you should see the login page as displayed above.
Have fun playing with the social login using the various social network services!