Blogg
Här finns tekniska artiklar, presentationer och nyheter om arkitektur och systemutveckling. Håll dig uppdaterad, följ oss på LinkedIn
Här finns tekniska artiklar, presentationer och nyheter om arkitektur och systemutveckling. Håll dig uppdaterad, följ oss på LinkedIn

In this blog post I will describe how to setup a local Docker Swarm cluster for test purposes with a minimal memory usage and fast startup times, using Docker in Docker instead of traditional local virtual machines.
This blog post is part of the blog series - Trying out new features in Docker.
Before deploying your Docker containers to production you most probably need a Container Orchestrator, such as Docker in Swarm mode or Kubernetes, to manage a cluster of nodes where your containers can be deployed (regardless of whether you are going to run them on premises or in the cloud). For a background see, for example, the blog post from containers to container orchestration.
Before deploying your Docker containers to a container orchestrator, you need to understand how your container orchestrator works. Even though you can setup a test instance in the cloud to get used to it, it is typically much more convenient and efficient to learn a complex software, such as a container orchestrator, if you initially can try it out locally.
Traditionally, setting up a local multi - node container orchestrator means spinning up a number of virtual machines locally and then setting up the container orchestrator on these nodes. It is known to both consume a lot of memory (a virtual machine with Docker running consumes at least 1 GB just to get started) and is also time consuming to setup.
 Source: http://info.crunchydata.com/blog/easy-postgresql-cluster-recipe-using-docker-1.12
But, what if we can use a number of containers to act as our cluster nodes instead of fully fledged virtual machines?
We know for sure that they start much faster and have very little overhead in terms of memory!
The only tricky thing is that these containers needs to run Docker in themselves, i.e. run Docker in Docker :-)
Docker provides a official Docker image for this specific purpose: Docker in Docker
Words of warning: You should only use Docker in Docker for test purposes. See, for example, this blog post for details.
Let’s try it out using Docker in Swarm mode!
We will use Docker for Mac acting both as the Swarm Manager and as the Docker Host for three Swarm Workers (i.e. that will run as containers).
First, you need to have Docker for Mac installed, I’m on version 17.09.1-ce-mac42.
Next, you also need to have jq and ctop installed to be able to follow my instructions below.
If you use Homebrew they can be installed with:
brew install jq
brew install ctop
ctopis liketop, but for containers.
To be able to follow the startup sequence, launch the ctop tool in one terminal window:
# Monitor Master and Worker nodes
ctop
Next, in another terminal window, run commands to:
Run the following commands:
# Init Swarm master
docker swarm init

# Get join token:
SWARM_TOKEN=$(docker swarm join-token -q worker)
echo $SWARM_TOKEN

# Get Swarm master IP (Docker for Mac xhyve VM IP)
SWARM_MASTER_IP=$(docker info | grep -w 'Node Address' | awk '{print $3}')
echo $SWARM_MASTER_IP
Next, setup environment variables for what Docker version to use and how many worker nodes you want:
# Docker version
DOCKER_VERSION=17.09.1-ce-dind

# Number of workers
NUM_WORKERS=3
Now, we can launch the worker nodes as containers and ask them to join our Docker Swarm cluster:
# Run NUM_WORKERS workers with SWARM_TOKEN
for i in $(seq "${NUM_WORKERS}"); do
	docker run -d --privileged --name worker-${i} --hostname=worker-${i} -p ${i}2375:2375 docker:${DOCKER_VERSION}
	docker --host=localhost:${i}2375 swarm join --token ${SWARM_TOKEN} ${SWARM_MASTER_IP}:2377
done
The first docker run command might take some time due to the required Docker image needs to be downloaded, otherwise it should only take a few seconds to setup the Swarm cluster!
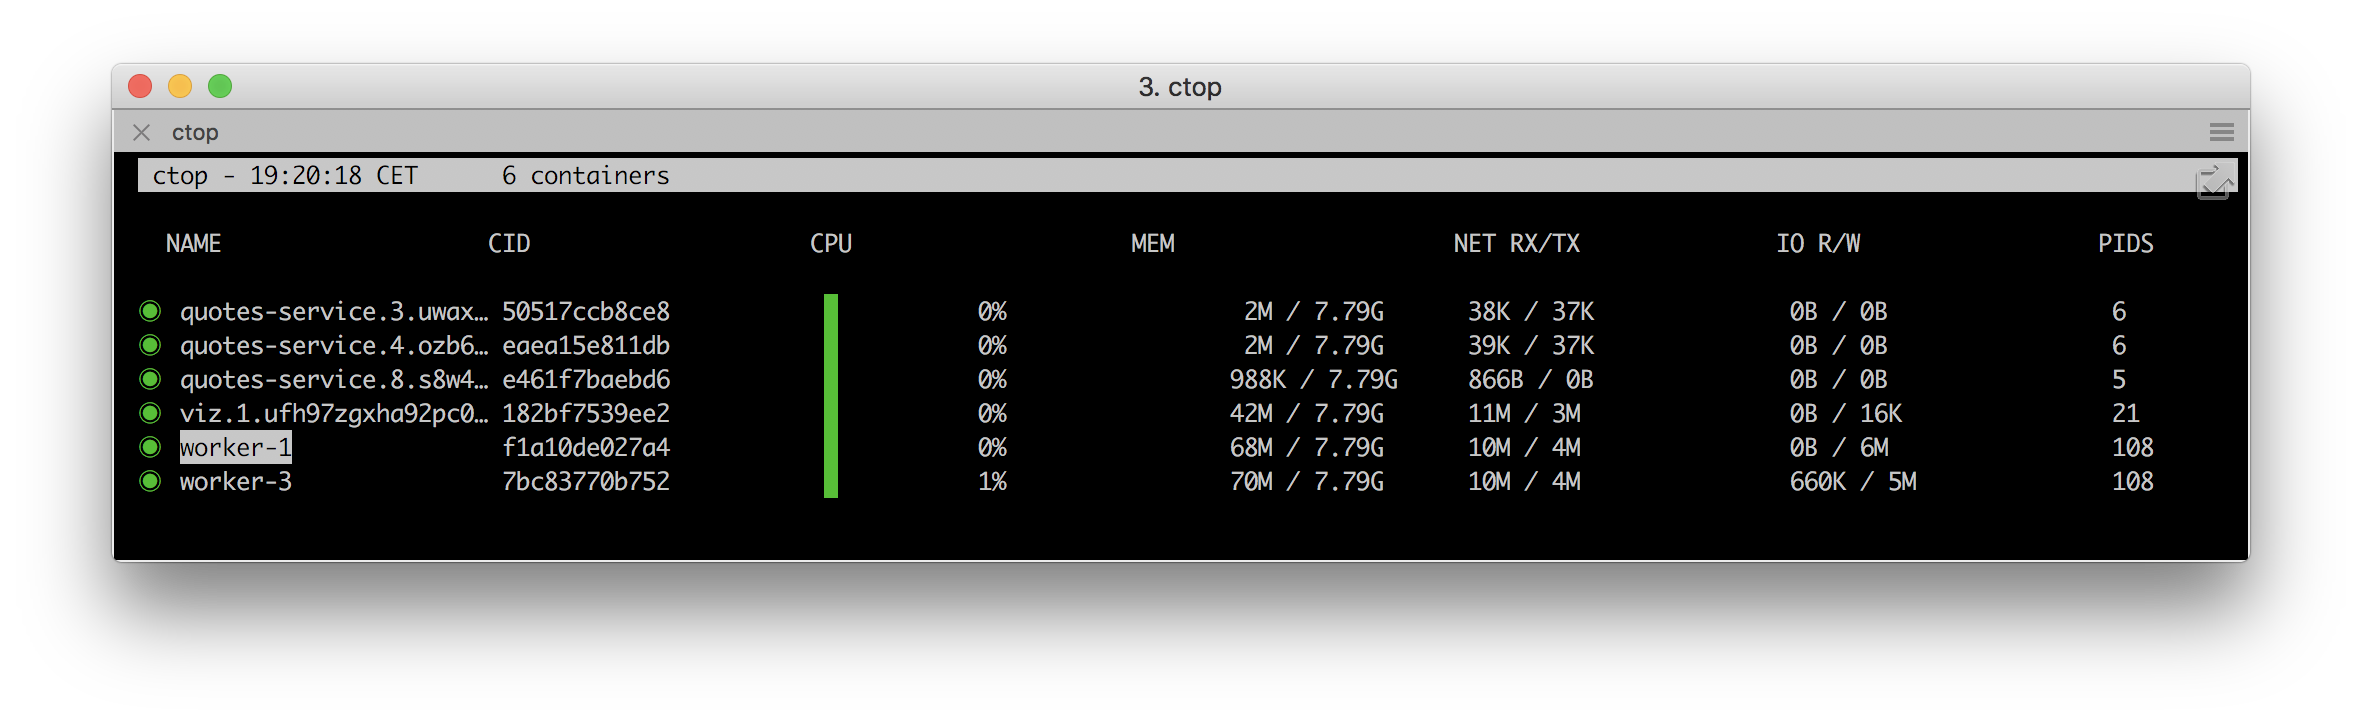
Verify that you can see the worker nodes using ctop as ordinary containers in Docker for Mac:

Note: The memory used per worker node is only some 30 MB!
To be compared to (at least) 1 GB required for an empty worker node that runs as a virtual machine…
To be able to monitor the state of the cluster you can start a Visualizer service as:
# Setup the visualizer
docker service create \
  --detach=true \
  --name=viz \
  --publish=8000:8080/tcp \
  --constraint=node.role==manager \
  --mount=type=bind,src=/var/run/docker.sock,dst=/var/run/docker.sock \
  dockersamples/visualizer
Ok, so let’s see if we actually have a Docker Swarm cluster up and running:
docker node ls
It should result in a response like:
ID                            HOSTNAME            STATUS              AVAILABILITY        MANAGER STATUS
p04lc6eikqz76rdzp9ehpejdx *   moby                Ready               Active              Leader
owpvm6mt8xpoxqk28mph81n0g     worker-1            Ready               Active
blf4o51phy1k7ds7pn2sok1h9     worker-2            Ready               Active
wtia3kscr694577je4v5ryms4     worker-3            Ready               Active
Also, let’s see if we have the Visualizer service up and running:
docker service ls
Expect output as follows:
ID                  NAME                MODE                REPLICAS            IMAGE                             PORTS
nv7uhth4k3vw        viz                 replicated          1/1                 dockersamples/visualizer:latest   *:8000->8080/tcp
Note:
REPLICASset to1/1means that the service is up and running!
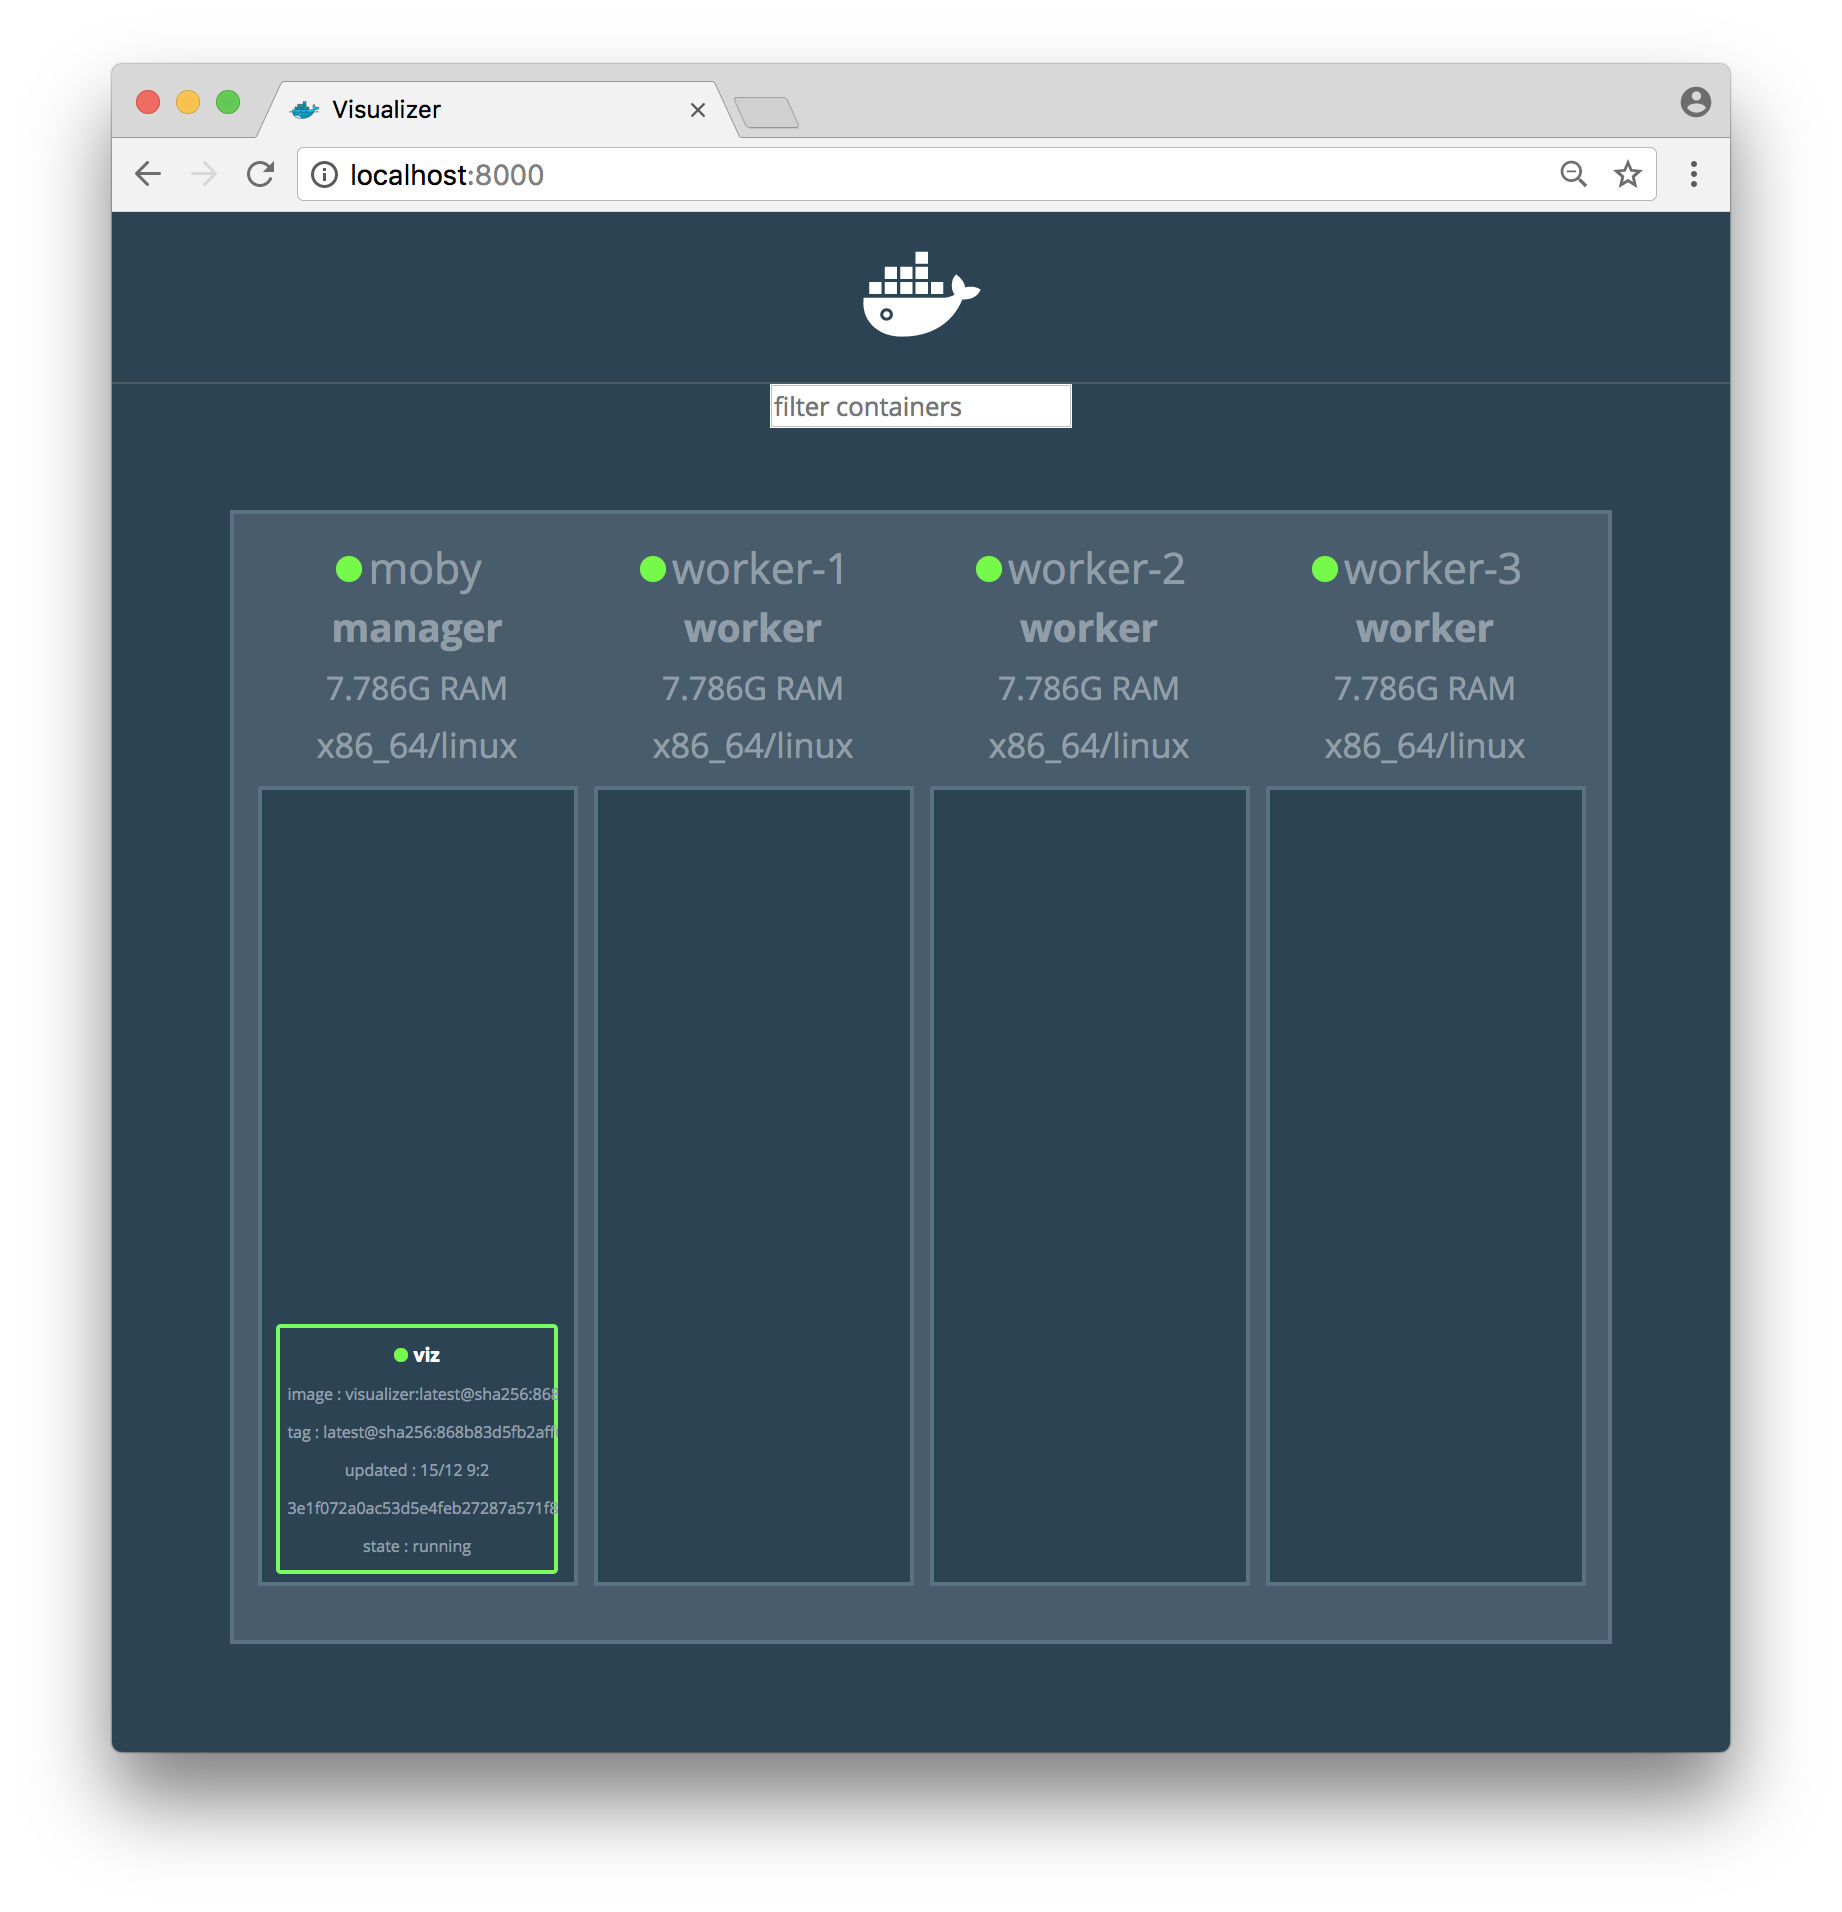
Try out the Visualizer: localhost:8000
Expect only a single Visualizer container to show up at this point:
Now, let’s deploy a service and try it out!
I have a very simple quote-service (written in Go) that creates some random quotes about successful programming languages. It can be deployed with the following command:
docker service create --name quotes-service --detach=false -p 8080:8080 magnuslarsson/quotes:go-22
Note: This time we set the
--detach- flag tofalsemeaning that the docker service create command waits to complete until the service is actually accessible, i.e. at least one container for the service reports to Docker that it is up and running.
Expect an output from the command like:
xvcvdc28kt1or1tslj0dv5ptn
overall progress: 1 out of 1 tasks
1/1: running   [==================================================>]
verify: Service converged
The Visualizer should report:

We can now try it out using curl:
curl localhost:8080/api/quote -s -w "\n" | jq .
Output should look like:
{
  "ipAddress": "fc9193f817ef/",
  "quote": "If I had to describe Go with one word it’d be ‘sensible’.",
  "language": "EN"
}
The most interesting part of the response from the service is actually the field ipAddress, that contains the hostname of the container that served the request, fc9193f817ef in the sample response above.
This can be used to verify that scaling of a service actually works. In the output from a scaled service we expect different values in the ipAddress - field from subsequent requests, indicating that the request is load balanced over the available containers.
Let’s try it out, shall we?
First, start a loop that use curl to sends one request per second to the quote-service and prints out the ipAddress - field from the response:
while true; do curl localhost:8080/api/quote -s -w "\n" | jq -r .ipAddress; sleep 1; done
Initially the output should return one and the same hostname, since we only have one container running in the service:
5fcdd3974d5c/
5fcdd3974d5c/
5fcdd3974d5c/
5fcdd3974d5c/
5fcdd3974d5c/
5fcdd3974d5c/
Now, scale the quote-service by adding 10 new containers to it (11 in total):
docker service scale quotes-service=11 --detach=true
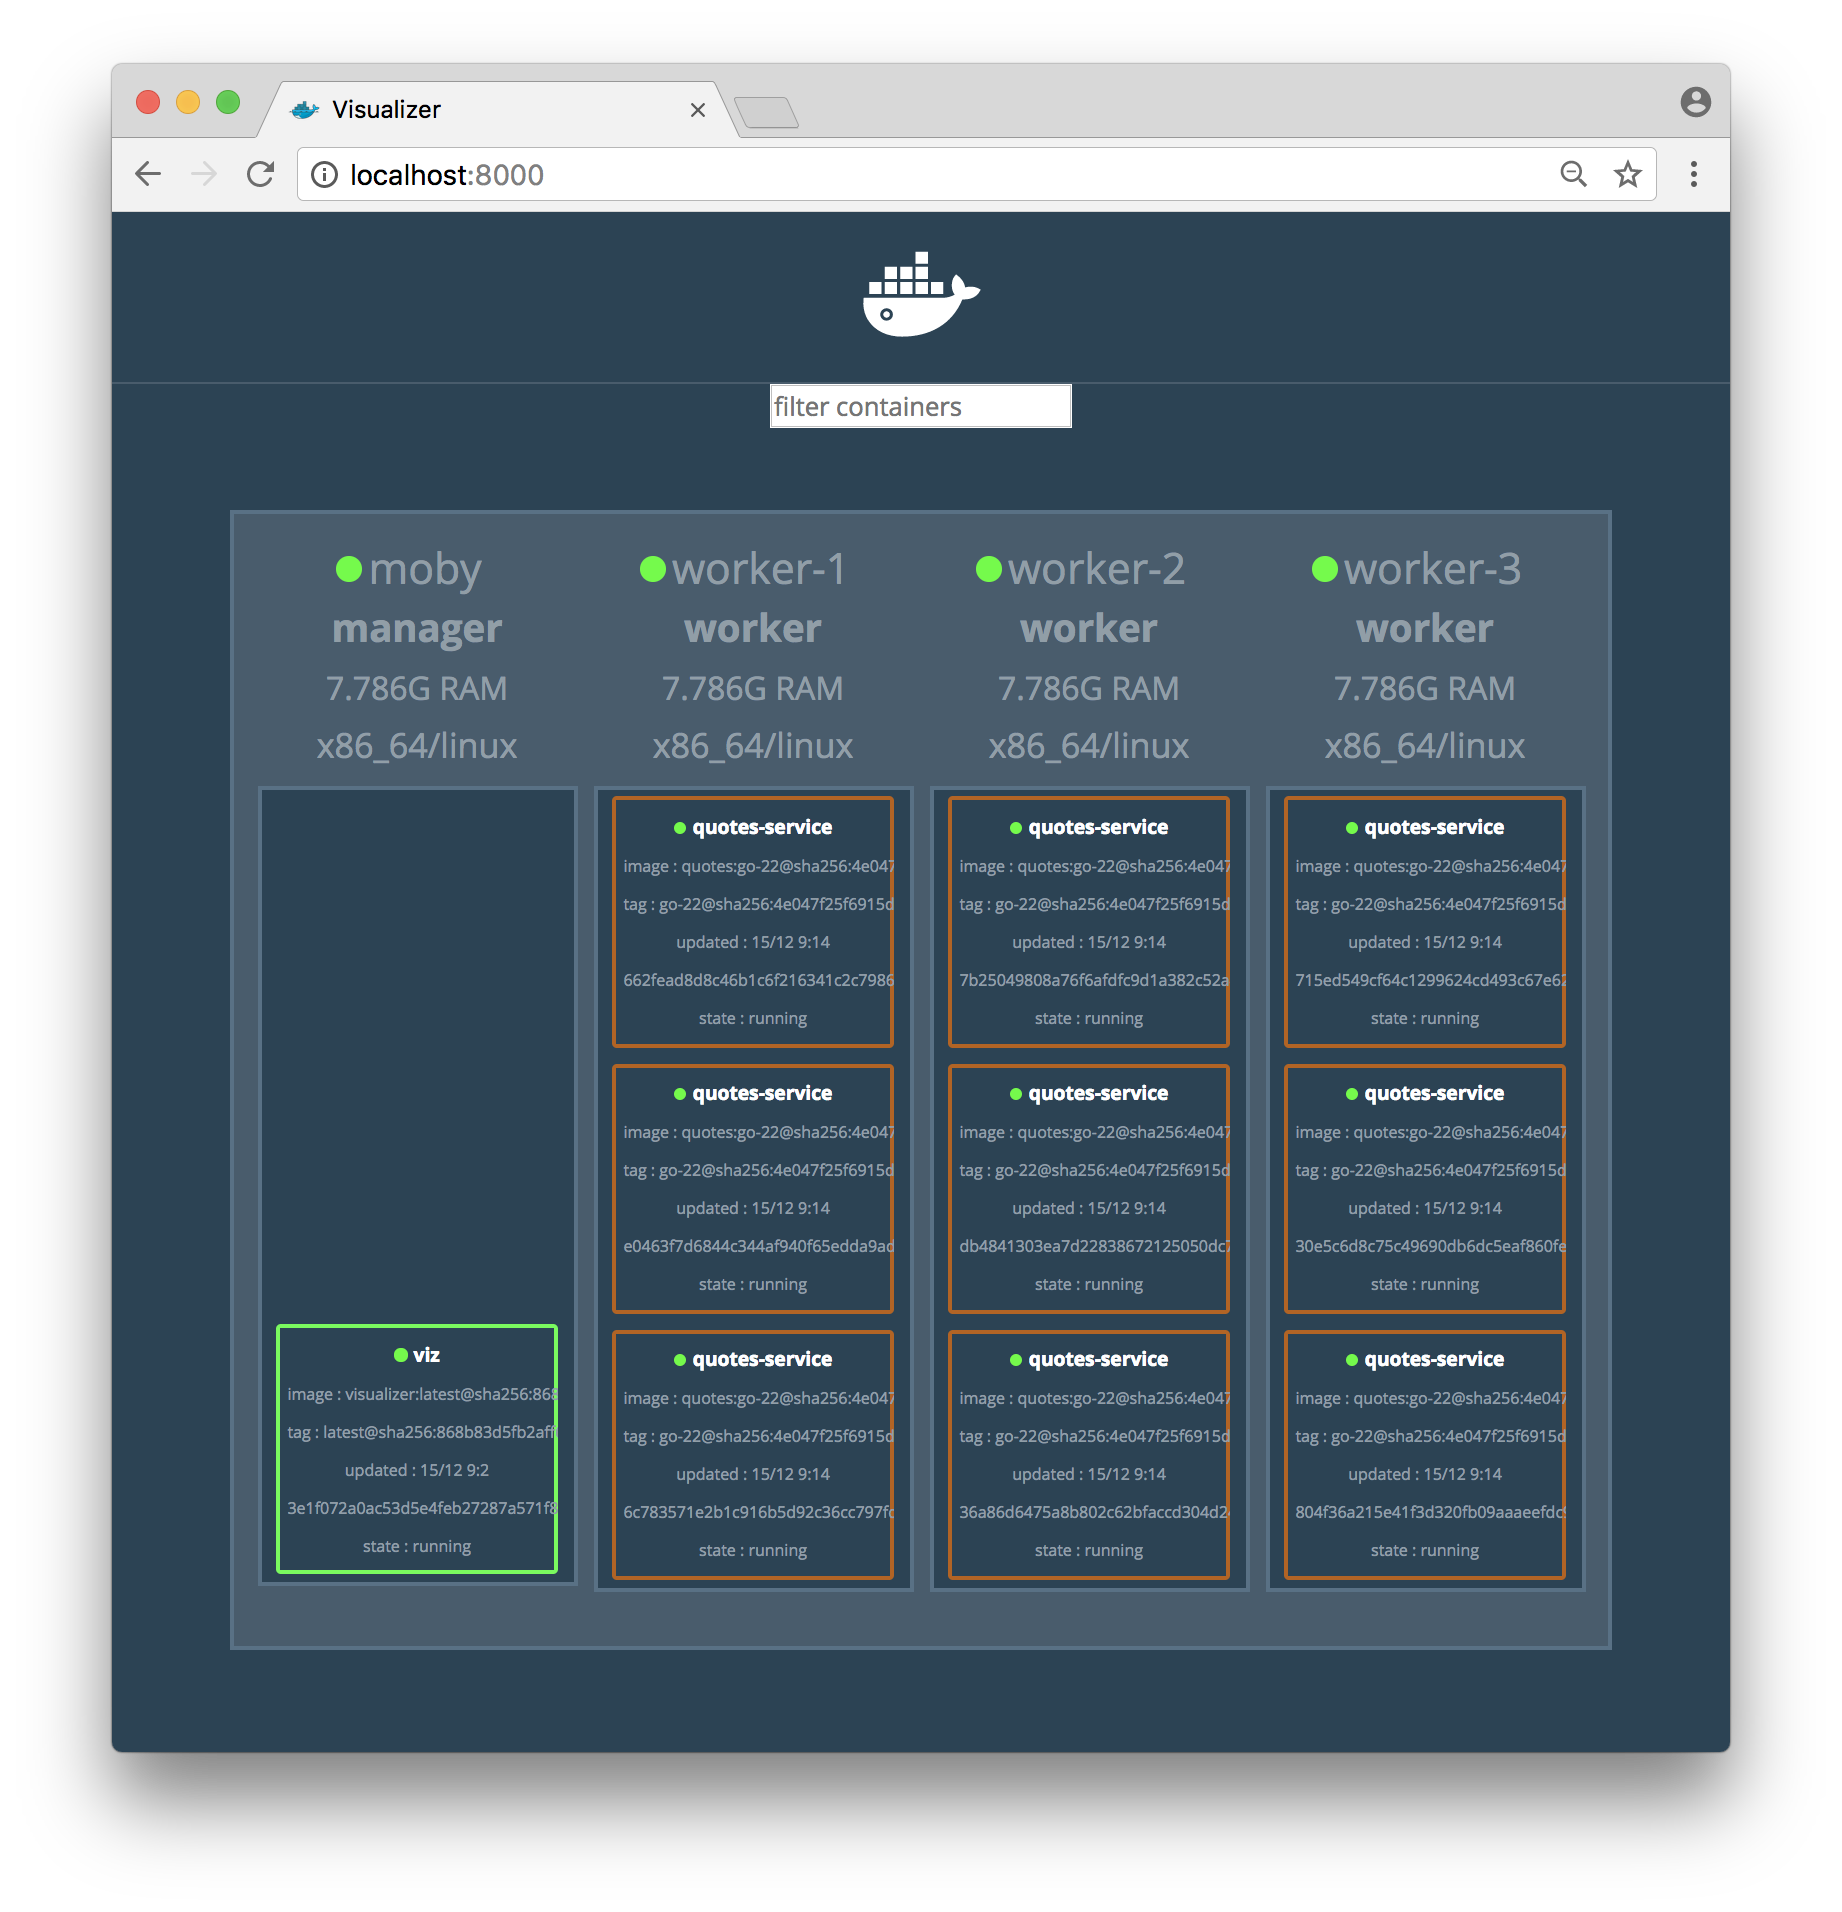
Verify that you can see all 11 quote-service containers in the Visualizer:

Now, the output from the curl - loop should report different hostnames as the requests are load balanced over the 11 containers:
5fcdd3974d5c/
5aa06cf9a0df/
8e02323f6b67/
5fcdd3974d5c/
b9f8da53ec30/
be9489f011c3/
559489f857d6/
494d5b0a5b5a/
4541532bc9bb/
709a6b244149/
Great, isn’t it?
Now, let’s expose the container orchestrator, i.e. Docker in Swarm mode, to some problems and see if it handles them as expected!
First, let’s shut down some arbitrary containers and see if the orchestrator detects it and start new ones!
To keep things relatively simple, let’s kill all quote-services running on the master node:
docker rm -f $(docker ps --filter name=quotes-service -q)
The command should respond with the ids of the killed containers:
25ca7c327cb4
6d28d64ff831
Take a quick look (you have to be fast!) in the Visualizer and you will see that there are two missing quote-service containers in the master node:
But after a few seconds you will find the new containers started by the orchestrator to fulfill the desired state, i.e. 11 containers for the quote-service!
Now, let’s make it even worse by killing a worker node, i.e. simulating that the node crash unexpected. Since we use Docker in Docker, this can be done by killing the worker nodes container. Let’s shutdown worker-2:
docker rm -f worker-2
You will soon see how worker-2 disappears from the ctop display:
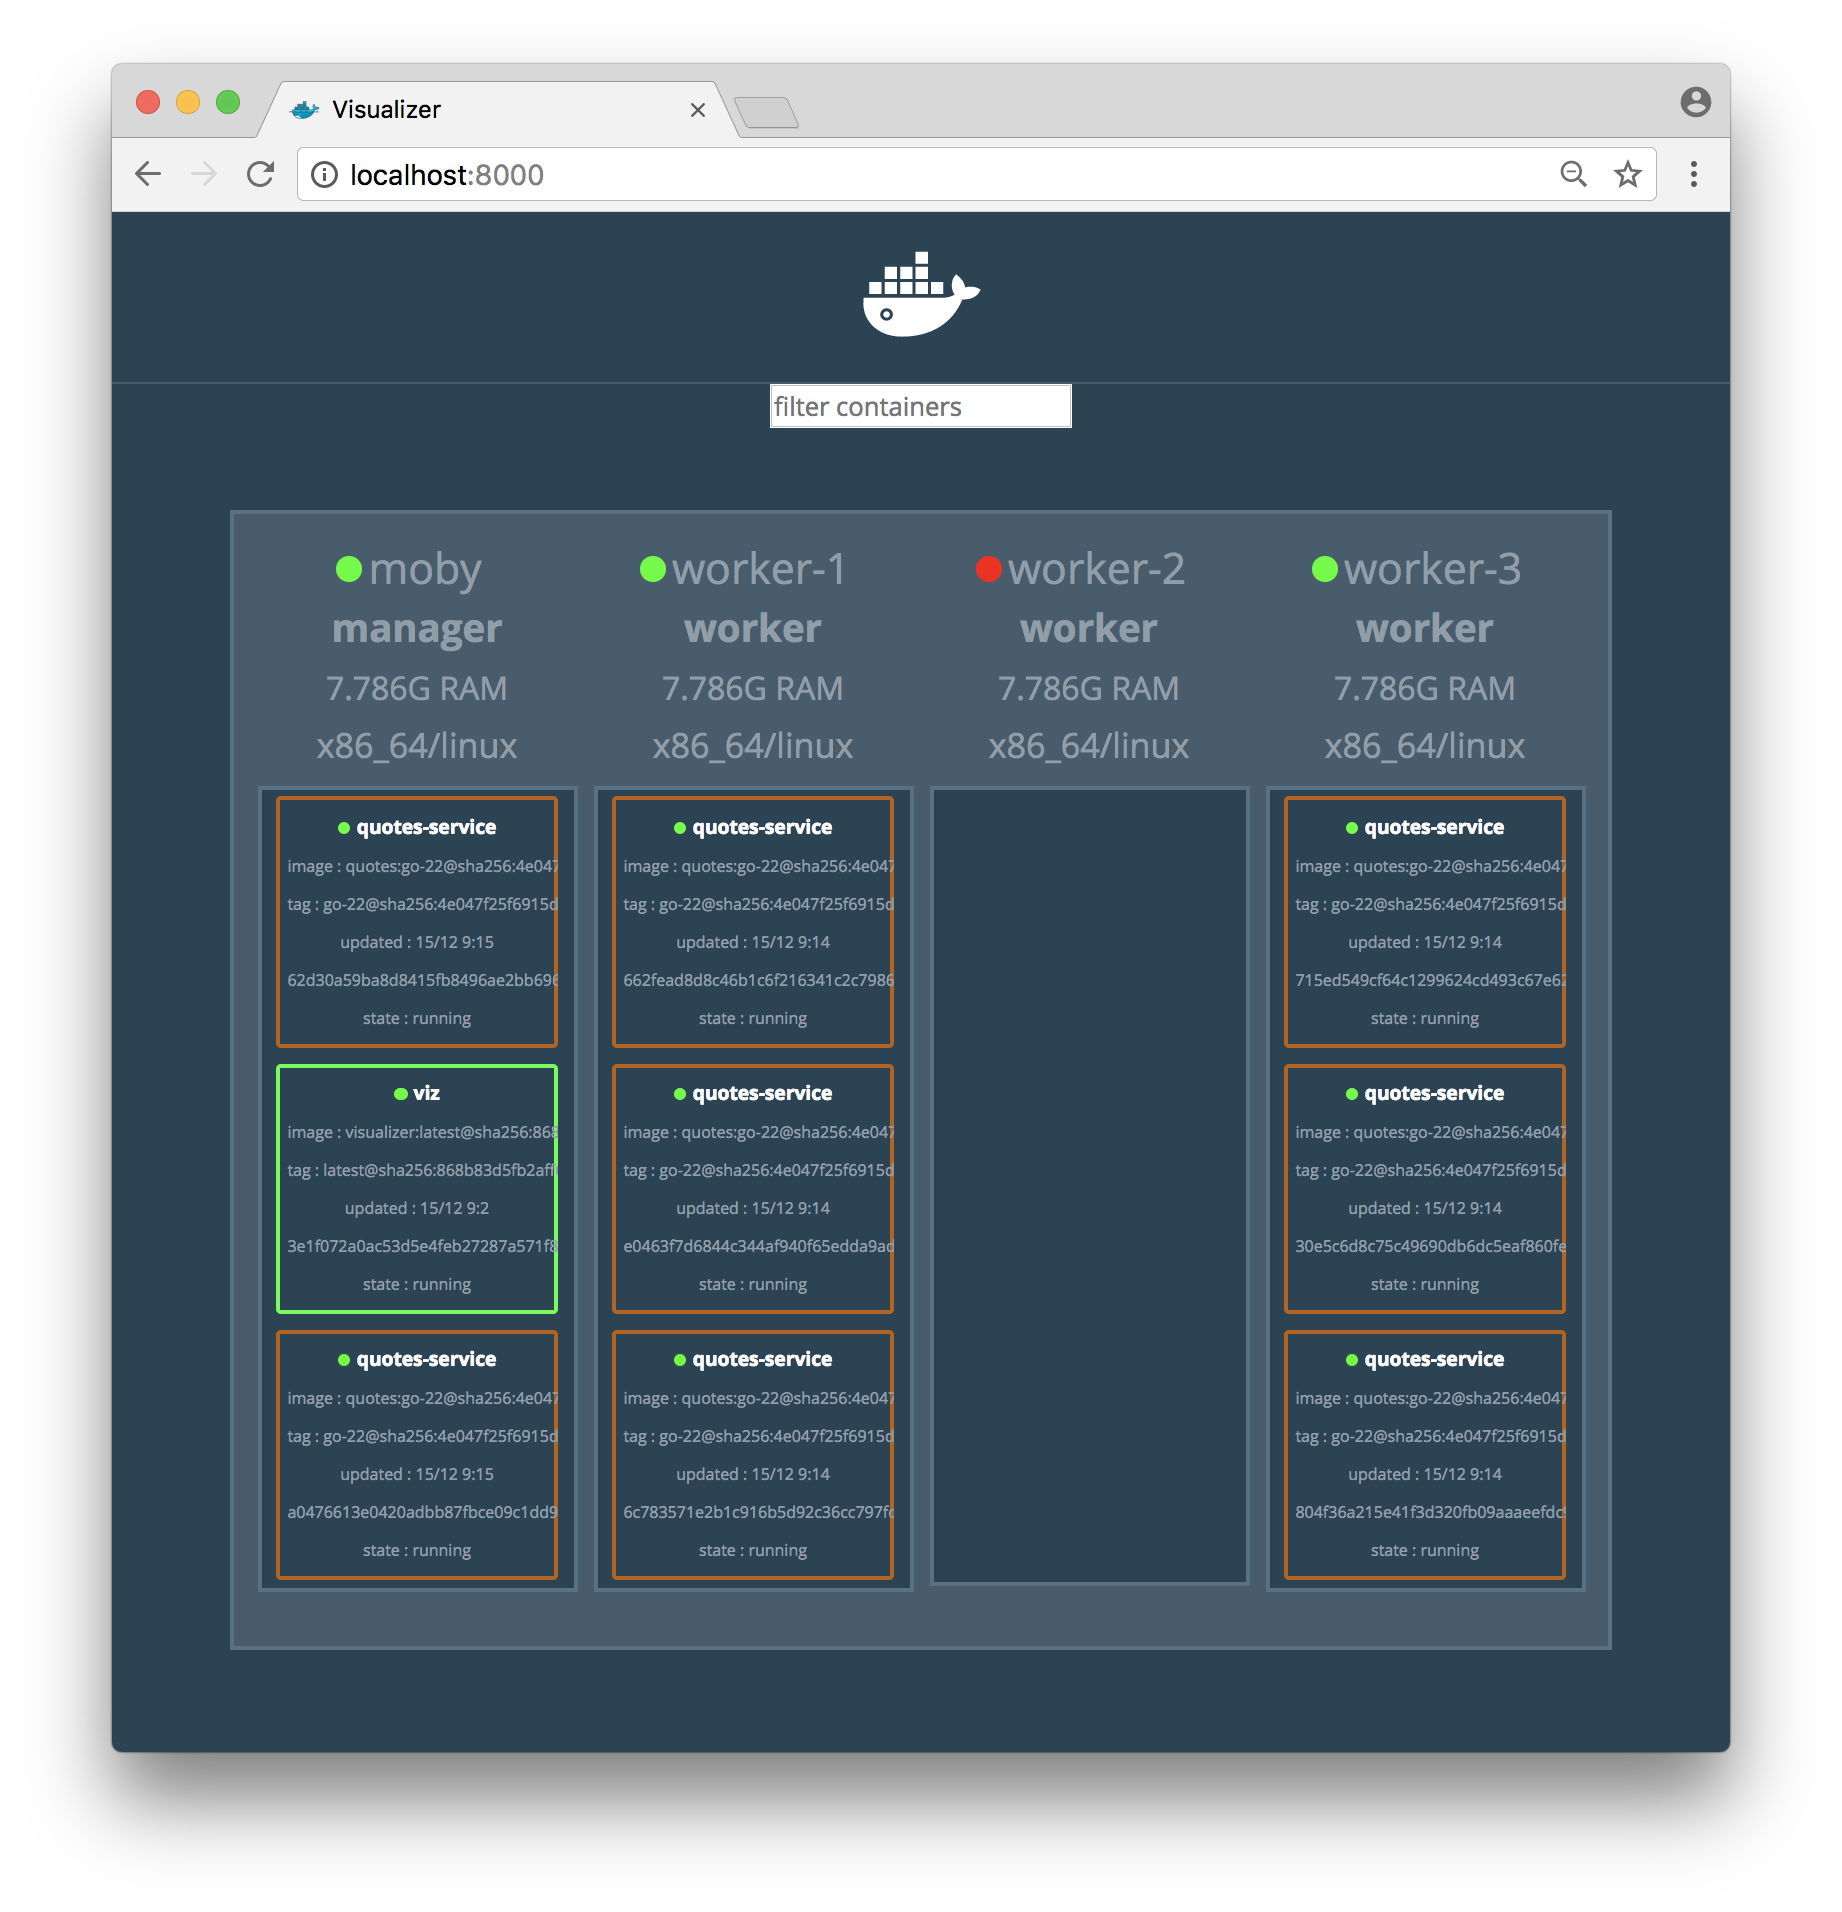
…and the Visualizer also reports that worker-2 is down:
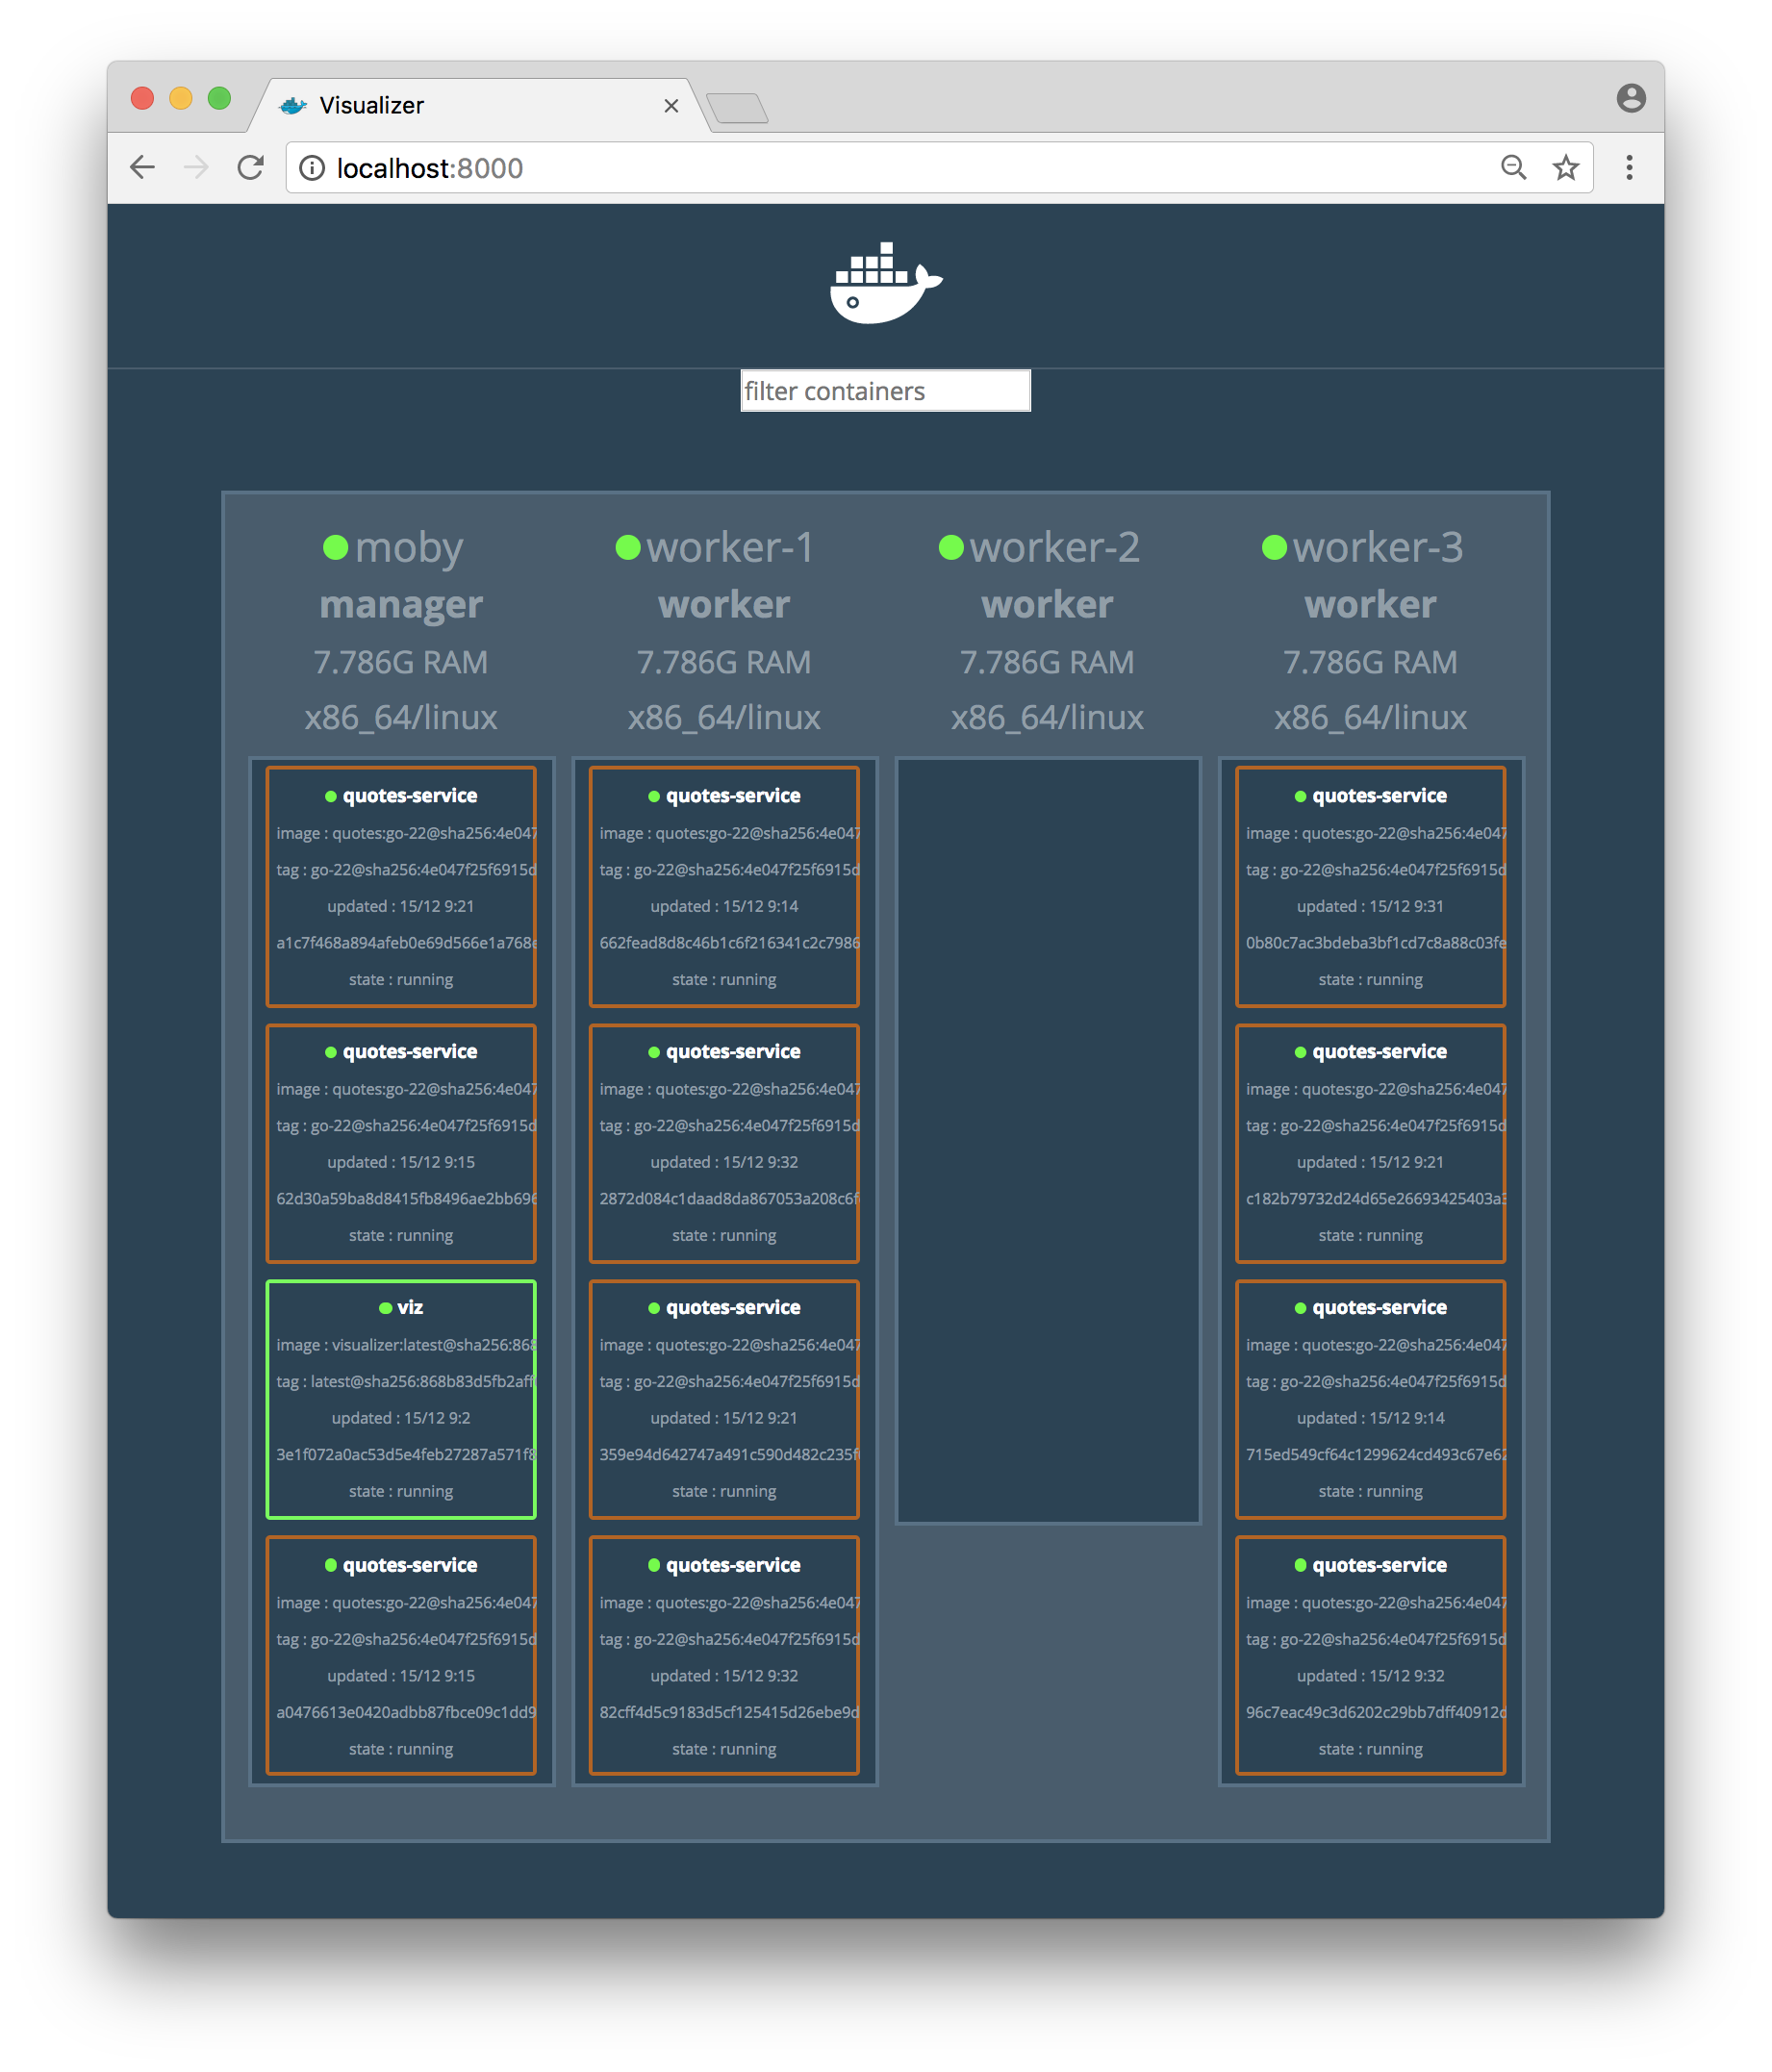
…and soon after, the containers that was running on the failing node are rescheduled on the other nodes:

Let’s wrap up with restarting the node again:
i=2
docker node rm worker-${i}
docker run -d --privileged --name worker-${i} --hostname=worker-${i} -p ${i}2375:2375 docker:${DOCKER_VERSION}
docker --host=localhost:${i}2375 swarm join --token ${SWARM_TOKEN} ${SWARM_MASTER_IP}:2377
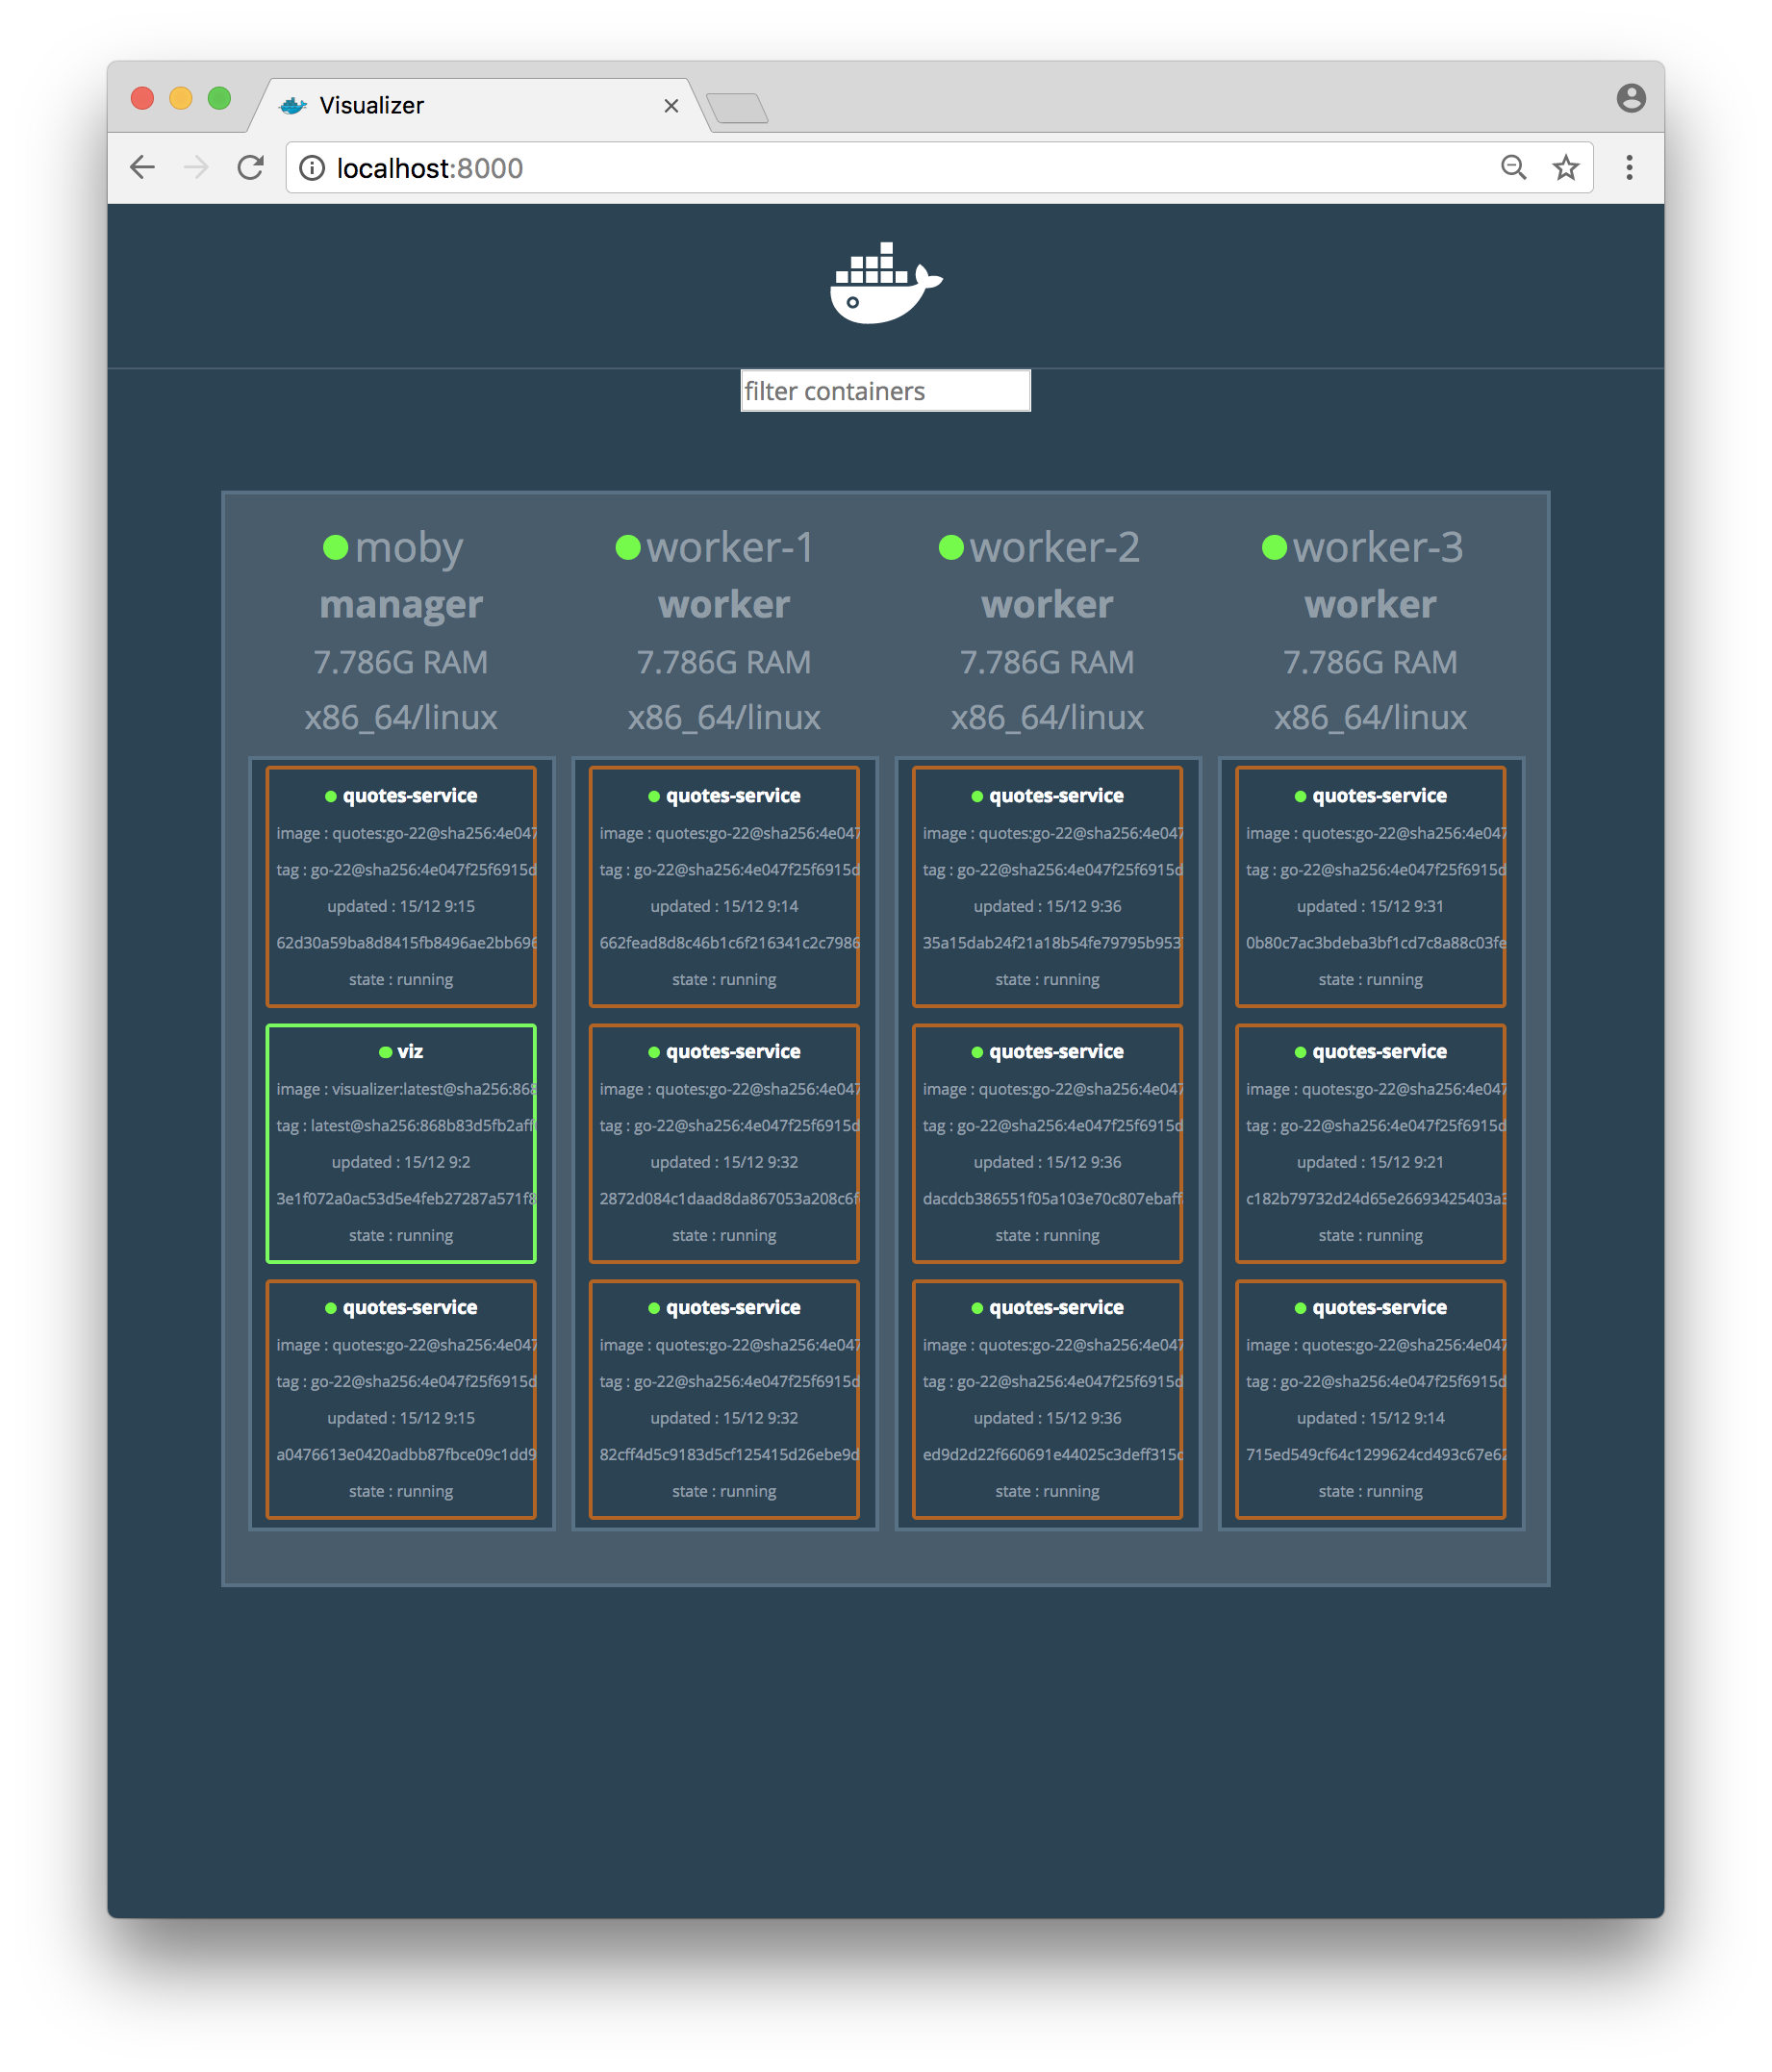
As you can see in the Visualizer, the new worker-2 node is back online but the containers are not rebalanced back to the new worker node automatically:
Note: You might need to refresh the Visualizer window in the browser to see that the
worker-2node is back online.
You can, however, manually rebalance your containers with the commands:
docker service scale quotes-service=8 --detach=false
docker service scale quotes-service=11 --detach=false
That’s it, let’s remove the Swarm cluster:
Run the following commands:
# Remove services
docker service rm quotes-service viz

# Unregister worker nodes
for i in $(seq "${NUM_WORKERS}"); do
	docker --host=localhost:${i}2375 swarm leave
done

# Remove worker nodes
docker rm -f $(docker ps -a -q --filter ancestor=docker:${DOCKER_VERSION} --format="")

# Leave Swarm mode
docker swarm leave --force
For more blog posts on new features in Docker, see the blog series - Trying out new features in Docker.