Blogg
Här finns tekniska artiklar, presentationer och nyheter om arkitektur och systemutveckling. Håll dig uppdaterad, följ oss på LinkedIn
Här finns tekniska artiklar, presentationer och nyheter om arkitektur och systemutveckling. Håll dig uppdaterad, följ oss på LinkedIn

Soi-toolkit adds value to the leading open source Mule ESB. Its makes it very easy to start building integrations and services. You get projects setup including tests all based on Maven. You also get support for logging, property handling, WSDL and XML Schema creation and much more.
So how do you get started? The Soi-toolkit website contains extensive help here and I have used the installation guide provided.
Since I’m on Mac OS I already have the recommended version of Java and Maven installed. Eclipse was already setup as well.
I’m used to running maven in a terminal window so I skipped the recommended Maven Eclipse plugin installation. Since I was only going to do some local work at this time, I skipped the Subversive Eclipse plugin. So the only thing I had left to do was to install the Soi-toolkit Eclipse plugin.
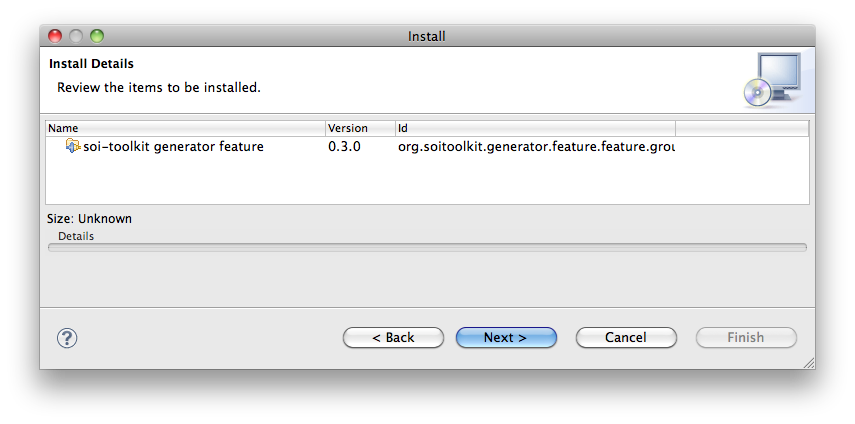
At the Install new Software menu option I entered the Soi-toolkit update site http://soi-toolkit.googlecode.com/svn/eclipse-update-site and got the confirmation that I was on the right track.
I also skipped the optional installations for now.
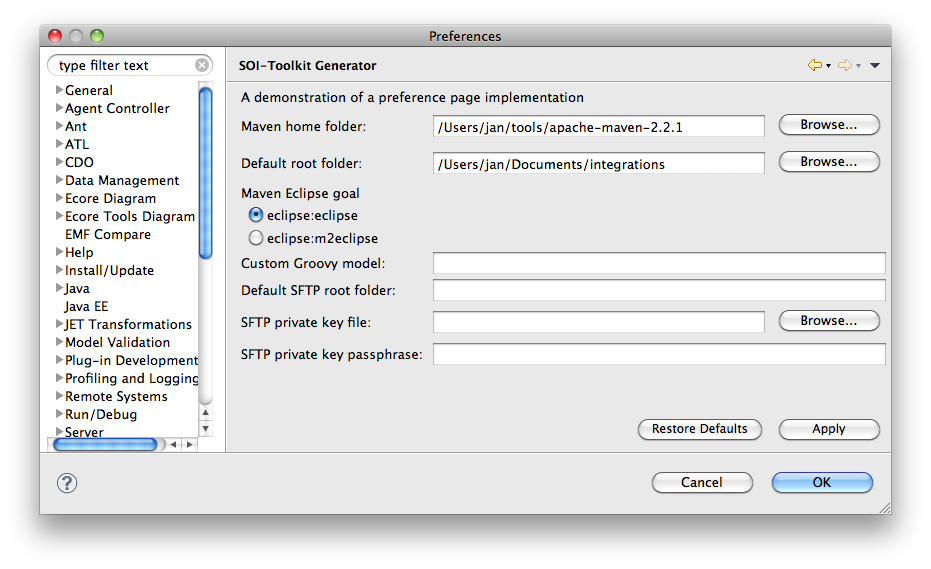
The configuration of the toolkit was no big deal after finding where maven was installed. I used the eclipse:eclipse options.
Next step is to create a component for my integrations. Using the wizard Create a new component and specify something like this:
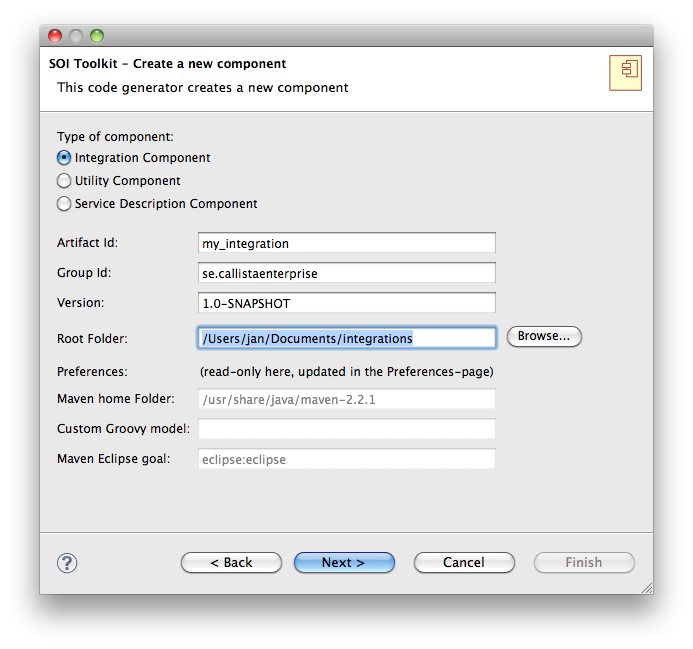
Remember to select Mule 2.2.1 which is the public available version.
The first time eclipse:eclipse command is executed a lot of dependencies area downloaded, you must be patient. The M2_REPO variable has to be set to where your maven repository is, /Users/jan/.m2/repository in my case.
Three eclipse projects are created, the service project is where the integration is going to be.
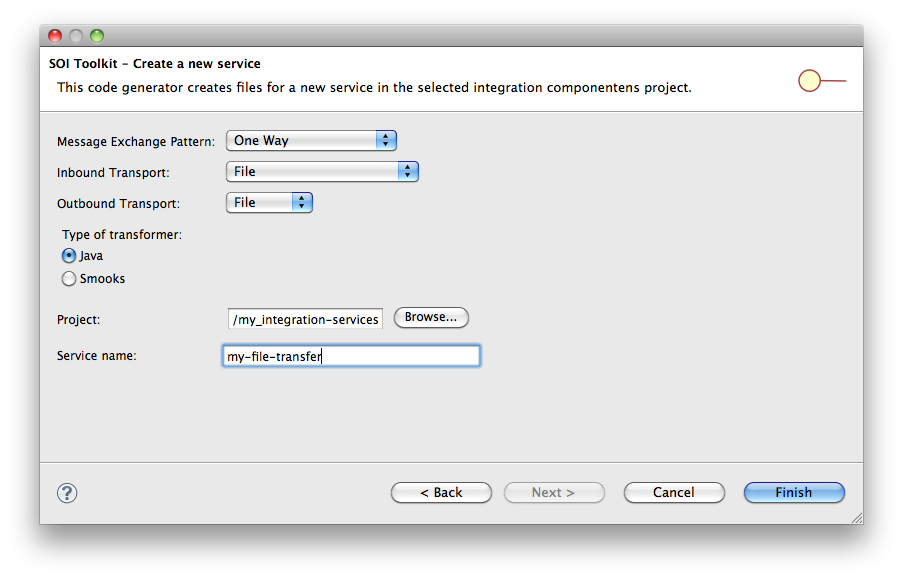
Now it is time to create an integration using the wizard Create new service. I picked a simple file transfer scenario to start with.
The main configuration file that was generated look like this
<model name="my-file-transfer-model">
  <service name="my-file-transfer-sender-service">

    <inbound>
      <file:inbound-endpoint
          path="${MY-FILE-TRANSFER_INBOUND_FOLDER}"
          pollingFrequency="${MY-FILE-TRANSFER_INBOUND_POLLING_MS}"
          fileAge="${MY-FILE-TRANSFER_INBOUND_FILE_AGE_MS}"
          moveToDirectory="${MY-FILE-TRANSFER_ARCHIVE_FOLDER}"
          moveToPattern="#[ORIGINALNAME]"
          transformer-refs="objToStr logMsgIn">
        <file:filename-wildcard-filter pattern="*.*"/>
      </file:inbound-endpoint>
    </inbound>

    <outbound>
      <pass-through-router>
        <file:outbound-endpoint
          path="${MY-FILE-TRANSFER_OUTBOUND_FOLDER}"
          outputPattern="#[ORIGINALNAME]"
          transformer-refs="myfiletransferTransformer logMsgOut"/>
      </pass-through-router>
    </outbound>
  </service>
</model>
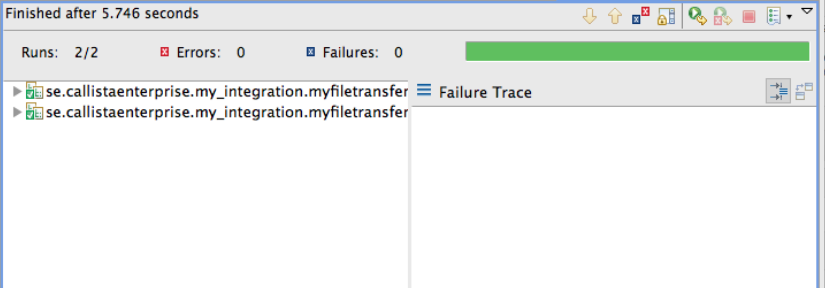
Also some test were generated and they show green when you execute them.
So we have a complete project setup including test, property handling, logging and build support. From then you can add transformers and other features to your integration. Obviously that need more knowledge on how Mule works, but using Soi-toolkit you know that you will be starting with best practise Mule usage.
Working with services and integrations in an open source environment has never been easier and Soi-toolkit takes Mule usage to the next level.