Blogg
Här finns tekniska artiklar, presentationer och nyheter om arkitektur och systemutveckling. Håll dig uppdaterad, följ oss på LinkedIn
Här finns tekniska artiklar, presentationer och nyheter om arkitektur och systemutveckling. Håll dig uppdaterad, följ oss på LinkedIn

Spring Boot makes it very easy to create Spring based applications. Spring Boot takes an opinionated view of the Spring platform and third-party libraries, allowing us to get started with a minimal configuration. For example we can develop a Jave EE based web application without any configuration files. Not even a web.xml file is required!
When required, however, we can take control over parts of the configuration and override the conventions that Spring Boot puts in play. We can also, if we really must, use traditional XML configuration files for some parts of the configuration. Please read the excellent documentation for extensive information.
In this blog we will develop a plain REST service using the Spring Web MVC framework (shortened to Spring MVC in this blog) and package it in a web application, ready to be deployed in any Servlet 3.0 compliant web server. We will also, of course, do it a test run in the embedded Servlet container that Spring Boot provides. We are going to use Gradle as our build system.
If you want to check out the source code and test it on your own you need to have Java SE 7 and Git installed. Then perform:
$ git clone git@github.com:callistaenterprise/blog-a-first-look-at-spring-boot.git
$ cd blog-a-first-look-at-spring-boot/spring-boot-one
$ tree
This should result in a tree structure like:
├── build.gradle
├── gradle
│   └── wrapper
│       ├── gradle-wrapper.jar
│       └── gradle-wrapper.properties
├── gradlew
├── gradlew.bat
└── src
    └── main
        ├── java
        │   └── se
        │       └── callista
        │           └── springbootone
        │               ├── Application.java
        │               ├── MyEmbeddedServletContainerCustomizer.java
        │               ├── ProcessingController.java
        │               └── ProcessingStatus.java
        └── resources
            ├── application.properties
            └── logback.xml
Let’s start with defining a vanilla REST Service using Spring MVC, next we look at the “magic” Spring Boot Application class and the Gradle build file that also is of great importance. We will wrap up the walk through with looking as some examples of how you easily can override the conventions that Spring Boot puts in play.
The REST service is implemented as a vanilla Spring MVC Rest-controller. The service takes two query parameters, minMs and maxMs, that defines the boundaries of the processing time of the service. The service will simulate a response time between the given boundaries by using Thread.sleep().
package se.callista.springbootone;

import ...

@RestController
public class ProcessingController {

  private static final Logger LOG = LoggerFactory.getLogger(ProcessingController.class);

  @RequestMapping("/process")
  public ProcessingStatus blockingProcessing(
    @RequestParam(value = "minMs", required = false, defaultValue = "0") int minMs,
    @RequestParam(value = "maxMs", required = false, defaultValue = "0") int maxMs) {

    int processingTimeMs = calculateProcessingTime(minMs, maxMs);

    LOG.debug("Start request, processing time: {} ms.", processingTimeMs);

    try {
      Thread.sleep(processingTimeMs);
    }
    catch (InterruptedException e) {}
    finally {
      LOG.debug("Processing of request done");
    }

    return new ProcessingStatus("Ok", processingTimeMs);
  }

  private int calculateProcessingTime(int minMs, int maxMs) {
    if (maxMs < minMs) maxMs = minMs;
    int processingTimeMs = minMs + (int) (Math.random() * (maxMs - minMs));
    return processingTimeMs;
  }
}
The RestController annotation makes the code REST aware and the RequestMapping annotation declares what URI the service should be mapped to. As you can see the service return an instance of the class ProcessingStatus. It is a POJO-class that looks like:
package se.callista.springbootone;

import ...

@XmlRootElement
public class ProcessingStatus {

  @XmlElement
  private final String status;

  @XmlElement
  private final int processingTimeMs;

  public ProcessingStatus() {
    status = "UNKNOWN";
    processingTimeMs = -1;
  }

  public ProcessingStatus(String status, int processingTimeMs) {
    this.status = status;
    this.processingTimeMs = processingTimeMs;
  }

  public String getStatus() {
    return status;
  }

  public int getProcessingTimeMs() {
    return processingTimeMs;
  }
}
Spring MVC will automatically marshal the ProcessingStatus object to either JSON or XML depending on what the client requests in the HTTP Accept header, by default JSON will be used. To have the XML processing automated we need the XML annotations XmlRootElement and XmlElement plus that JAXB is available on the classpath (we will ensure that in our build-file, see below).
Here is where all the magic happens that for example removes the burden of developing and maintaining XML configuration files!
The source code required to do that looks like:
package se.callista.springbootone;

import ...

@ComponentScan
@EnableAutoConfiguration
public class Application {

  public static void main(String[] args) {
    SpringApplication.run(Application.class, args);
  }
}
That is not that much source code, right?
The ComponentScan annotation tells Spring to look for REST controllers in our code.
The EnableAutoConfiguration annotation tells Spring Boot to “guess” how you want to configure Spring, based on the dependencies we have in our build file. In this case it will figure out that we want to build a web app and run it on an embedded Tomcat instance with Spring MVC enabled (e.g. configuration of a DispatcherServlet).
Let’s look into the build file to understand that a bit more…
As mentioned earlier we use Gradle as our build system. It gives us a much more compact and easier to maintain build file compared to using Maven. Please see the this blog about Gradle if you want to know more.
The build file, build.gradle, looks like:
buildscript {
  repositories {
    mavenCentral()
  }
  dependencies {
    classpath("org.springframework.boot:spring-boot-gradle-plugin:1.0.0.RELEASE")
  }
}

apply plugin: 'java'
apply plugin: 'eclipse'
apply plugin: 'idea'
apply plugin: 'spring-boot'
apply plugin: 'war'

war {
  baseName = 'spring-boot-one'
  version =  '1.0.0-SNAPSHOT'
}

repositories {
  mavenCentral()
}

dependencies {
  compile("org.springframework.boot:spring-boot-starter-web")
  // compile("org.springframework.boot:spring-boot-starter-jetty")
  compile("org.springframework.boot:spring-boot-starter-actuator")
  compile("javax.xml.bind:jaxb-api:2.1")
  compile("com.sun.xml.bind:jaxb-impl:2.1.9")
  testCompile("org.springframework.boot:spring-boot-starter-test")
}

task wrapper(type: Wrapper) {
  gradleVersion = '1.11'
}
spring-boot-starter-web drags in a convenient set of dependencies for building web applications, e.g. Spring Framework, Spring MVC, the Servlet API and embedded Tomcat.spring-boot-starter-jetty can be used to replace Tomcat with Jetty as our embedded Servlet container (disabled for the moment)spring-boot-starter-actuator adds some interesting out-of-the-box features for metrics and monitoringjaxb-api and jaxb-impl enables, as described above, our REST controller to automatically marshal our result to XML if so requested by the callerspring-boot-starter-test drags in a convenient set of test dependencies, such as JUnit, Mockito and HamcrestNote #1: The version of the Spring Boot Gradle-plugin decides the versions of the spring-boot-starter-* dependencies.
Note #2: The spring-boot-starter-* dependencies are very convenient to use but if they don’t suite your specific needs you can easily replace them with your own. They are only a set of prepackaged “pom type” dependencies that Spring Boot puts together for you, for example see spring-boot-starter-web v1.0.0.
First, if you want to reuse some of your existing XML configuration files you can simply load them using an ImportResource annotation or as the Spring Boot Reference Guide states in §14.2 Importing XML configuration:
If you absolutely must use XML based configuration, we recommend that you still start with a
@Configurationclass. You can then use an additional@ImportResourceannotation to load XML configuration files.
No doubt on what direction the Spring Boot people wants you to go :-)
Now over to a sample Java based configuration. I want to be able to use this code example for some load testing and therefore I want to be able to configure the embedded Tomcat runtime environment, e.g. adjusting the max number of threads in the request thread pool. I can do that by defining a EmbeddedServletContainerCustomizer - bean in my Application.java - class:
public class Application {

  @Bean
  public EmbeddedServletContainerCustomizer embeddedServletCustomizer() {
    return new MyEmbeddedServletContainerCustomizer();
  }
The implementation looks like:
package se.callista.springbootone;

import ...

public class MyEmbeddedServletContainerCustomizer implements EmbeddedServletContainerCustomizer {

  private static final Logger LOG =
      LoggerFactory.getLogger(MyEmbeddedServletContainerCustomizer.class);

  @Value("${servlet.container.maxThreads}")
  private int MAX_THREADS;

  @Override
  public void customize(ConfigurableEmbeddedServletContainer factory) {
    if(factory instanceof TomcatEmbeddedServletContainerFactory) {
      customizeTomcat((TomcatEmbeddedServletContainerFactory) factory);
    }
  }

  public void customizeTomcat(TomcatEmbeddedServletContainerFactory factory) {
    factory.addConnectorCustomizers(new TomcatConnectorCustomizer() {
      @Override
      public void customize(Connector connector) {
        Object defaultMaxThreads = connector.getAttribute("maxThreads");
        connector.setAttribute("maxThreads", MAX_THREADS);
        LOG.info("Changed Tomcat connector maxThreads from " +
            defaultMaxThreads + " to " + MAX_THREADS);
      }
    });
  }
}
The customize() - method checks if we are using Tomcat and if so it delegates the settings to the method customizeTomcat() that use Tomcat specific API’s to set the MaxThreads property.
You can also see that we have avoided to hard code the new MaxThreads value but instead used property injection. The value of the property servlet.container.maxThreads can be found in the file src/main/resources/application.properties, standardised by Spring Boot. It looks like:
server.port = 9090
servlet.container.maxThreads=500
As you might already have guessed the other property server.port is another Spring Boot convention for setting the HTTP port for the embedded Servlet container.
Ok, now we are ready to see if this works!
Let’s begin with building the war-file:
$ ./gradlew build
You will find the war-file in the folder build/libs:
build
└── libs
    └── spring-boot-one-1.0.0-SNAPSHOT.war
Start the web app in an embedded Tomcat instance with the command:
$ ./gradlew bootRun
It should result in something like:
:: Spring Boot ::        (v1.0.0.RELEASE)
.
.
.
2014-04-03 21:41:47 INFO  main o.a.c.c.StandardService:183 - Starting service Tomcat
2014-04-03 21:41:47 INFO  main o.a.c.c.StandardEngine:183 - Starting Servlet Engine: Apache Tomcat/7.0.52
2014-04-03 21:41:47 INFO  localhost-startStop-1 o.a.c.c.C.[.[.[/]:183 - Initializing Spring embedded WebApplicationContext
.
.
.
2014-04-03 21:41:48 INFO  main o.s.b.c.e.t.TomcatEmbeddedServletContainer:139 - Tomcat started on port(s): 9090/http
2014-04-03 21:41:48 INFO  main s.c.w.s.a.t.Application:61 - Started Application in 2.755 seconds (JVM running for 3.55)
Now try out the REST service with a command like:
$ curl -i "http://localhost:9090/process?minMs=1000&maxMs=2000"

HTTP/1.1 200 OK
Server: Apache-Coyote/1.1
X-Application-Context: application:9090
Content-Type: application/json;charset=UTF-8
Transfer-Encoding: chunked
Date: Thu, 03 Apr 2014 19:47:22 GMT

{"status":"Ok","processingTimeMs":1374}
Here we ask the REST service to process our request and respond in between 1 and 2 secs. The response comes from Tomcat (Apache Coyote means Tomcat) in a json-format. The json-response reports that the internal processing actually took 1374 ms.
Let’s try to ask for a response in XML format this time:
$ curl -H "accept:application/xml" "http://localhost:9090/process?minMs=1000&maxMs=2000"

<?xml version="1.0" encoding="UTF-8" standalone="yes"?>
 <processingStatus>
  <status>Ok</status>
  <processingTimeMs>1034</processingTimeMs>
</processingStatus>
That worked pretty good as well.
Shall we try another web server?
Open the file build.gradle in a text editor and uncomment the dependency to spring-boot-starter-jetty. Restart the web-app and look for the following in the output from the startup:
2014-04-03 22:02:28 INFO  main o.e.j.s.Server:272 - jetty-8.1.14.v20131031
2014-04-03 22:02:29 INFO  main o.s.b.c.e.j.JettyEmbeddedServletContainer:97 - Jetty started on port: 9090
Seems like SpringBoot deployed our web app in an embedded Jetty container, try it out and look for Jetty in the server-information:
$ curl -i "http://localhost:9090/process?minMs=1000&maxMs=2000"

HTTP/1.1 200 OK
X-Application-Context: application:9090
Content-Type: application/json;charset=UTF-8
Transfer-Encoding: chunked
Server: Jetty(8.1.14.v20131031)

{"status":"Ok","processingTimeMs":1007}
Great!
Let’s wrap up the test run with a quick look at what the spring-boot-starter-actuator dependency gives us out-of-the-box. First fire off a number of calls to the REST service and then give the command:
$ curl localhost:9090/metrics/counter.status.200.process
12
Ok, so we have made twelve calls to the service. No try out:
$ curl localhost:9090/metrics/gauge.response.process
1821.0
…and we get some metrics regarding the response time of our service. Without writing a single line of code!
An impressive test run, right?
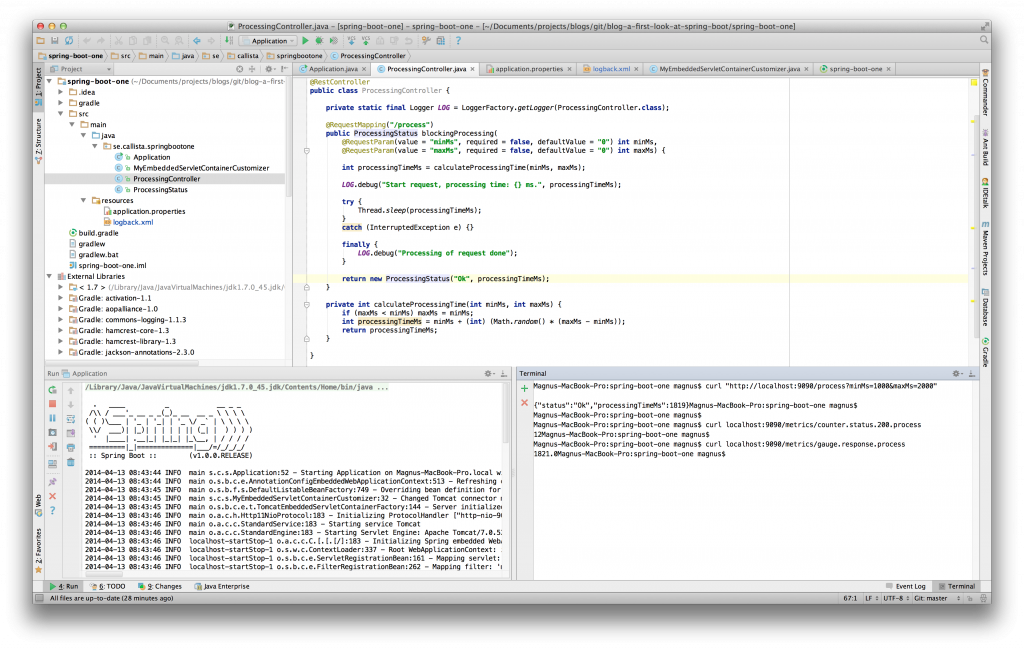
So far we have been doing everything on the command line, but you can of course import the project into a IDE that supports Gradle, e.g. Eclipse or IntelliJ. Below is a screen shot from my favorite IDE, IntelliJ, where I have Spring Boot running in one sub window and a Terminal in another sub window where I run my test commands:
Getting started with a Spring project, specifically when based on Java EE, has never been this easy! With Spring Boot you can get a new application up and running in a few minutes and, at least initially, disregarding all questions related to deployment descriptors and configuration files. When required you can take control over the conventions Spring Boot puts in play and refine parts of the configuration to meet your needs!
I can only encourage you to try this out in your next Spring project!