Blogg
Här finns tekniska artiklar, presentationer och nyheter om arkitektur och systemutveckling. Håll dig uppdaterad, följ oss på LinkedIn
Här finns tekniska artiklar, presentationer och nyheter om arkitektur och systemutveckling. Håll dig uppdaterad, följ oss på LinkedIn

In part 5, we’ll get our “accountservice” up and running on a locally deployed Docker Swarm cluster and discuss the core concepts of container orchestration.
This blog post deals with the following:
Gophers beware: After writing this part of the blog series, I realized there’s nothing Go-specific in this part. I hope you’ll enjoy it anyway.
Before going practical, a quick introduction of the concept of a “container orchestrator” may be of use.
As an application becomes more complex and has to handle an (hopefully) ever higher load, we have to deal with the fact that we could be running hundreds of service instances spread out over a lot of physical (or virtualized) hardware. Container orchestration allows us to view all that hardware as a single logical entity.
This article about container orchestration from thenewstack.io sums it up as:
"abstracting the host infrastructure, orchestration tools allow users to treat the entire cluster as a single deployment target."
I can’t summarize it better myself - using a container orchestrator such as Kubernetes or Docker Swarm allows us to deploy our software components as services running on one or more nodes of our available infrastructure. In the case of Docker - the Swarm mode is about managing a cluster of Docker Engines called a swarm. Kubernetes uses a slightly different nomenclature and hierarchy of key abstractions, but the concept on the whole is roughly the same.
The container orchestrator not only handles the lifecycle of our service for us, it also provides mechanics for things like service discovery, load-balancing, internal addressing and logging.
In Docker Swarm, there’s three concepts that entails an introduction:
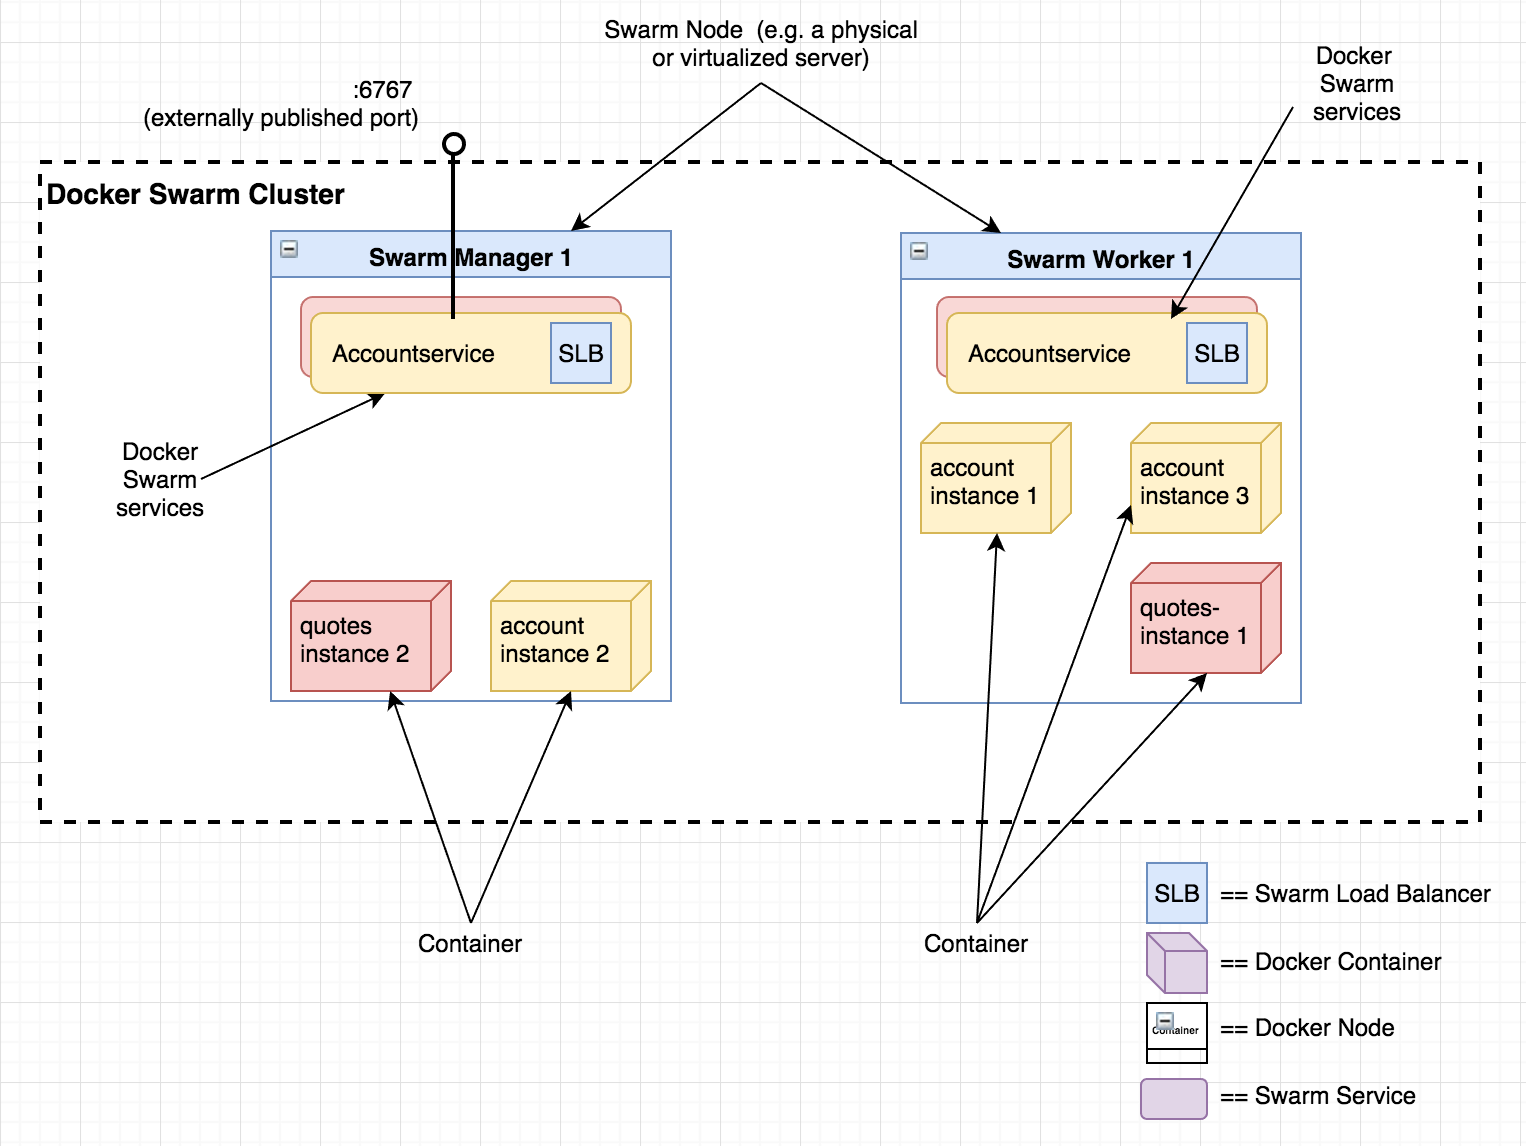
The diagram below shows a possible (simplified) deployment of our microservice landscape with two nodes running a total of five container instances abstracted by two services - “accountservice” and “quotes-service”.
While this part doesn’t change any of the Go code from the previous parts, we’re going to add some new files for running on Docker. Feel free to checkout the appropriate branch from git to get the source of the completed state of this part.
git checkout P5
Note: Most of the Go source code for the blog series was rewritten in July 2019 to better reflect contemporary idiomatic Go coding guidelines and design patterns. However, the corresponding git branch for each part of the series remains unchanged in order to stay aligned with the content of each installment. For the latest and greatest code, look at the master branch in github.
For this part to work, you’ll need to have Docker installed on your dev machine. I suggest following this guide for your Operating System. Personally, I’ve used Docker Toolbox with Virtualbox when developing the code for this blog series, but you could just as well use Docker for Mac/Windows or run Docker natively on Linux.
A Dockerfile is the recipe used by Docker for building a docker container image containing whatever you want it to contain. Let’s get this started by creating a file called Dockerfile in the /accountservice folder:
FROM iron/base

EXPOSE 6767
ADD accountservice-linux-amd64 /
ENTRYPOINT ["./accountservice-linux-amd64"]
A quick explanation:
As you see, the file we’re adding has this “linux-amd64” in its name. While we can name a Go executable just about anything, I like using a convention where we put the OS and target CPU platform into the executable name. I’m writing this blog series on a Mac running OS X. So if I just build a go executable of our accountservice from the commandline when in the /goblog/accountservice folder:
> go build
That will create an executable called accountservice in the same folder. The problem with that executable is that it won’t run in our Docker container as the underlying OS there is Linux-based. Therefore, we need to set a few Environment variables before building so the go compiler and linker knows we’re building for another OS and/or CPU architecture - in our case Linux.
Again, from the /goblog/accountservice folder:
> export GOOS=linux
> go build -o accountservice-linux-amd64
> export GOOS=darwin
This produces an executable binary named using the -o flag. I usually brew my own little shell script that automates this for me.
Since both OS X and our Linux-based container runs on the AMD64 CPU architecture we don’t need to set (and reset) the GOARCH env var. But if you’re building something for an 32-bit OS or perhaps an ARM processor you would need to set GOARCH appropriately before building.
Now it’s time to build our very first Docker image containing our executable. Go to the parent folder of the /accountservice folder, it should be $GOPATH/src/github.com/callistaenterprise/goblog.
When building a Docker container image, we usually tag it with a name usually using a [prefix]/[name] naming convention. I typically use my github username as prefix, e.g. eriklupander/myservicename. For this blog series, I’ll use “someprefix”. Execute the following command from the root project folder (e.g. /goblog) to build a Docker image based on the Dockerfile above:
> docker build -t someprefix/accountservice accountservice/

Sending build context to Docker daemon 13.17 MB
Step 1/4 : FROM iron/base
 ---> b65946736b2c
Step 2/4 : EXPOSE 6767
 ---> Using cache
 ---> f1147fd9abcf
Step 3/4 : ADD accountservice-linux-amd64 /
 ---> 0841289965c6
Removing intermediate container db3176c5e1e1
Step 4/4 : ENTRYPOINT ./accountservice-linux-amd64
 ---> Running in f99a911fd551
 ---> e5700191acf2
Removing intermediate container f99a911fd551
Successfully built e5700191acf2
Nice! Our local docker image repository now contains an image named someprefix/accountservice. If we’d be running with multiple nodes or if we’d want to share our new image, we’d use docker push to make the image available for hosts other than our currently active Docker Engine provider host to pull.
We can now try to run this image directly from the command line:
> docker run --rm someprefix/accountservice
Starting accountservice
Seeded 100 fake accounts...
2017/02/05 11:52:01 Starting HTTP service at 6767
However - note that this container is not running on your host OS localhost anymore. It now lives in it’s own networking context and we can’t actually call it directly from our host operating system. There are ways to fix that of course, but instead of going down that route we’ll now set up Docker Swarm locally and deploy our “accountservice” there instead.
Use Ctrl+C to stop the container we just started.
One of the goals of this blog series is that we want to run our microservices inside a container orchestrator. For many of us, that typically means Kubernetes or Docker Swarm. There are other orchestrators as well such as Apache Mesos and Apcera, but this blog series will focus exclusively on Docker Swarm based on Docker 1.13.
The tasks involved when setting up a Docker Swarm cluster on your dev computer may vary somewhat depending on how you installed Docker itself. I suggest following this guide or you can try to do it using my approach using Docker Toolbox, Oracle Virtualbox and docker-machine that based on my colleague Magnus lab-repo regarding service discovery found here.
A Docker Swarm cluster consists of at least one Swarm Manager and zero to many Swarm Workers. To keep things simple, my examples will just use a single Swarm Manager - at least for now. The important thing is that after this section you need to have a working Swarm Manager up and running.
The example here uses docker-machine and makes a virtual linux machine running on Virtualbox my Swarm Manager. It’s referred to as “swarm-manager-1” in my examples. You can also take a peek at the offical documentation on how to create a Swarm.
This command initializes the docker-machine host identified as swarm-manager-1 as a swarm node with the IP address of the same swarm-manager-1 node:
> docker $(docker-machine config swarm-manager-1) swarm init --advertise-addr $(docker-machine ip swarm-manager-1)
If we’d be creating a multi-node swarm cluster we’d make sure to store the join-token emitted by the command above as we’d need it later if we were to add additional nodes to the swarm.
A docker overlay network is a mechanism we use when adding services such as our “accountservice” to the Swarm so it can access other containers running in the same Swarm cluster without having to know anything about the actual cluster topology. Let’s create such a network:
docker network create --driver overlay my_network
my_network is the name we gave the network.
Almost there! Now it’s time to deploy our “accountservice” as a Docker Swarm service. The docker service create command takes a lot of parameters but isn’t that scary, promise. Here’s the command we’ll execute to deploy the “accountservice”:
> docker service create --name=accountservice --replicas=1 --network=my_network -p=6767:6767 someprefix/accountservice
ntg3zsgb3f7ah4l90sfh43kud
Here’s a quick rundown of the arguments:
That’s it. Run this to see if our service was started successfully.
> docker service ls
ID            NAME               REPLICAS  IMAGE
ntg3zsgb3f7a  accountservice     1/1       someprefix/accountservice
Sweet. We should now be able to curl or even use a web browser to query our API. The only thing we need to know up front is the public IP of the Swarm. Even if we’re running only one instance of our service on a swarm with many nodes, the overlay network and Docker Swarm lets us ask any of the swarm hosts for our service based on its port. That also means that two services cannot expose the same port externally. They may very well have the same port internally but to the outside world - the Swarm is one.
Anyway - remember that environment variable ManagerIP we saved earlier?
> echo $ManagerIP
192.168.99.100
If you’ve changed your terminal session since then, you can re-export it:
> export ManagerIP=`docker-machine ip swarm-manager-0`
Let’s curl:
> curl $ManagerIP:6767/accounts/10000
{"id":"10000","name":"Person_0"}
It’s alive!
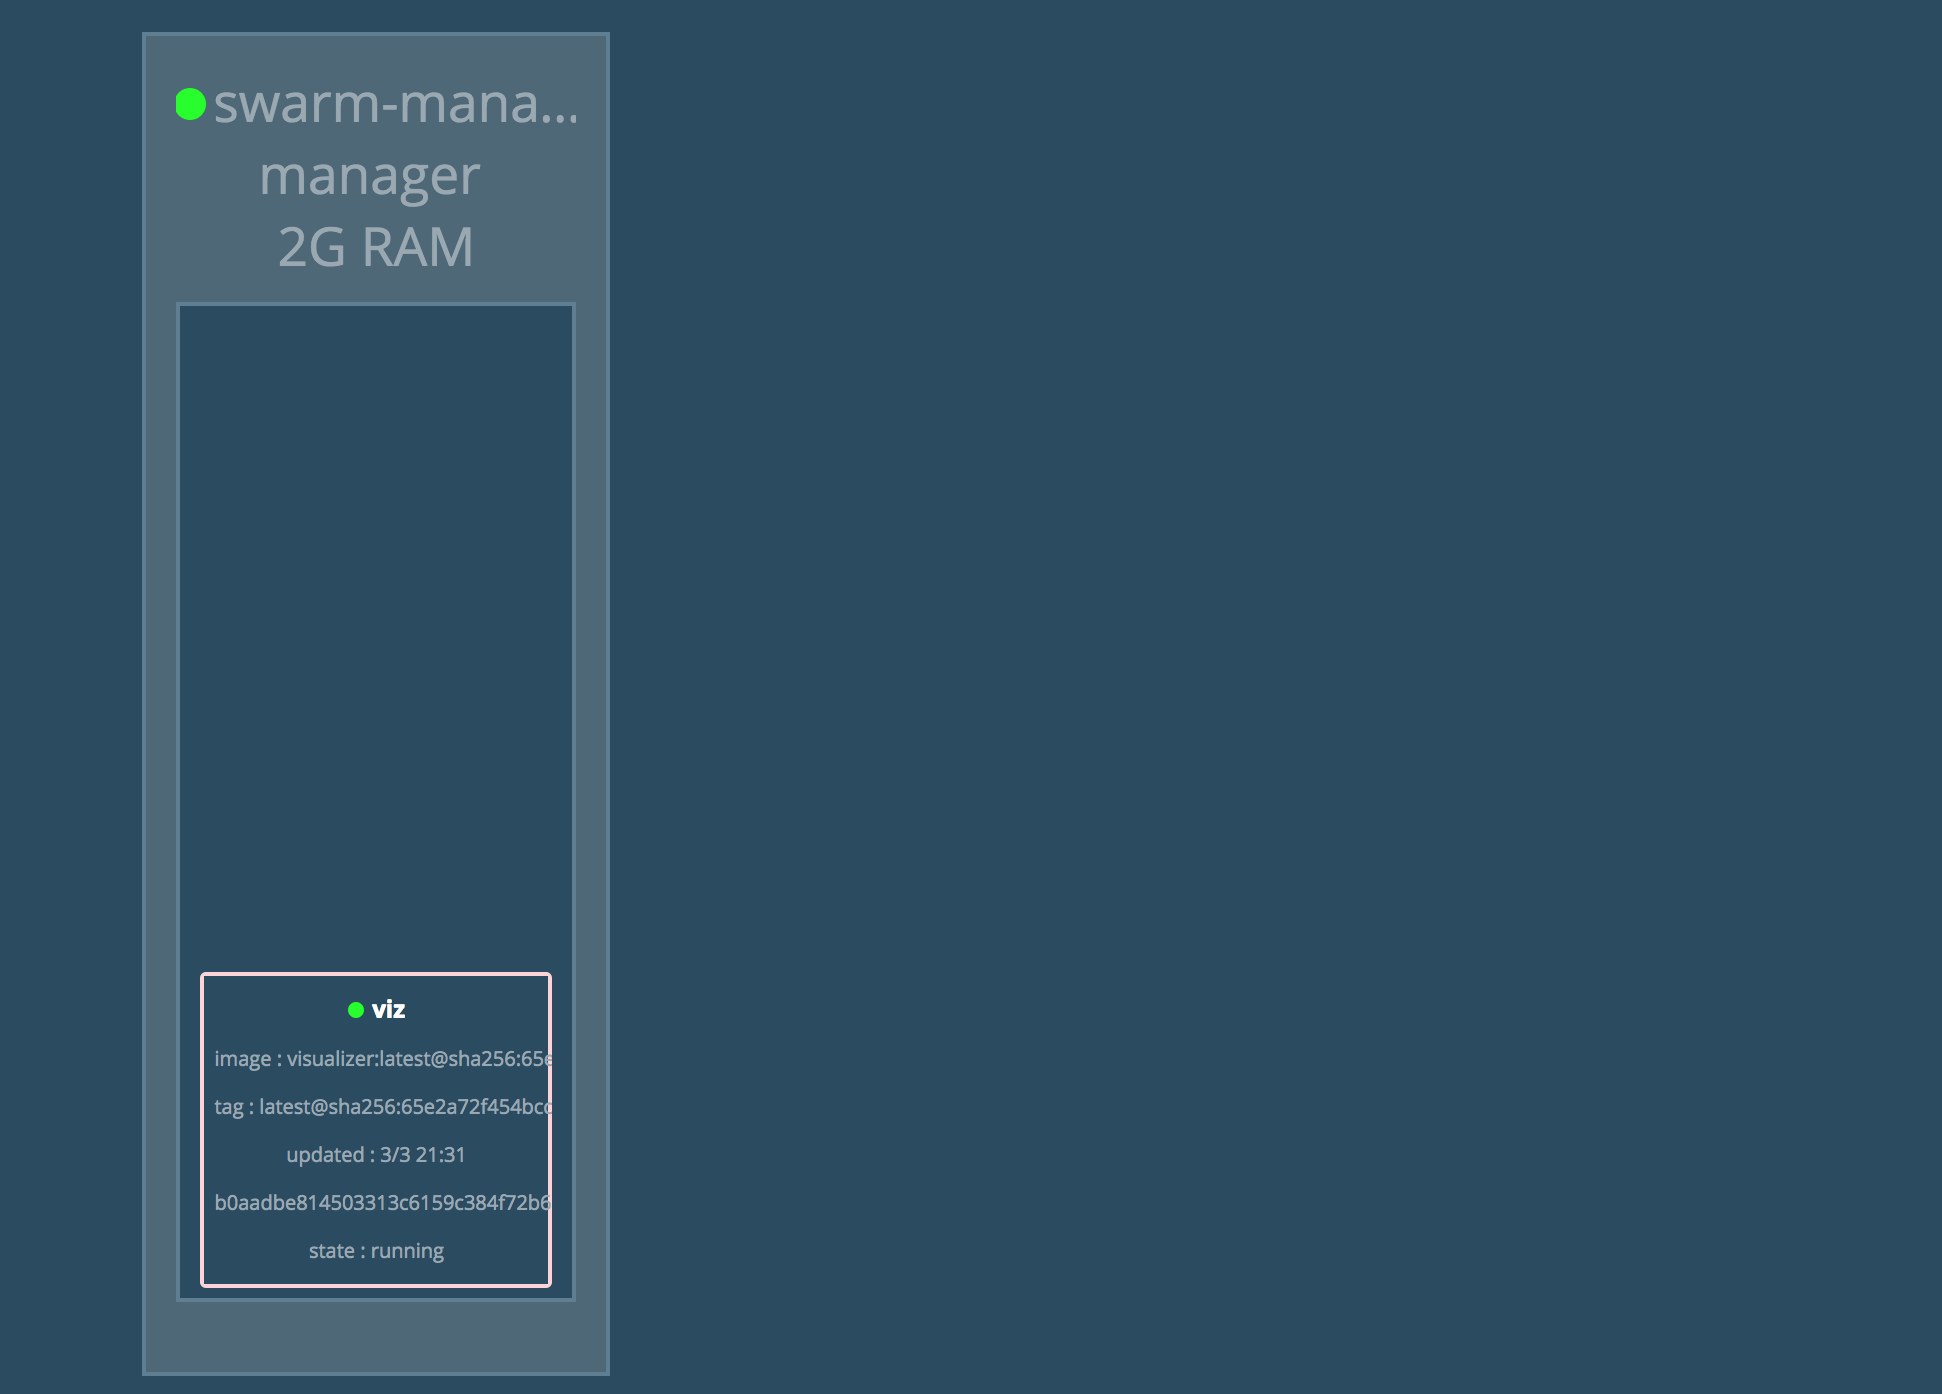
While using the Docker command-line API to examine the state of your Swarm (such as docker service ls) is fully viable, a more graphical representation may be interesting to look at. Such a visualizer is manomarks Docker Swarm Visualizer that we can deploy as a Docker Swarm service. This provides us with an alternate mechanism for looking at our cluster topology. It can also be used just for making sure we can reach a service exposed at a given port within our cluster.
Installing the visualizer from a pre-baked container image is a one-liner:
docker service create \
  --name=viz \
  --publish=8080:8000/tcp \
  --constraint=node.role==manager \
  --mount=type=bind,src=/var/run/docker.sock,dst=/var/run/docker.sock \
  manomarks/visualizer
This creates a service we can access at port 8000. Direct your browser to http://$ManagerIP:8000:
I’ve made a little Swarm visualizer myself called “dvizz” using Go, the Docker Remote API and D3.js force graphs. You can install it directly from a pre-baked image if you like:
 docker service create \
   --constraint node.role==manager \
   --replicas 1 --name dvizz -p 6969:6969 \
   --mount type=bind,source=/var/run/docker.sock,target=/var/run/docker.sock \
   --network my_network \
   eriklupander/dvizz
Direct your browser to http://$ManagerIP:6969:
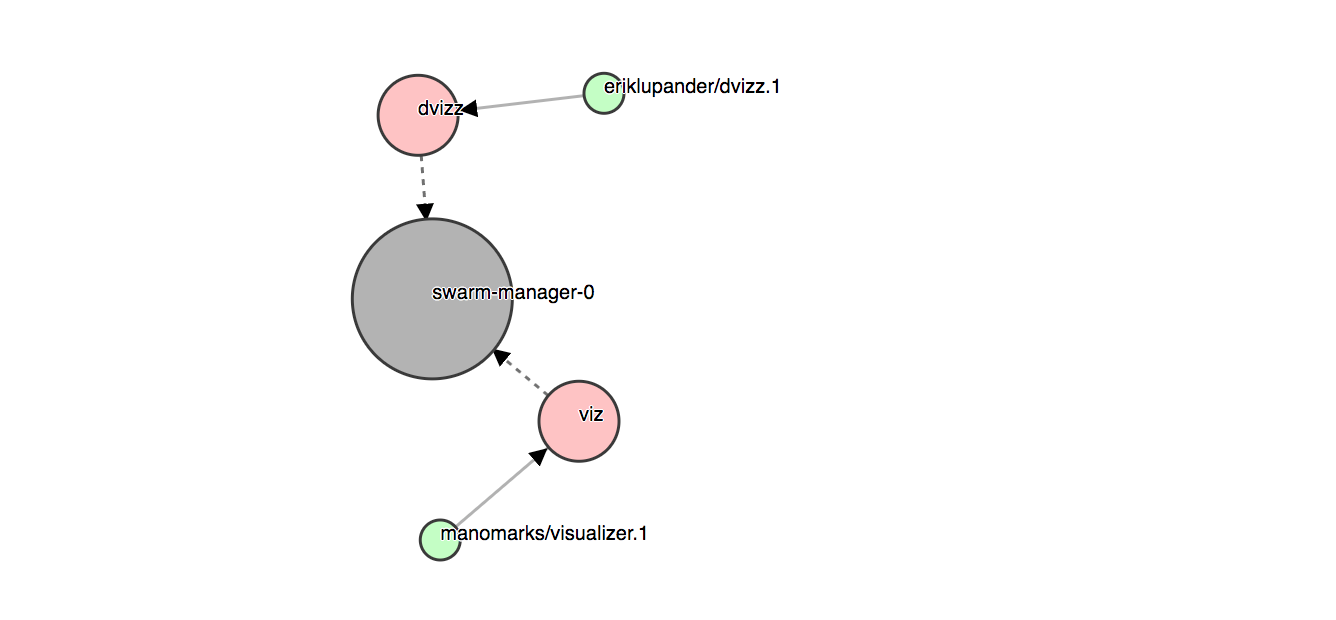
It’s a bit buggy so don’t take it too seriously, but it’s rather fun to look at that graph bouncing around when scaling services up and down - something we’ll do in part 7 of the blog series. Feel free to branch dvizz or submit a pull request if you want to help making it even cooler, more useful or less buggy!
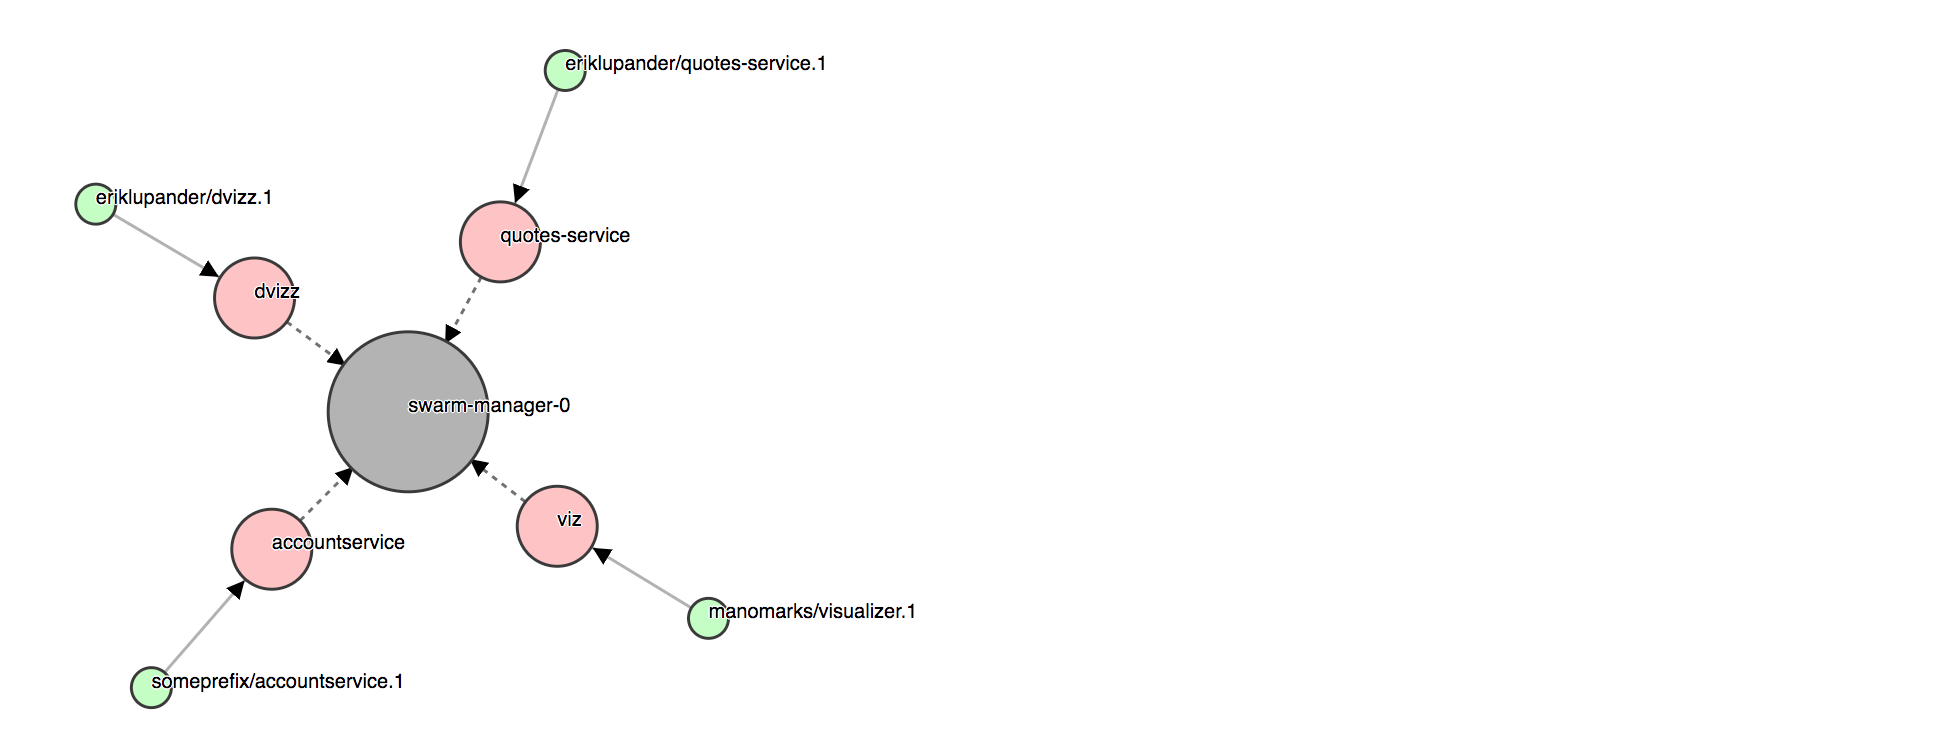
Not much of a Microservice landscape with only one type of service (our ubiquitous accountservice) in it. Let’s remedy that by deploying the Spring Boot-based “quotes-service” previously mentioned directly from a container image I’ve pushed to Docker Hub tagged as eriklupander/quotes-service:
> docker service create --name=quotes-service --replicas=1 --network=my_network eriklupander/quotes-service
If you do a docker ps to list running Docker containers we should see it started (or starting):
> docker ps
CONTAINER ID    IMAGE                       COMMAND                 CREATED         STATUS                           PORTS                                           NAMES
98867f3514a1    eriklupander/quotes-service "java -Djava.security"  12 seconds ago  Up 10 seconds (health: starting) 8080/tcp
Note that we’re not exporting a port mapping for this service which means it won’t be reachable from outside of the Swarm cluster, only internally on port 8080. We’ll integrate with this service later on in Part 7 when we’ll be looking at Service Discovery and load-balancing.
If you added “dvizz” to your Swarm, it should show something like this now that we’ve added the “quotes-service” and “accountservice”.
To make things a little easier for us along the way, we can add a shell script to automate things for us when rebuilding/redeploying. In the root /goblog folder, create a shell script named copyall.sh:
#!/bin/bash
export GOOS=linux
export CGO_ENABLED=0

cd accountservice;go get;go build -o accountservice-linux-amd64;echo built `pwd`;cd ..

export GOOS=darwin

docker build -t someprefix/accountservice accountservice/

docker service rm accountservice
docker service create --name=accountservice --replicas=1 --network=my_network -p=6767:6767 someprefix/accountservice
This script sets up environment variables so we safely can build a statically linked binary for Linux/AMD64, does this and then runs a few Docker commands to (re)build the image and (re)deploy it as a Docker Swarm service. Saves time when prototyping!
Build scripts for Go is a topic I won’t dive into in this blog series. Personally, I like the simplicity of shell scripts, though I’ve occasionally used a gradle plugin myself and I know good ol’ make is quite popular as well.
From now on, all benchmarking and collection of CPU/memory metrics will happen on the service when its running inside the Docker Swarm. This means the results from previous blog posts isn’t comparable to what we’re going to get from now on.
Both CPU utilization and memory use will be collected using docker stats while we’re going to use the same Gatling test as before.
If you feel like running the load tests yourself, the requirements for this introduced in Part 2 still applies. Just note that you’ll need to change the -baseUrl= argument to the IP of your Swarm Manager node, e.g:
> mvn gatling:execute -Dusers=1000 -Dduration=30 -DbaseUrl=http://$ManagerIP:6767
> docker stats $(docker ps | awk '{if(NR>1) print $NF}')

CONTAINER                                    CPU %               MEM USAGE / LIMIT
accountservice.1.k8vyt3dulvng9l6y4mj14ncw9   0.00%               5.621 MiB / 1.955 GiB
quotes-service.1.h07fde0ejxru4pqwwgms9qt00   0.06%               293.9 MiB / 1.955 GiB
Right after startup, the container consisting of a bare linux distro and our running “accountservice” uses ~5.6 mb of RAM out of the 2GB I’ve allocated to the Docker Swarm node. The Java-based quotes-service hovers just under 300 mb - though it should be said that it certainly can be reduced somewhat by tuning its JVM.
CONTAINER                                    CPU %               MEM USAGE / LIMIT
accountservice.1.k8vyt3dulvng9l6y4mj14ncw9   25.50%              35.15 MiB / 1.955 GiBB
At 1K req/s within the Swarm running on a Virtualbox instance instead of native OS X as in part 2 and 3, we see numbers pretty consistent with the earlier figures - as expected slightly higher memory use (after all, the container itself needs a few Mb) and a roughly similar CPU utilization.

The mean latency is now up to 4 ms. The exact reason for this to increase from the sub-millisecond mean when running directly could be several, I’m guessing there’s an overhead involved when the Gatling test that’s running on the native OS accesses the Swarm running on a virtualized instance with a bridged network and some perhaps some routing going on within the Swarm and it’s own overlay network. It’s still really nice to be able to serve a peak of 1K req/s at a 4ms mean latency including reading from the BoltDB, serializing to JSON and serving it over HTTP.
In case we need to greatly decrease the number of req/s in later blog posts due to large overhead when adding things like tracing, logging, circuit breakers or whatnot - here’s a figure when running 200 req/s:

This sums up part 5 of the blog series where we have learned how to bootstrap a Docker Swarm landscape (with one node) locally and how to package and deploy our “accountservice” microservice as a Docker Swarm Service.
In part 6, we’ll add a Healthcheck to our microservice.