Blogg
Här finns tekniska artiklar, presentationer och nyheter om arkitektur och systemutveckling. Håll dig uppdaterad, följ oss på LinkedIn
Här finns tekniska artiklar, presentationer och nyheter om arkitektur och systemutveckling. Håll dig uppdaterad, följ oss på LinkedIn

This is the first of three blog posts where I will explain what you can learn from each chapter in the second edition of my book Microservices with Spring Boot and Spring Cloud. This blog post will go through the first part that focuses on using Spring Boot and other Spring projects to build microservices.
Since the 1st edition was published in September 2019, a lot of exciting new versions have been released by the open source projects used in the book. Last autumn, my publisher asked me if I was interested in producing an updated version of the book. Thus, on July 29th, the 2nd edition of my book was published:
If you are interested in an overview of the updates in the 2nd edition, see the blog post: Updates in the 2nd edition.
Let’s go through chapter by chapter:
Chapter 1, Introduction to Microservices, will help you understand the basic premise of the book – microservices – along with the essential concepts and design patterns that go along with them.
The design patterns covered in the book are as follows:
Chapter 2, Introduction to Spring Boot, will get you introduced to Spring Boot and the other open source projects that will be used in the first part of the book:
Chapter 3, Creating a Set of Cooperating Microservices, will teach you how to create a set of cooperating microservices from scratch. You will use Spring Initializr to create skeleton projects based on Spring Framework 5.3 and Spring Boot 2.5. The idea is to create three core services that will handle their own data and one composite service that uses the three core services to aggregate a combined result. Toward the end of the chapter, you will learn how to add basic RESTful APIs based on Spring WebFlux. In the following chapters, we will add more and more functionality to these microservices.
The following video clip demonstrates how to create a skeleton for a Spring based microservice using the CLI command spring init and after that build, run and finally verify that the microservice is healthy.

Chapter 4, Deploying Our Microservices Using Docker, will teach you how to deploy microservices using Docker. You will learn how to add Dockerfiles and docker-compose files in order to start up the whole microservice landscape with a single command. Then, you will learn how to use multiple Spring profiles to handle configurations with and without Docker.
The following video clip demonstrates how to get the source code from GitHub and build the Docker images. After that, Docker Compose is used to start up the microservice landscape, end-to-end tests are executed and finally, Docker Compose is used to bring down the microservice landscape.

Chapter 5, Adding an API Description Using OpenAPI, will get you up to speed with documenting the APIs exposed by a microservice using OpenAPI. You will use the springdoc-openapi tool to annotate the services to create OpenAPI-based API documentation on the fly. The key highlight will be how the APIs can be manually tested in a web browser using Swagger UI.
The following video clip starts with pointing out the source code that is central to the generated OpenAPI documentation. It also demonstrates how to startup the microservices. After that, it tries out the OpenAPI-based API documentation in a web browser. Finally, one of the exposed APIs is called from the OpenAPI documentation, and the response is inspected.
Chapter 6, Adding Persistence, will show you how to add persistence to the microservices’ data. You will use Spring Data to set up and access data in a MongoDB document database for two of the core microservices and access data in a MySQL relational database for the third microservice. Testcontainers will be used to start up databases when running integration tests.
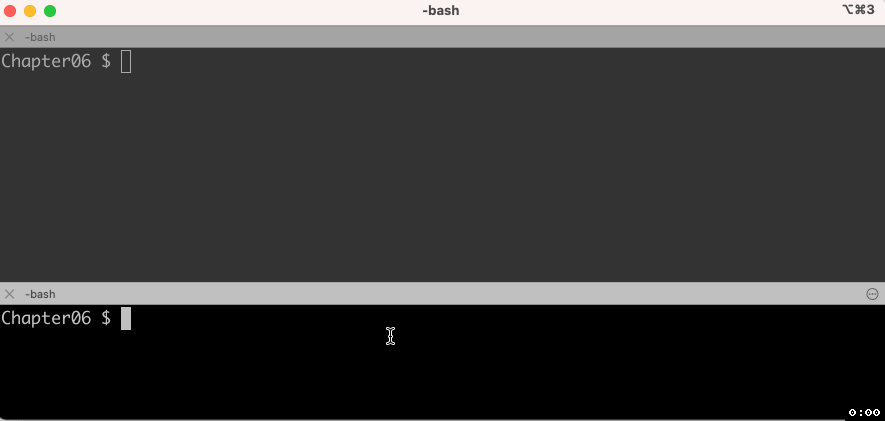
The following video clip demonstrates the usage of Testcontainers when running integration tests from jUnit. The terminal window is divided into two panels, where a docker stat command is running in the lower panel showing running containers. A jUnit-based integration test for the product microservice is started in the upper panel. Since the product microservice uses MongoDB for its storage, Testcontainers will launch a MongoDB instance in a container during the test, given the random name modest_mendel. The container named testcontainers-ryuk-... is responsible for removing the MongoDB container once the tests are completed.
Chapter 7, Developing Reactive Microservices, will teach you why and when a reactive approach is of importance and how to develop end-to-end reactive services. You will learn how to develop and test both non-blocking synchronous RESTful APIs and asynchronous event-driven services. You will also learn how to use the reactive non-blocking driver for MongoDB and use conventional blocking code for MySQL.
Below is an extract from the log output from the product-composite microservice when it requests data from the three microservices that hold the data. The requests are performed in parallel, and from the log output we can see that only one thread is used to send the three requests. Then, 16 ms later, another thread starts to take care of the responses from the three requests. None of the threads are blocked by these requests while waiting for the responses; therefore, it is called non-blocking I/O or simply NIO.
product-composite_1  | 2021-09-04 15:06:19.085  INFO 1 --- [or-http-epoll-8] ... : Will get composite product info for product.id=1
product-composite_1  | 2021-09-04 15:06:19.089 DEBUG 1 --- [or-http-epoll-8] ... : request(unbounded)
product-composite_1  | 2021-09-04 15:06:19.090 DEBUG 1 --- [or-http-epoll-8] ... : request(unbounded)
product-composite_1  | 2021-09-04 15:06:19.094 DEBUG 1 --- [or-http-epoll-8] ... : request(unbounded)
...
product-composite_1  | 2021-09-04 15:06:19.110 DEBUG 1 --- [or-http-epoll-3] ... : onComplete()
product-composite_1  | 2021-09-04 15:06:19.117 DEBUG 1 --- [or-http-epoll-3] ... : onComplete()
product-composite_1  | 2021-09-04 15:06:19.124 DEBUG 1 --- [or-http-epoll-3] ... : onComplete()
Below is an extract from the log output from the review microservice that needs to access its relational database in a blocking way. It needs to allocate a thread that waits for the response from the database, i.e., it is blocked while waiting. Therefore this is called blocking I/O or simply BIO. From the log output we can see that a thread, jdbc-pool-12, is allocated from a dedicated thread pool for database access, jdbc-pool.
review_1  | 2021-09-04 15:29:23.273  INFO 1 --- [or-http-epoll-3] ... : Will get reviews for product with id=1
review_1  | 2021-09-04 15:29:23.280 DEBUG 1 --- [   jdbc-pool-12] ... : select * from reviews where product_id=?
review_1  | 2021-09-04 15:29:23.289 DEBUG 1 --- [   jdbc-pool-12] ... : Response size: 3
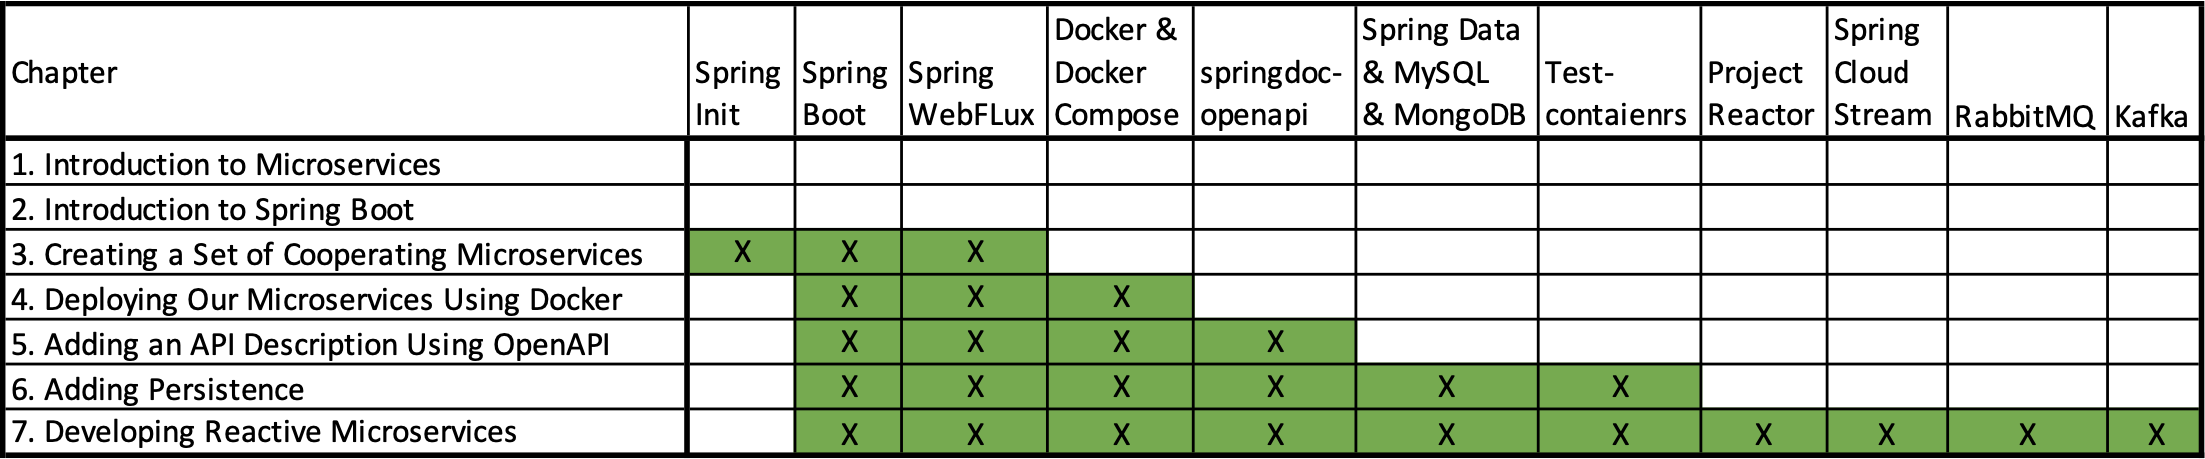
To summarize what tools each chapter adds, see the following table:
Installation instructions for building and running the examples in the book on either a Mac or a Windows PC running a Linux instance using WSL2 are provided in chapters 21 and 22. The third and last blog post will cover these chapters.
Next up
In part 2 of this blog series, we will focus on using Spring Cloud to build a production-ready microservice landscape.