Blogg
Här finns tekniska artiklar, presentationer och nyheter om arkitektur och systemutveckling. Håll dig uppdaterad, följ oss på LinkedIn
Här finns tekniska artiklar, presentationer och nyheter om arkitektur och systemutveckling. Håll dig uppdaterad, följ oss på LinkedIn

I recently stumbled upon this great guide on how to build a CHIP-8 interpreter from scratch. This blog post is a personal rambling on my experience learning a bit of Rust by implementing a CHIP-8 interpreter, with some comparison with Go thrown into the mix.
These days, I almost exclusively write my code in Go, so I implemented my (first) CHIP-8 interpreter (technically speaking, it’s an interpreter, not an emulator) in that language. The result can be found here. Meanwhile, I was hearing a lot of fuzz about Rust being a really cool programming language, especially for safety and performance oriented work. So, once content with my Go-based CHIP-8 implementation, I installed Rust on my laptop, fired up VSCode and started implementing CHIP-8 in Rust as my very first baby steps with the Rust programming language.
This blog post will give a very brief overview of CHIP-8 emulation, with an emphasis on some beginners perceived pro’s and con’s on using Rust from a Gopher’s perspective, with code samples showcasing some differences between my Go and Rust implementations.
CHIP-8 is technically a programming language conceived back in 1977 most known for use on the COSMAC VIP microcomputer.
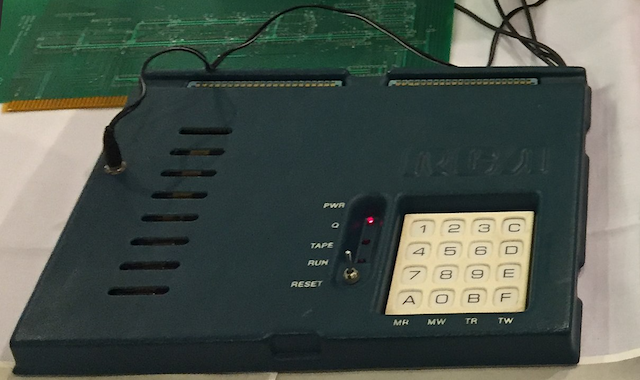
Cosmac VIP, cropped: David Ruske, CC BY 2.0
Due to its simplicity, CHIP-8 has over the years attained popularity as something akin to the “Hello world” of game console emulation.
While CHIP-8 is technically described as a programming language - for 2020s developers, the “code” in the ROM for the de-facto Hello World program, a program that displays the IBM logotype, is at a glance completely incomprehensible converted from binary to hexadecimal form:
$ hexdump -e '16/1 "%02x " "\n"' roms/IBM\ Logo.ch8
00 e0 a2 2a 60 0c 61 08 d0 1f 70 09 a2 39 d0 1f
a2 48 70 08 d0 1f 70 04 a2 57 d0 1f 70 08 a2 66
d0 1f 70 08 a2 75 d0 1f 12 28 ff 00 ff 00 3c 00
3c 00 3c 00 3c 00 ff 00 ff ff 00 ff 00 38 00 3f
00 3f 00 38 00 ff 00 ff 80 00 e0 00 e0 00 80 00
80 00 e0 00 e0 00 80 f8 00 fc 00 3e 00 3f 00 3b
00 39 00 f8 00 f8 03 00 07 00 0f 00 bf 00 fb 00
f3 00 e3 00 43 e0 00 e0 00 80 00 80 00 80 00 80
00 e0 00 e0
Running this ROM with my Rust-based interpreter produces the following result::
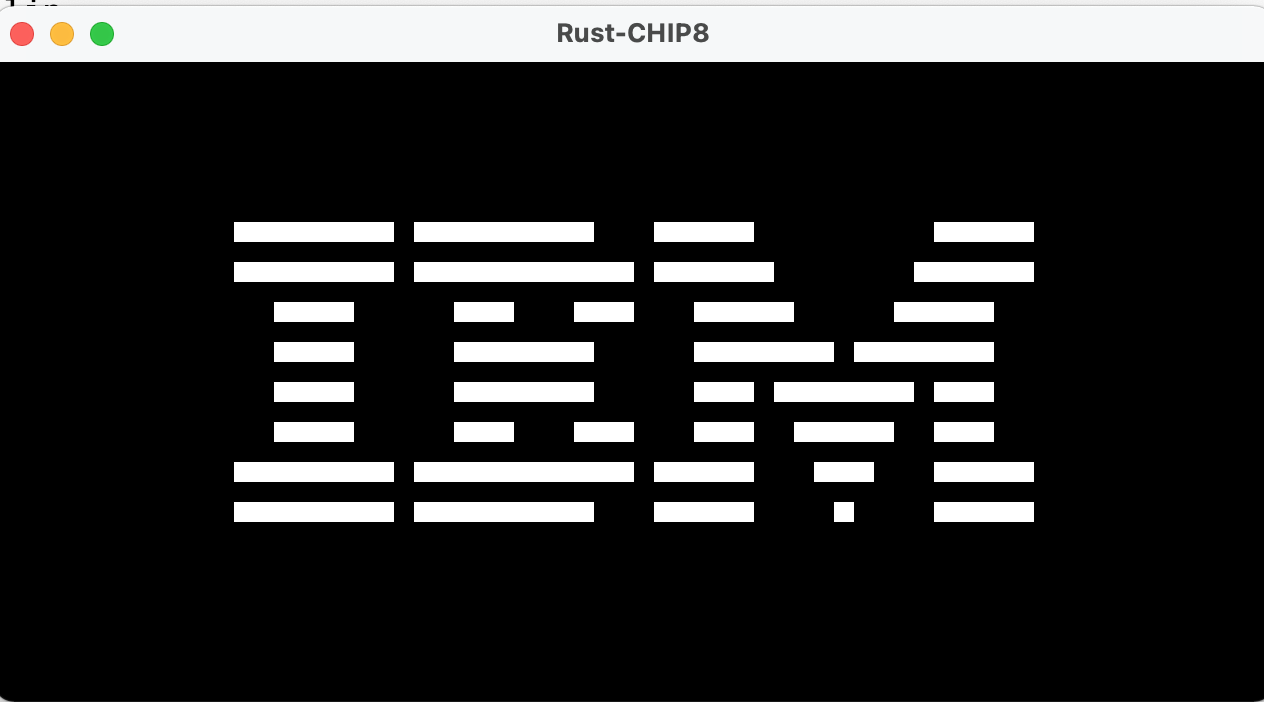
Note! The code to display a window, handle key presses from the OS and render actual graphics to the window are not part of the ROM code. Code that interfaces the CHIP-8 interpreter with the (modern) underlying OS is kind of the point of an emulator. See section 6 for a bit more on drawing graphics.
The hexadecimal “source code” above contains “CPU” instructions, values and even sprite data for the “IBM” logo. Quite impressive for a 132 byte program!
So, how does this work? On a high level, we build a data structure in our host programming language that holds the state of the interpreter:
Rust:
struct Emulator {
    memory: [u8; 4096],  // Our 4kb of RAM
    stack: [u16; 32],    // The stack offers a max depth of 32 with 2 bytes per stack frame
    stackFrame: i8,      // current stack frame. Starts at -1 and is set to 0 on first use
    I: u16,              // represents the 16-bit Index register
    registers: [u8; 16], // represents the 16 1-byte registers
    pc: u16,             // Program counter, set it to the initial memory offset
    delayTimer: u8,      // represents the delay timer that's decremented at 60hz if > 0
    soundTimer: u8,      // represents the sound timer that's decremented at 60hz and plays a beep if > 0.
}
Go:
type emulator struct {
	memory         [4096]byte // 4kb of internal memory
	stack          [32]uint16 // The stack offers a max depth of 32 with 2 bytes per stack frame
	stackFrame     int        // current stack frame. Starts at -1 and is set to 0 on first use
	I              uint16     // represents Index register
	registers      [16]byte   // represents the 16 1-byte registers
	pc             uint16     // Program counter, set it to the initial memory offset
	delayTimer     byte       // represents the delay timer that's decremented at 60hz if > 0
	soundTimer     byte       // represents the sound timer that's decremented at 60hz and plays a beep if > 0.
	delayTimerLock sync.Mutex // lock for incrementing/setting/accessing the delay timer
	soundTimerLock sync.Mutex // lock for incrementing/setting/accessing the sound timer
}
We’ll look a bit more closely at a few instructions later, but the CHIP-8 interpreter basically works as most other Fetch -> Decode -> Execute cycles:
1 Load the ROM into `memory`
2 Set `pc` to 0
3 Loop until exit
   3.1. Read 2 bytes from `memory` at `pc`
      3.1.1. Increment `pc` by 2
   3.2. Decode those 2 bytes into an `instruction` and (possible) values.
   3.3. Execute the `instruction`
   3.4. Repeat
In the next section, we’ll take a look at how to decode these instructions in Rust and Go. Hint: The code is quite similar!
Each CHIP-8 instruction (or statement) consists of two bytes, which we need to decode into 4 discrete nibbles of 4 bits each.
To do this, we need to do some bitwise operations. If you’re not familiar with bitwise operations and hexadecimal numbers, I’ll cover the most important things first using Go code.
In the example code below, we’ll split a single byte consisting of 01111110 into 0111 and 1110. Note that both Go and Rust denotes hexadecimal numbers using the 0x prefix. A single byte (also known as an unsigned 8-bit integer) can hold decimal 0 -> 255, or hexadecimal 0x0 -> 0xFF. Please see wikipedia for more info on hexadecimal numbers.
var input = 0b01111110 // same as hexadecimal 0x7E or decimal 126. Key is to look at the bits. 0111 1110
var rightmostBitsMasked = input & 0xF0 // F0 == 11110000, by ANDing only the bits on the left are kept. Result => 01110000
var leftmostBitsMasked = input & 0x0F // 0F == 00001111, like above, only the bits on the right are kept. Result => 00001110
var firstNibble = rightmostBitsMasked >> 4 // shift 4 steps to the right. Result => 00000111.
var secondNibble = leftmostBitsMasked  // no need to shift here, the bits are already in the "rightmost" position.
Results in:
input       => Hex: 7e Decimal: 126 Binary: 01111110
firstNibble => Hex: 07 Decimal: 7   Binary: 00000111
seondNibble => Hex: 0e Decimal: 14  Binary: 00001110
The code above is of course over-verbose and can be written more compactly.
Taking this concept to CHIP-8, we use the following code to extract the instruction as well as variables known as X, Y, N, NN and NNN from each 2-byte CHIP-8 “statement” read from the ROM at the current program counter:
register lookups.register lookup.pc jumps and setting memory Index.Rust:
    let instr = ((self.memory[self.pc as usize] as u16) << 8) | self.memory[self.pc as usize + 1] as u16; // convert the 2-bytes into a u16.

    let b0 = (instr & 0xFF00) >> 8 as u8;   // To get first byte, & the 8 leftmost bits which removes the 8 rightmost, then shift by 8 to the right to make the u8 conversion contain the bits originally on the left.
    let b1 = (instr & 0x00FF) as u8;        // To get the second byte, just & the 8 rightmost bits, which removes the leftmost bits. The remaining bits are already at the rightmost position so no need to shift before converting to u8.

    let instr = (b0 & 0xF0) >> 4 as u8;  // first nibble, the instruction. Keep 4 leftmost bits, then shift them to the right-hand side.
    let X = (b0 & 0x0F) as usize;        // second nibble, register lookup! Only keep rightmost bits.
    let Y = ((b1 & 0xF0) >> 4) as usize; // third nibble, register lookup! Keep leftmost bits, shift 4 to left.
    let N = b1 & 0x0F;                   // fourth nibble, 4 bit number
    let NN = b1;                         // NN = second byte
    let NNN = (instr & 0x0FFF) as u16;   // NNN = second, third and fourth nibbles, obtained by ANDing by b00001111 11111111 masking away the first nibble.
Go:
    // Read 2 bytes from memory, designated by the value of program counter (PC).
	b0 := e.memory[e.pc]
	b1 := e.memory[e.pc+1]

	// DECODE
	instr := (b0 & 0xF0) >> 4        // first nibble, the instruction
	X := b0 & 0x0F                   // second nibble, register lookup!
	Y := (b1 & 0xF0) >> 4            // third nibble, register lookup!
	N := b1 & 0x0F                   // fourth nibble, 4 bit number
	NN := b1                         // NN = second byte
	NNN := uint16(X)<<8 | uint16(NN) // NNN = second, third and fourth nibbles
The basics are IMHO very similar - we use masking and bit-shifting to extract the various parts of each 2-byte instruction. The Go code uses a slightly different approach as it doesn’t operate on the full 2-byte instruction, while the Rust code uses the slightly complicated let instr = ((self.memory[self.pc as usize] as u16) << 8) | self.memory[self.pc as usize + 1] as u16; expression to turn the 2 bytes into a single u16. Both approaches work. I haven’t benchmarked if either of the two methods are more efficient, but since we will artificially slow down the interpreter to 1970’s performance anyway, efficiency is a rather moot point in this particular case.
From a “Go vs Rust” perspective, I do find the Go code more concise, mostly due to not having to “cast” variables to usize which also requires a few extra parenthesis.
In the last section, we obtained the instr, X, Y, N, NN and NNN variables that makes up a single instruction we want to interpret and execute.
I recommend Tobias V Langhoff’s guide for all the details about each instruction. Let’s take a look at a the first instructions from the IBM ROM.
00 e0 a2 2a 60 0c 61 08 d0 1f 70 09
Since we’re dealing with 2 bytes at a time, it means that in practice we handle: 00e0 a22a 600c 6108 d01f 7009.
Let’s follow the first 6 instructions. Note that the screen resolution is 64x32 pixels. registers are used to store temporary values for access based on register indexes.
I to value of NNN (0x22A). This happens to be the first byte of the letter “I” sprite in memory, e.g. this was hardcoded by the original ROM developer.I to where the B sprite begins etc …What does this look like in code? Let’s start with Rust:
fn run(&mut self, ... omitted for brevity ....) {

   // match the instruction
   match (instr, X, Y, N)  {

       // 0x00E0 Clear screen
       (0x0, 0x0, 0xE, 0x0) => {
           pixels.lock().unwrap().get_frame_mut().iter_mut().
               for_each(|x| *x = 0x0);
       }

       // 0xANNN: Set Index register to NNN
       (0xA, _, _, _) => {
           self.I = NNN;
       }

       // 0x6XNN: Set register X to NN
       (0x6, _, _, _) => {
           self.registers[X] = NN;
       }

       // 0x7XNN: Add NN to register X
       (0x7, _, _, _) => {
           self.registers[X] = self.registers[X].wrapping_add(NN);
       }

       // 0xDXYN: Draw
       (0xD, _, _, _) => {
           let xCoord = self.registers[X] % 64;
           let yCoord = self.registers[Y] % 32;
           // Rest omitted for brevity ... more on this later
       }


   }
The Go counterpart:
func (e *emulator) Run(... some params here ...) {
	// other code omitted for brevity

	switch instr {
		case 0x0:
			switch Y {
			case 0xE:
				switch N {
				// clear screen
				case 0x0:
					r.ClearScreen() // this is a method defined on the struct that handles screen redrawing
				case 0xE: // There's another instruction for another value of N, requiring a deep nested switch
					// impl omitted
				}
			}

		// Set Index register to NNN
		case 0xA:
			e.I = NNN

		// Set register X to NN
		case 0x6:
			e.registers[X] = NN

		// draw sprite at I at screen x, y given by values in registers X and Y.
		case 0xD:
			xCoord := e.registers[X] % 64
			yCoord := e.registers[Y] % 32

		// Add NN to register X
		case 0x7:
			e.registers[X] = e.registers[X] + NN
		}
Here’s where the Rust match statement really shines! It provides a very clean way of implementing switch-like matching with wildcard pattern _, while the Go code needs to nest switch statements where combinations of instr and other parts of the instruction forms their own instruction. Alternatively, one could use a switch for the top-level instr only, and then use if-statements within each case block. Might be more readable.
Aside from match vs switch, the code is very similar. A small difference is how registers etc on the Go struct are accessed by the e receiver name of the type, while Rust allows access to member variables through the explicit self receiver parameter.
The excerpts above only deals with the five instructions used in the beginning of the IBM program. In total, CHIP-8 defines ~34 instructions, but they’re quite similar to the 5 examples above. We’ve got subtract, bitwise AND/OR/XOR, copy to/from registers/memory.
There’s a few instructions such as Add (7XNN) and Subtract (8XY5) that requires us to take overflows into consideration.
Given the following Go snippet, what is the expected output?
var a uint8 = 255
var b = a + 2
fmt.Printf("%d", b) // outputs 1
Output is 1. Why? In Go, an add (or subtract) causing an over/underflow, will simply wrap around, in this case the 8-bit unsigned int can take values 0-255, and thus wraps around to 1 when we compute 255+2.
Rust is a quite different story.
Rust:
let a: u8 = 255;
let b = a+2;
println!("{}", b);
Trying to compile the above snippet:
error: this arithmetic operation will overflow
In essence - the Rust compiler won’t allow addition or subtraction (+other arithmetic operations) where the operands are known at compile time and the compiler can deduce that the operation would over/underflow the data type.
What if the compiler can’t know beforehand that an addition will overflow? Given the following function:
fn add(a: u8,b: u8) {
    println!("{}", a+b);
}
Calling add(255, 2); will now compile, but instead cause a panic at runtime:
thread 'main' panicked at 'attempt to add with overflow'
What can we do about this? One option is of course to use a data type such as an unsigned 16-bit integer (u16) that can fit the result:
let a: u8 = 255;
let b: u16 = a as u16+2;  // declare b as u16 and cast a to u16.
println!("{}", b);        // outputs 257
The approach above compiles and works fine, but we should note how Rust forces us to be very explicit; we must declare b to be of type u16 (16-bit unsigned integer) and we also need to “cast” a to u16.
Go won’t allow arithmetic operations on operands of different types either, requiring an explicit conversion of a to uint16, e.g var b = uint16(a) + 2.
But in the context of the Add instruction of CHIP-8, the specification clearly states that a “wrapping” add must be allowed to wrap around. 255+2 must result in 1. How can we accomplish this in Rust if the compiler won’t let us compile this, and that the result must be an u8? Safety to the rescue!
Luckily, Rust number types implements a trait called WrappingAdd which allows us, as programmers, to explicitly tell the compiler “it’s OK, I know I’m doing, I want wrapping!” when adding two numbers together:
 let a: u8 = 255;
 let b: u8 = a.wrapping_add(2);
 println!("{}", b); // outputs 1
A wrapping_add won’t panic and is very explicit about its behaviour. Overflows should be taken seriously, just ask the programmer(s) behind the (in)famous Ariane V launch failure…
Let’s take a look at a Rust feature I like, it’s built-in support for functional-style operations on its Vector type.
Let’s see how we handle the 00E0 “clear screen” instruction in Go vs Rust:
Go:
	for x := 0; x < width; x++ {
		for y := 0; y < height; y++ {
			g.image.Set(x, y, color.Black)
		}
	}
A simple nested for-loop, setting each pixel to black (where g.image is a *image.RGBA).
Rust:
// 0x00E0 Clear screen
   (0x0, 0x0, 0xE, 0x0) => {
       pixels.lock().unwrap().get_frame_mut().iter_mut().
           for_each(|x| *x = 0x0);
   }
Ignore the lock() and unwrap() method calls for now, the interesting thing is that get_frame_mut() returns a mutable byte slice, which provides the iter_mut() iterator function that takes a in-lined closure for each slice element. The |x| *x = 0x0 lambda dereferences the provided element and sets its value to 0 (black). The iter_mut() method is part of the standard slice offering in Rust, providing (with friends) functional-style capabilities to a built-in type.
This little example also showcases Rust’s nice and compact lambda-syntax with type inference, while a Go equivalent built on some third-party library such as lo would look something like:
	// Use lo.Map to replace the entire []byte in Pix with a new one with 0x0 values
	g.image.Pix = lo.Map[byte](g.image.Pix, func(_ byte, _ int) byte {
		return 0x0
	})
	// or iterate over each element of Pix, update directly using index i.
	// Note that _ byte is an iterator variable which is meaningless to update.
	lo.ForEach[byte](g.image.Pix, func(_ byte, i int) {
		g.image.Pix[i] = 0x0
	})
The code above showcases two of my main gripes with Go: The lack of a compact lambda notation and lack of built-in functional-style slice/map code. Furthermore, since Go generics doesn’t support type parameters on methods, third-party options such as lo must resort to generic functions rather than providing custom Map/Slice types with generic methods.
You may have noticed that the interpreter structs contained two “timers”:
Both work similarly - if set to a value > 0, the value is decreased by 1 until value == 0 at a rate of 60 times per second. The delayTimer can be used to - you guessed it - time things in programs. An example could be to introduce a small artificial pause every time one scores a point in Pong. The soundTimer works in the same way, where a beep sound is played as long as the soundTimer is > 0.
What is more interesting, is that I chose to implement these timers quite differently in Go vs Rust.
In Rust, I decided to use the system clock to see if 16.6 ms had passed in the looping interpreter thread, and in that case, decrease the timer values by 1 if > 0.
    thread::spawn(move||{
		// other stuff omitted...
		// timer is used for updating delayTimer and soundTimer every time approx. 1/60th second has elapsed.
		let mut timer = Instant::now();
		loop {
			// decode and execute one instruction (details later!)
			emul.run(&screenClone1, &keysClone2);

			// update timers each time more than 16.6 ms (16666 microseconds) have passed, i.e. 60hz
			if timer.elapsed().as_micros() > 16666 {
				if emul.delayTimer > 0 {
					emul.delayTimer -= 1;
				}
				if emul.soundTimer > 0 {
					emul.soundTimer -= 1;
				}
				timer = Instant::now();
			}
		}
	}
)
Example - setting value of delayTimer with Rust:
// 0xFX15 -  Set the delay timer to value of register X
(0xF, _, 0x1, 0x5) => {
    self.delayTimer = self.registers[X];
}
The key here is that the code setting the delayTimer value above executes in that emul.run method, which means it’s in the same thread which removes the need for any access/mutation across threads, which Rust’s borrow checker would have prohibited.
The caveat here is that I haven’t gotten around to supporting sound in the Rust implementation, which almost certainly will require “soundTimer > 0” to use or call code executing independent of the thread.
For Go - which is my main programming language these days - I decided to run the timers in their own goroutines, protecting against data races using simple sync.Mutex locks, stored in the emulator struct.
The struct, as a reminder, contains:
type emulator struct {
	// REST OMITTED FOR BREVITY
	delayTimer     byte       // represents the delay timer that's decremented at 60hz if > 0
	soundTimer     byte       // represents the sound timer that's decremented at 60hz and plays a beep if > 0.
	delayTimerLock sync.Mutex // lock for incrementing/setting/accessing the delay timer
	soundTimerLock sync.Mutex // lock for incrementing/setting/accessing the sound timer
}
The timers are started at program start using go e.startDelayTimer() etc, which kicks off a goroutine that will loop until program termination.
// startDelayTimer is called using go startDelayTimer() in the main function, so it runs in its own goroutine.
func (e *emulator) startDelayTimer() {
	var tick = 1000 / 60
	for {
		time.Sleep(time.Millisecond * time.Duration(tick)) // sleep for approx 16ms
		e.delayTimerLock.Lock()                            // obtain lock
		if e.delayTimer > 0 {                              // if above 0, decrement by 1
			e.delayTimer--
		}
		e.delayTimerLock.Unlock()                          // release lock
	}
}
Taking a look at how the delayTimer is set using the FX15 instruction in the interpreter goroutine, we see the same sync.Mutex in action:
// Set the delay timer to value of register X
case 0x15:
	e.delayTimerLock.Lock()
	e.delayTimer = e.registers[X]
	e.delayTimerLock.Unlock()
Perhaps a bit crude, but this solution is very simple to implement and understand, and does not cause data races, so I think it’s quite OK.
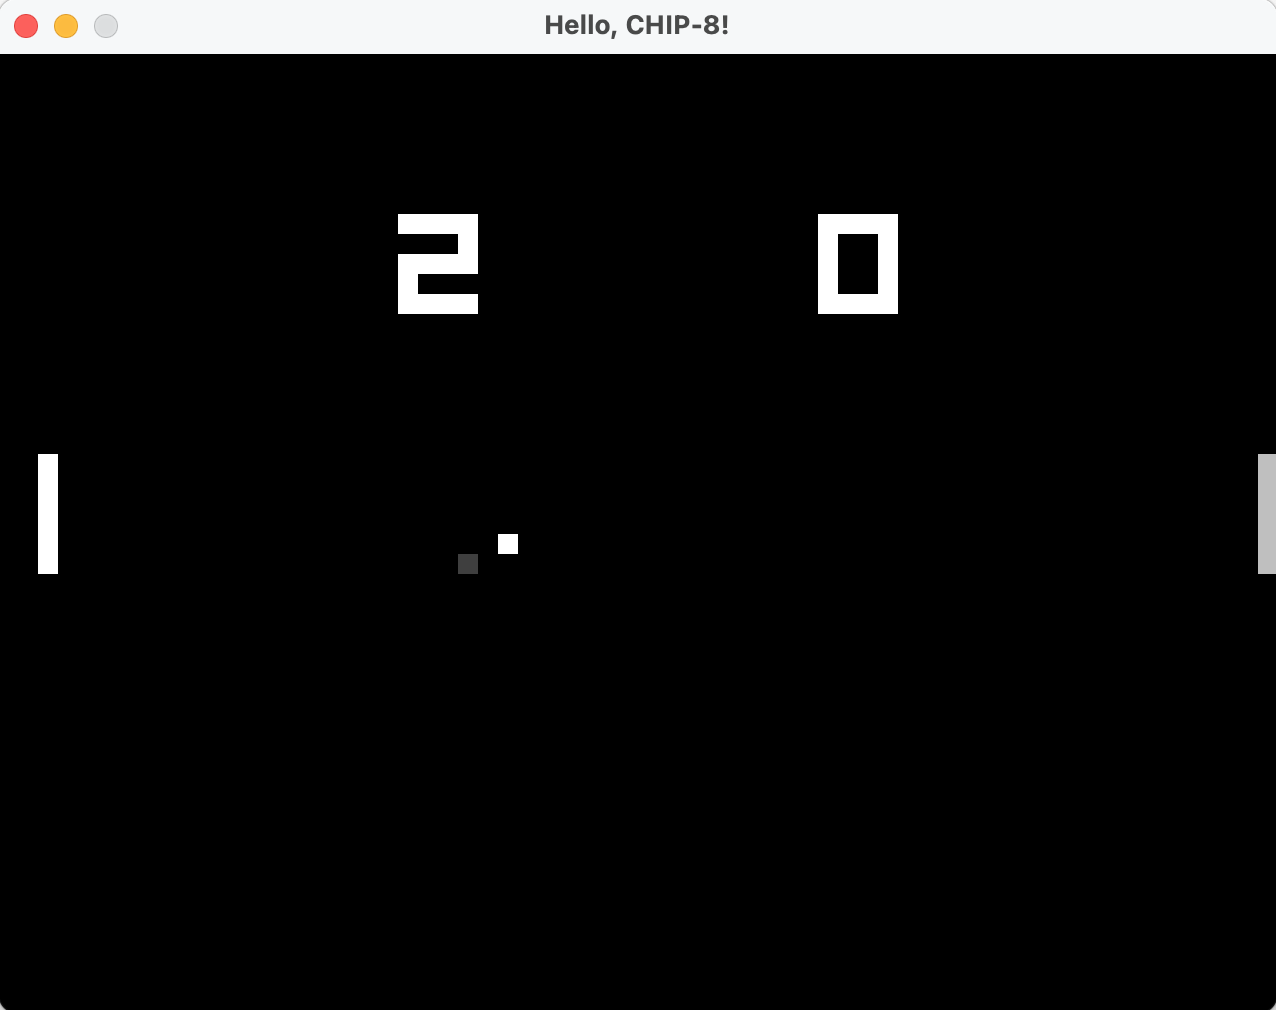
Decoding instructions is fun and everything, but without actually seeing “Pong”, “Space invaders” or similar ROMs in action, an emulator/interpreter wouldn’t be of much use.
CHIP-8 screen drawing is handled in the DXYN instruction, which essentially says “draw the sprite starting at memory location I, at the screen coordinates stored in registers X and Y, for N lines.”
Doesn’t sound too hard, and it isn’t. There’s some peculiarities regarding turning pixels on/off (which is what makes many CHIP-8 emulators “flicker”), but the tricky part is - how do we actually get a window with 64x32 drawable pixels from our operating system, and how can we let our DXYN instruction turn on/off pixels in it?
What we need is some kind of “Canvas” that supports “draw white (or black) at pixel x,y”. For Go, there’s quite a few 2D graphics libraries and GUI toolkits that should support this use case. However, I chose to use a 2D game engine called Ebitengine that provides some pretty nice abstractions as well as handling keyboard input and also sound support.
Ebitengine jacks into our own code through its Game interface, which allows us to pass our own struct implementing Update, Draw and Layout methods.
A slightly simplified struct we’re calling Runtime implements Game. It contains the following members:
type Runtime struct {
	keys        []ebiten.Key       // stores currently pressed keys
	image       *image.RGBA        // screen buffer
	lock        sync.Mutex         // lock to protect image from concurrent read/writes.
}
Our Update and Draw methods are very simple:
func (g *Runtime) Update() error {
	// store currently pressed keys, reusing the last update's slice of pressed keys.
	g.keys = inpututil.AppendPressedKeys(g.keys[:0])
	return nil
}

func (g *Runtime) Draw(screen *ebiten.Image) {
	// Protected by the lock, call the screen's "WritePixels"
	// with the current []byte in g.image.Pix
	g.lock.Lock()
	screen.WritePixels(g.image.Pix)
	g.lock.Unlock()
}
As seen above, the standard Ebitengine code is really simple. Ebitengine will make sure Draw is called at the refresh rate of your screen, while Update strives to be called 60 times per second. One might think we could have put the interpreter inside the Update method, but since the interpreter should execute about 700 instructions per second - including artificial sleeps - it’s a lot more flexible and convenient to let the interpreter run in its own goroutine.
The more interesting part is how our interpreter - running in a different goroutine - should update the image member given some screen x/y coordinate.
I added a Set(col, row int, on bool) method that obtains the lock, uses the Set method on *image.RGBA and then draws a white or black pixel depending on the desired on/off state of the pixel. The interpreter also needs a way to check if a pixel is already lit, which IsPixelSet provides.
func (g *Runtime) Set(col int, row int, on bool) {
	g.lock.Lock()
	if on {
		g.image.Set(col, row, colorWhite)
	} else {
		g.image.Set(col, row, colorBlack)
	}
	g.lock.Unlock()
}

func (g *Runtime) IsPixelSet(col int, row int) bool {
   g.lock.Lock()
   defer g.lock.Unlock()
   return g.image.RGBAAt(col, row) == colorWhite
}
At the interpreter side, the DXYN implementation code (an excerpt) looks like this:
if spriteByte&(1<<(7-bit)) > 0 { // check if bit is set in sprite
   if r.IsPixelSet(col, row) {   // if already lit, turn off
	   r.Set(col, row, false)
	   // set register F to 1
	   e.registers[0xF] = 0x1
   } else {                      // otherwise, turn on.
	   r.Set(col, row, true)
   }
}
Note that col and row are obtained elsewhere, and that bit represents a pixel in a sprite 8-pixel row.
To summarize, the Go code runs the interpreter in one goroutine (at 700 instructions per second), while Ebitengine runs in some other goroutine calling Draw and Update at different rates. The point of integration is the *image.RGBA underlying []byte slice which the interpreter writes to after obtaining the sync.Mutex lock, while ebitengine reads from it in the Draw method.
That peculiarity I mentioned earlier - that CHIP-8 games “flicker” - is due to that “lit” pixels that are drawn on will flicker, since CHIP-8 stipulates that drawing on a lit pixel actually turns it off. For Pong, where the paddles are drawn each frame, this means that stationary paddles will flicker since they’re continuously overdrawn, causing them to toggle between white and black.
As it turns out - modern flat screens are actually “too good” at efficiently redrawing our screens, leaving no visible traces of previously lit pixels. Old CRT (cathode ray tube) screens weren’t that good, often leaving slight “ghosts” of previously lit pixels behind, which actually reduced the perceived amount of flickering and also provided a bit of motion blur.
My Go-based drawing code implements a CRT-like “ghost” effect where the last frame’s lit pixels are stored in a separate image in a “faded” state. Then, after the current frame has been drawn, the “faded” image is superimposed on top of the new frame using a relevant blending mode. Here’s where a dedicated 2D game engine such as Ebitengine really shines, since it provides both convenient drawing APIs as well as a plethora of different blending modes when drawing images on top of other images. Note that the “CRT” code is omitted from the code samples in section 6.1 for brevity, you can check out the full source here.
In the slowed-down animated GIF below, we see that the Go implementation, with its fake CRT effect, has drawn a dim pixel trailing the ball, and that the paddle flickering has lessened since the first “off” frame after an overdraw now leaves faint gray pixels from the previous frame’s lit pixels instead of pure black. Still not quite perfect, but it does work better when running at 60hz rather than slowed down.
I’d like to stress that implementation of this “anti-flickering CRT effect” has nothing to do with Go vs Rust, I’m quite certain it can be implemented using Rust as well!
Just like the Go implementation, drawing to screen requires third-party libraries. Some googling and reading suggested using a combination where Winit provides screen/OS and keyboard support, while Pixels provides a very easy-to-use 2D canvas drawing library that plays nicely with Winit.
Skipping the Winit and Pixels boilerplate, the solution pretty much boils down to how Pixels provides a 2D pixel buffer our interpreter thread needs to write to, while also letting the Winits “update loop” call the render() method on the same data structure.
I.e - we need to let two different threads access the same data structure. Hint: Rust is extremely picky when it comes to ownership, borrowing etc. of variables.
The Go implementation we looked at in the previous section, uses the pretty naive but simple solution of a sync.Mutex lock protecting the screen buffer. Thing is - the Go implementation actually works pretty well without the sync.Mutex protecting against data races. I may have had a crash at some point, but the point here is that while Go allows you to write unsafe and “bad” code - Rust just won’t let us do that! The compiler will stop us from nasty data races, simply not agreeing to compile such code.
The Winit equivalent to the Draw() method in the Go implementation, has the following signature: pub fn run<F>(self, event_handler: F) -> ! and is documented here. The key thing is that our main function needs to call event_loop.run with a closure to handle redraw and key/mouse events emitted by winit.
The syntax for this closure is not for the faint-hearted Rust beginner with all type information inferred:
event_loop.run(event_handler: move |event: Event<()>, _, _control_flow: &mut ControlFlow| {
	// ... here's the event handler implementation
}
Closures in Rust are denoted by |<param list>| { <implementation> }, where the move prefix converts any variables used in the closure body - such as our pixels data structure - into variables captured by value.
The implementation isn’t really that complex in itself. If we omit the keyboard-handling code and focus on screen redraws, the following snippet (inside the closure) makes sure the contents of pixels are drawn to screen:
	 // Draw the current frame
	 if let Event::RedrawRequested(_) = event {
		 screenClone2.lock().unwrap().render().expect("do not fail");

		  // We must tell the window to redraw.
		 window.request_redraw();
	 }
Wait?!?! Where is pixels? We only see this weird screenClone2.lock().unwrap().render() thing??!?! Well - here’s when Rust gets both quite elegant - and simultaneously nasty. The Rust compiler simply won’t let us access pixels - declared in the main thread and also accessed by the interpreter thread - directly. We need to use Rust’s constructs for safe access of shared memory, namely std::sync::Mutex and std::sync::Arc.
Mutex is actually quite neat. Directly from its official documentation:
A mutual exclusion primitive useful for protecting shared data

This mutex will block threads waiting for the lock to become available.
The mutex can be created via a [new] constructor. Each mutex has a type parameter which represents the data that it is protecting.
So in order to let the event_loop code capture and use pixels, we first need to wrap pixels in a Mutex<T> primitive:
let mut data = Mutex::new(pixels);
However, this is not quite enough. Since we have multiple threads accessing the same data, we also need to use an “Atomically Referenced Counted” Arc<T> pointer that wraps our Mutex<T> primitive. The type Arc<T> provides shared ownership of a value of type T.
By inlining the Mutex::new call above, the “setup” code in our main thread ends up looking like this:
    // set up shared ownership constructs for the "pixels" data.
    let screen = Arc::new(Mutex::new(pixels));
So, we create a Mutex wrapping pixels, which is then wrapped by Arc::new. However, we’re not quite done yet. Since we’ll have different threads (interpreter and event_loop) accessing pixels, we actually need to create two clones, where each one can be captured by the interpreter closure and event_loop closure respectively.
    let screen = Arc::new(Mutex::new(pixels)); // same as above
    let screenClone1 = Arc::clone(&screen);
    let screenClone2 = Arc::clone(&screen);
So if we take a look inside the interpreter thread’s closure, we can see that we borrow one of the clones to the interpreter’s run method.
 thread::spawn(move||{
	// omitted stuff...
	emul.run(&screenClone1, &keysClone2); // we use the same mechanism for keys
	// more omitted stuff
 }
And finally, inside the DXYN handling function of the Rust implementation, our code mutates pixels:
let mut handle = screenClone1.lock().unwrap(); // obtain lock and get a mutable handle to pixels
let px = handle.get_frame_mut();               // use pixels API to get a mutable frame

let isSet = px[index as usize] == 0xFF;        // check if current pixel (1D indexed) is set (to white)
if isSet {
	px[index as usize] = 0x0;                  // Set RGB colors to black, keep alpha channel fully opaque.
	px[index as usize + 1] = 0x0;
	px[index as usize + 2] = 0x0;
	px[index as usize + 3] = 0xff;
	self.registers[0xF] = 0x1
} else {
	px[index as usize] = 0xFF;                 // Or - set RGB colors to white
	px[index as usize + 1] = 0xFF;
	px[index as usize + 2] = 0xFF;
	px[index as usize + 3] = 0xff;
}
The code is quite similar to the Go implementation, but do note the use of lock() and unwrap() to let us access pixels through the Arc<T> and Mutex<T>. While quite verbose, it’s also a safe and quite elegant way to assure memory safety.
At final look at the event_loop handler code should make much more sense now:
screenClone2.lock().unwrap().render().expect("do not fail");
By using the other cloned Arc<T>, we obtain the lock, unwrap it to get to pixels, and finally call the render() method on pixels that will update the screen. .expect("do not fail"); is error handling code out of scope for this blog post.
The key take-away from this section is that Rust really enforces data safety through its compiler, which at times can be slightly annoying, but which also is a very powerful feature, especially given stdlib tools such as Arc<T> and Mutex<T> used here.
This blog post isn’t about “Go vs Rust”, especially since I’m a Rust novice and quite fond of Go, but has hopefully shown some differences and insights I’ve had implementing CHIP-8 interpreters in the two languages.
First off - I think implementing a CHIP-8 interpreter, regardless of language, is a really fun and rewarding exercise. It gives a bit of insight into the Fetch - Decode - Execute cycle, registers, bitwise operations and a 1970:s take on computing. Additionally, seeing Pong, Space Invaders and other classics come to life is very rewarding!
Secondly, choosing a CHIP-8 interpreter as my very first Rust experience might not have been the smartest approach. I have since then completed most of the Rustlings exercises and also implemented a simple Game of Life clone to further my Rust skills.
Finally - I think Rust is a perfectly fine tool for the job, especially given some of the safety features of the language, and perhaps the match statement in particular since it provides very clean and readable matching of the 30+ CHIP-8 instructions to the interpreting code. As a seasoned Go developer I didn’t have to think much about implementation details in the Go implementation, while I certainly struggled at times with even the most basic things in Rust such as the ubiquitous as usize conversions, borrowing, locks, closures and the general syntax - but as I became more familiar with Rust, I do realize that Rust really provides something special: great performance and safety, while also providing a lot of expressiveness that Go just doesn’t provide.
While I won’t abandon Go as my Go-to (pun intended!) language, I hope I’ll find opportunities to further expand my Rust skills.
Thanks for reading! // Erik Lupander